Hello World from OSS Silicon Valley
HowToUse/VirtualBox/4.3
_ Install&Setup
_ Install VirtualBox
- Step.1
- Download the installer(virtualization platform package) from here
- Step.2
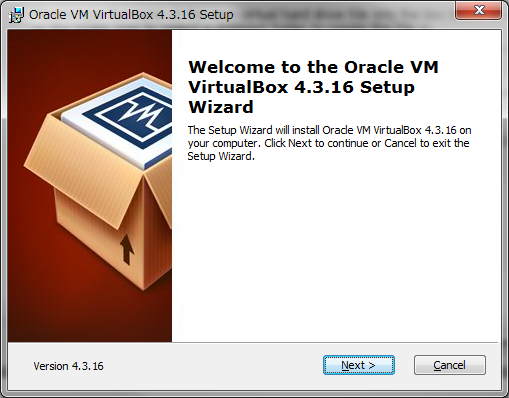
- Run installer|
- Step.3
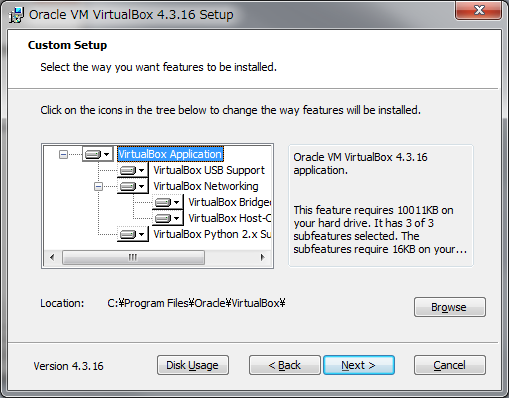
- Setup install folder|
- Step.4
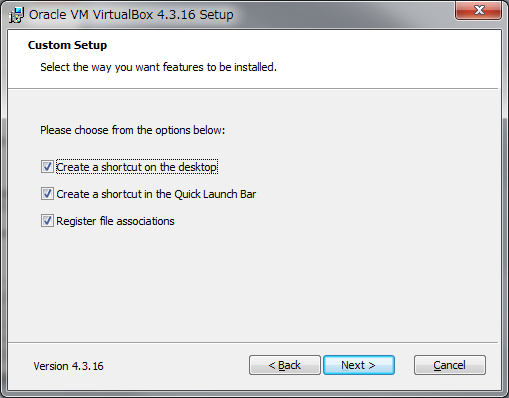
- Confirm shortcut option|
- Step.5
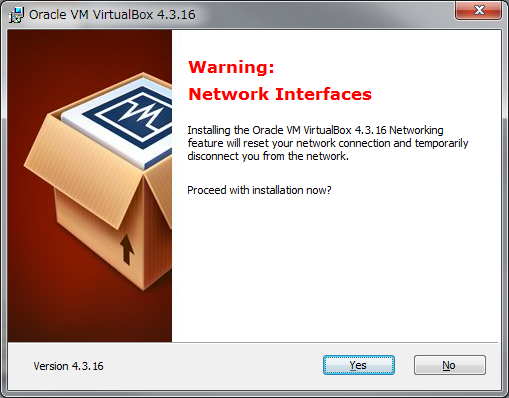
- Execute install|
_ HowToUse
_ Create New Virtual Machine
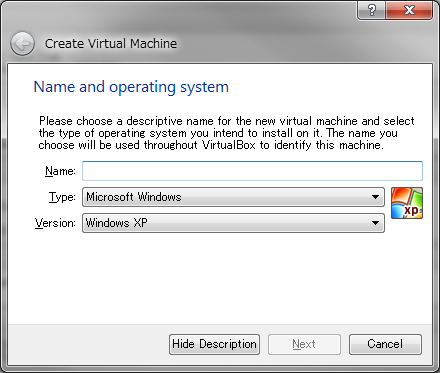
- Step.1
- Click "New" button and define guest OS
Item Description Example Name Name of guest OS "CentOS6.5(64bit)" Type Type of guest OS "Linux" Version Version of guest OS "Red Hat(64bit)"
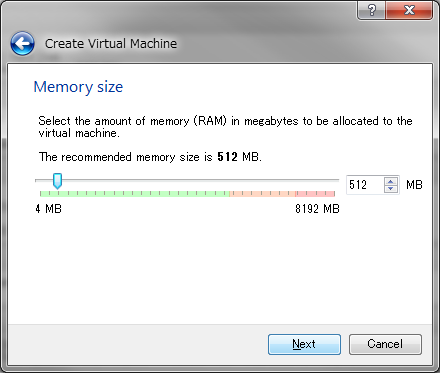
- Step.2
- Specify the memory size for guest OS
Item Description Example Memory Size Memory allocation size for guest OS "2048MB"
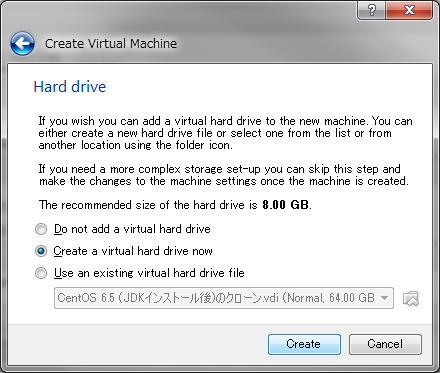
- Step.3
- Choose default option and click "next" button
Item Description Example Hard drive Check if you want to create virtual hard drive "Create a virtual hard drive now"(default)
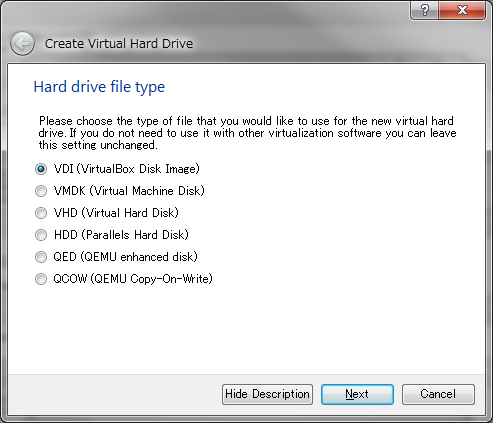
- Step.4
- Choose default option(VDI) for hard drive file type and click "next" button
Item Description Example Hard drive file type Choose Hard drive file type (VDI, VMDK, VHD, HDD, QED, QCOW) "VDI"(default)
- Step.5
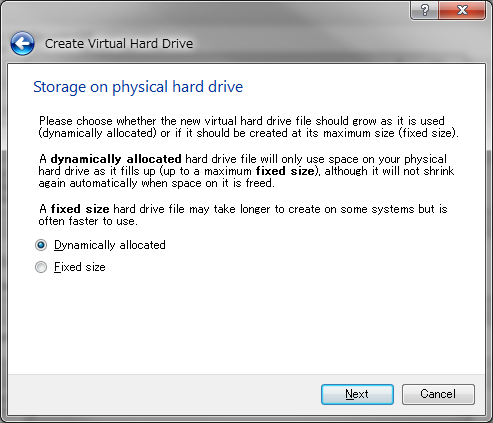
- Choose default option(Dynamically allocated) and click "next" button
Item Description Example Storage on Physical hard drive Choose from "Dynamically allocated" or "Fixed size" "Dynamically allocated"(default)
- Step.6
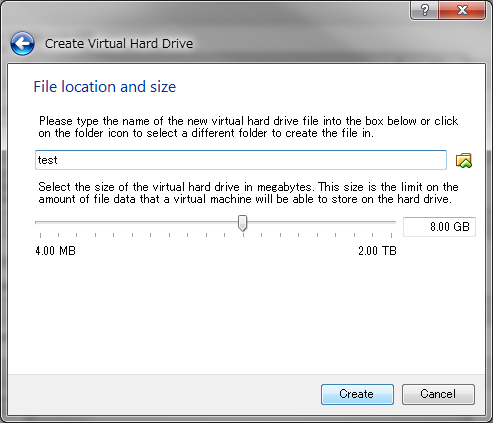
- Set Box file name, location (I recommend to use default location) and choose file size. Then click "create" button. Now you will see new icon for guest OS.
Item Description Example Box File name and location and size Set "Box file name and location" and its "size" "CentOS 6.5(64bit)", "32GB"
- Step.7
- Confirm the newly created guest OS icon is selected, click "start" button.
- Step.8
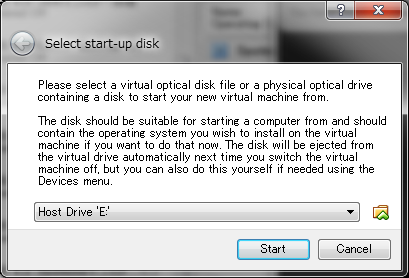
- Select startup disk(ISO file) and click "start" button.
Item Description Example Startup disk Choose "ISO File" "CentOS-6.5-x86_64-bin-DVD1"
- Step.9
- Run guest OS. And follow the operation for each OS.
_ Setup Network
- Step.1
- Power-off the Guest OS.
- Step.2
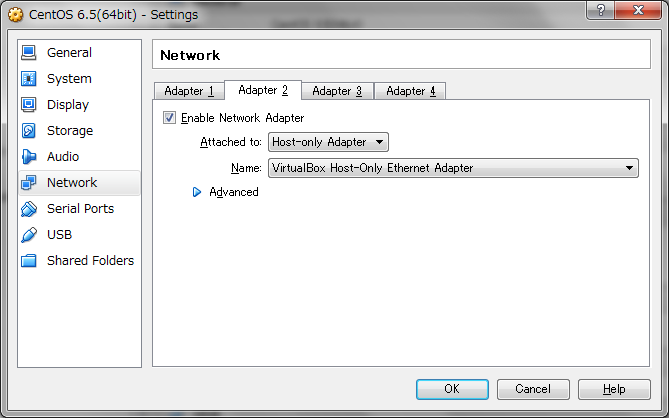
- Select "Network" menu, "Adapter2" tab and set the parameter as below and Click "OK" button. Remember MAC Address which is necessary for setup network adapter in guest OS.
| Item | Description | Example |
| Enable Network Adapter | TRUE | |
| Attached To | Host Only Adapter | |
| Name | VirtualBox Host-Only Eathernet Adapter |
- Step.3
- Run Guest OS.
- Step.4
- Setup Network adapter in Guest OS.
_ Setup Guest Additions
- Step.1
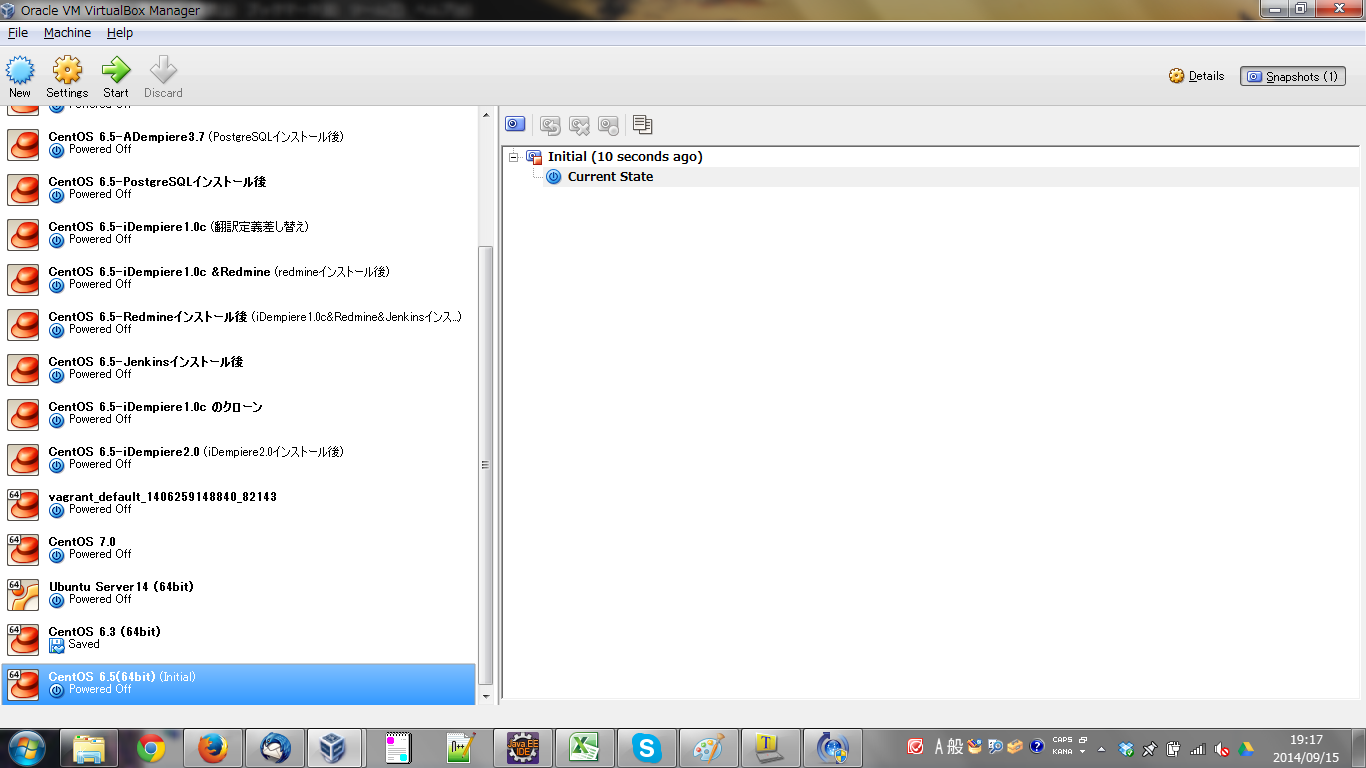
- Create snapshot.
- Step.1
- Login with root.
- Step.2
- Execute the following command.
# yum install gcc kenel-devel kernel-headers dkms make bzips2
# reboot
- Step.3
- Login with root and execute the following command.
#export KERN_DIR=/usr/src/kernels/`uname -r`
- Step.4
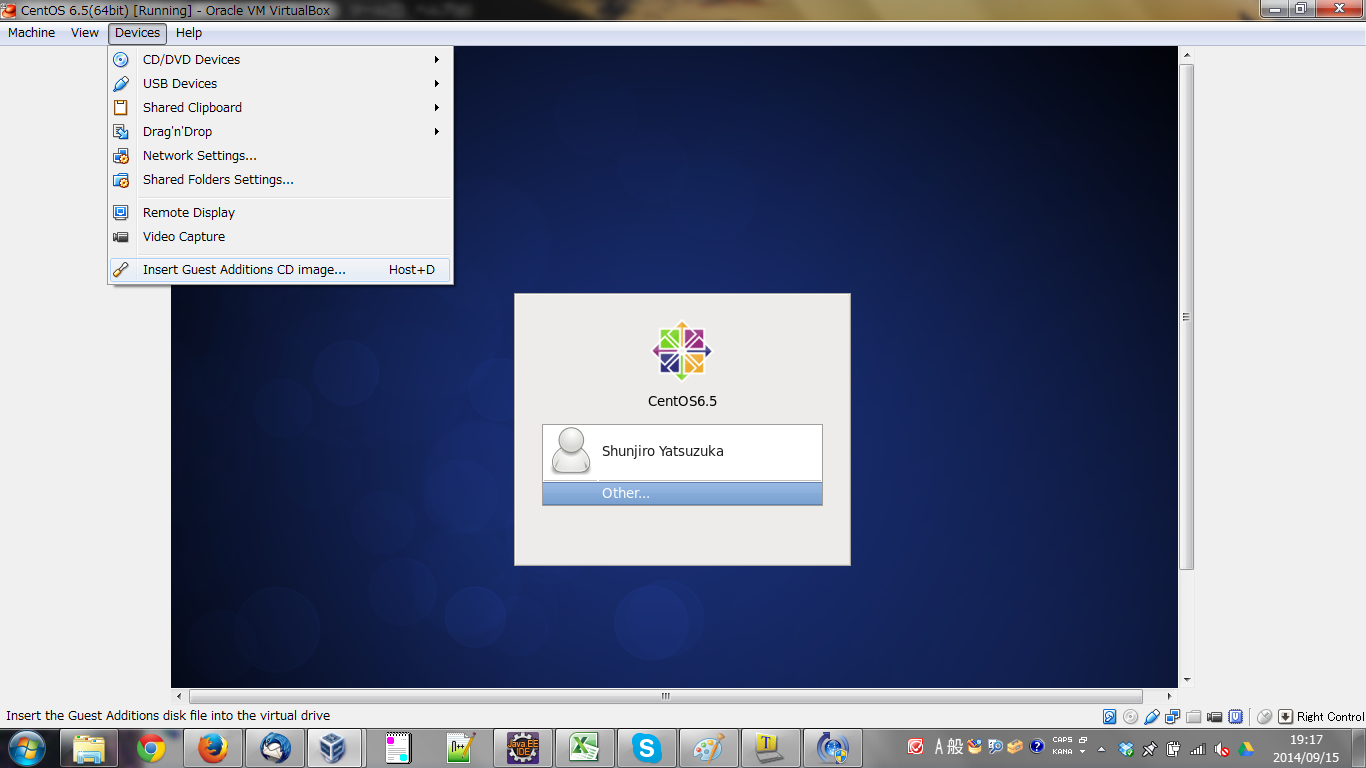
- Mount Guest Additions CD Image from "Device"->"Insert Guest Additions CD-Image".
- Step.5
- If the auto-run didn't run, right click the CD driver icon and select "Open with Auto-run prompt". After the installation is finished, you can access mouth pointer seamlessly between guest OS and host OS.
- Step.6
- Eject the "Guest Additions CD-Image" drive.
_ Author
S.Yatsuzuka
Attach file:  howtouse_fig7.png 198 download
[Information]
 howtouse_fig6.png 217 download
[Information]
 howtouse_fig5.png 214 download
[Information]
 install_fig1.png 194 download
[Information]
 install_fig2.png 217 download
[Information]
 install_fig4.png 199 download
[Information]
 install_fig3.png 192 download
[Information]
 howtouse_fig4.png 202 download
[Information]
 howtouse_fig3.png 215 download
[Information]
 SetupGuestAdditions_fig1.png 196 download
[Information]
 SetupNetwork_fig1.png 103 download
[Information]
 SetupGuestAdditions_fig2.png 112 download
[Information]
 SetupNetwork_fig2.png 202 download
[Information]
 howtouse_fig2.png 209 download
[Information]
 howtouse_fig1.png 226 download
[Information]
 SetupGuestAdditions_fig0.png 214 download
[Information]
Last-modified: 2015-08-17 (Mon) 02:41:34 (3175d)
