Hello World from OSS Silicon Valley
HowToUse/Wordpress/wordpress.com/2016
_ Prerequisite
None
_ Install&Setup
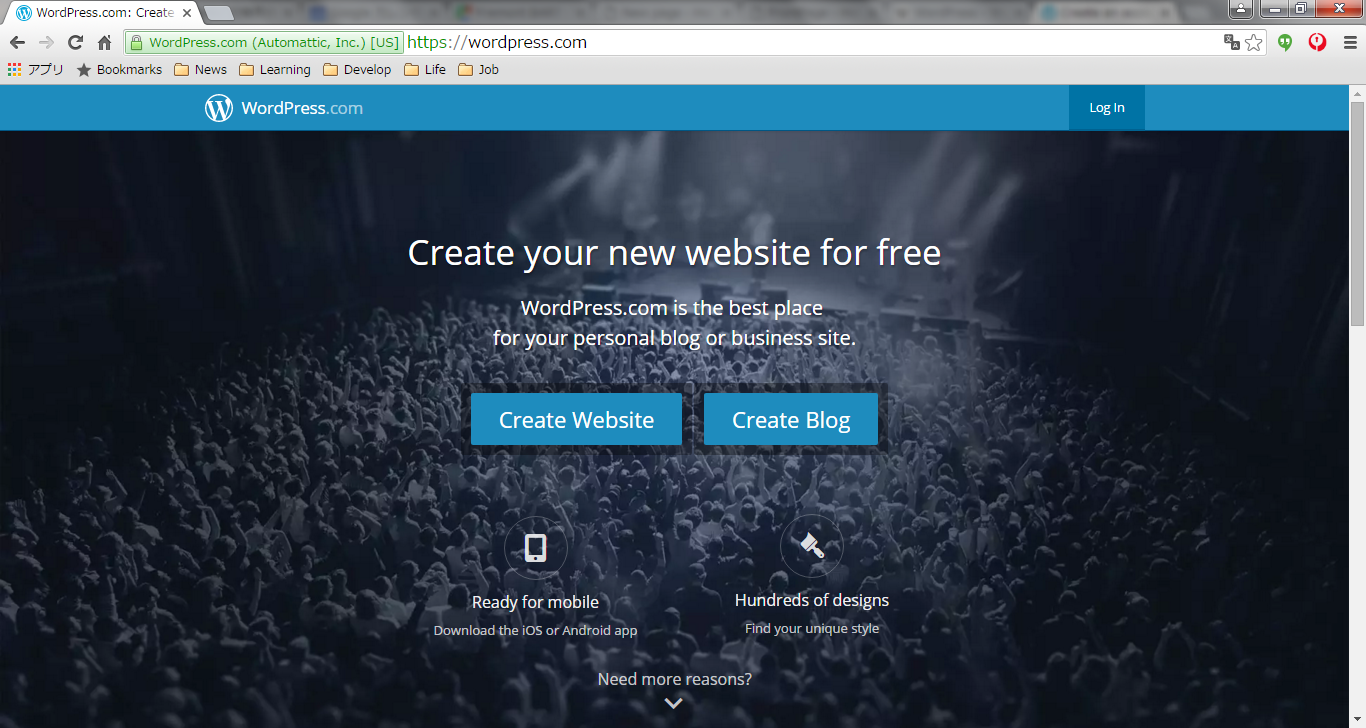
- Step.1
- Access here and click "Create Website".
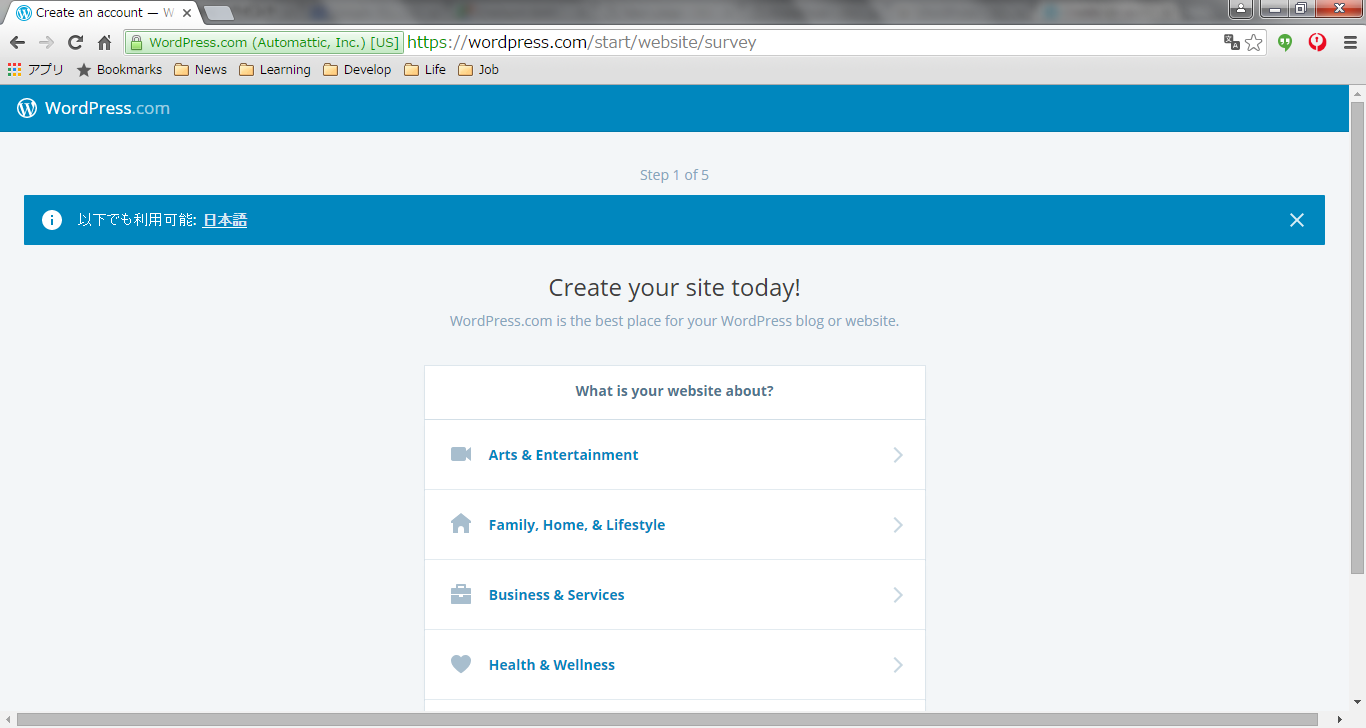
- Step.2
- Choose the type of your web site. Probably, this selection doesn't affect the functionality of your web site.
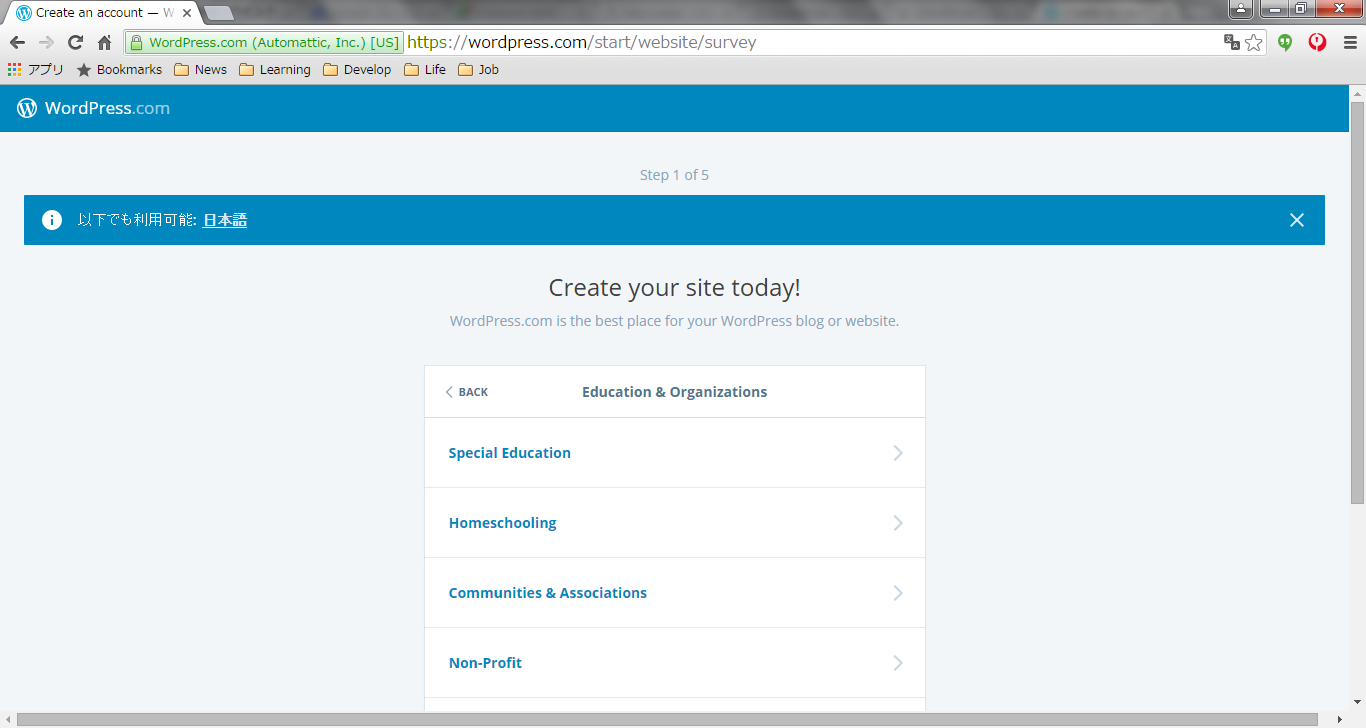
- Step.3
- Choose the subcategory of your web site. Probably, this selection doesn't affect the functionality of your web site.
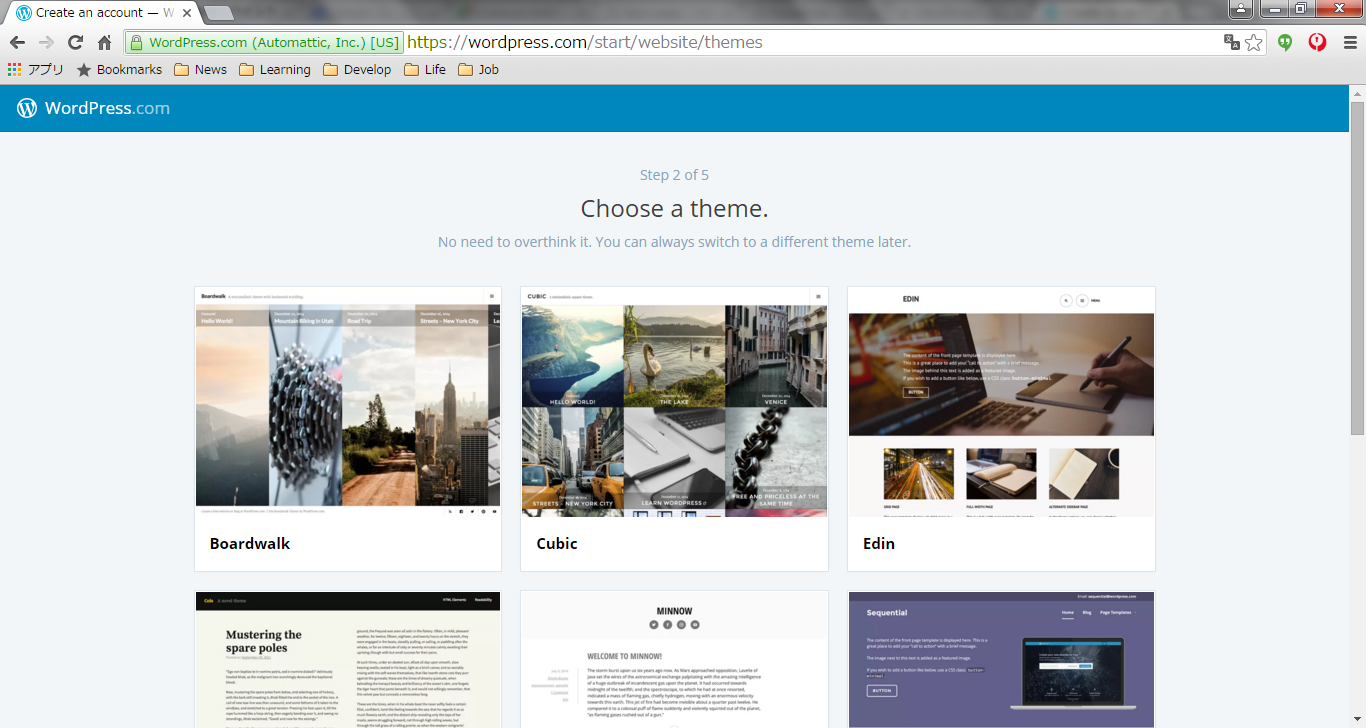
- Step.4
- Choose the theme of your web site. You can change this setting later.
- Step.5
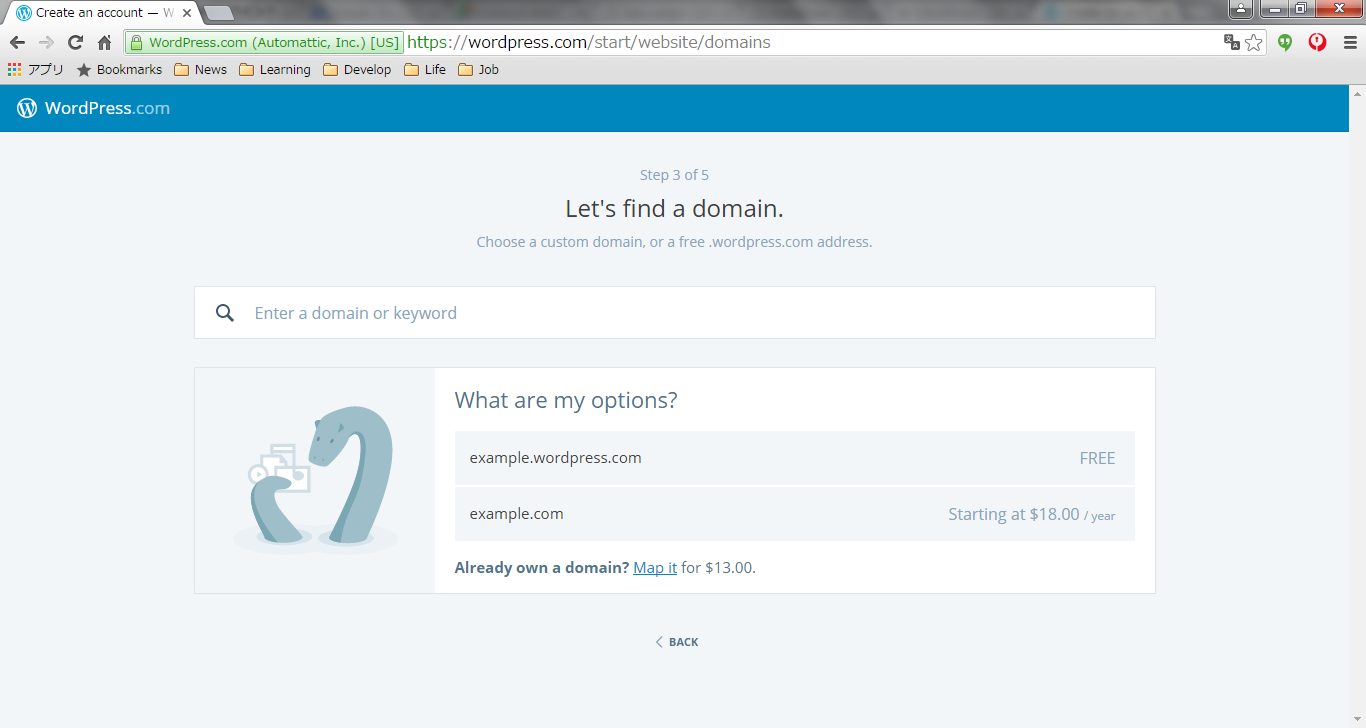
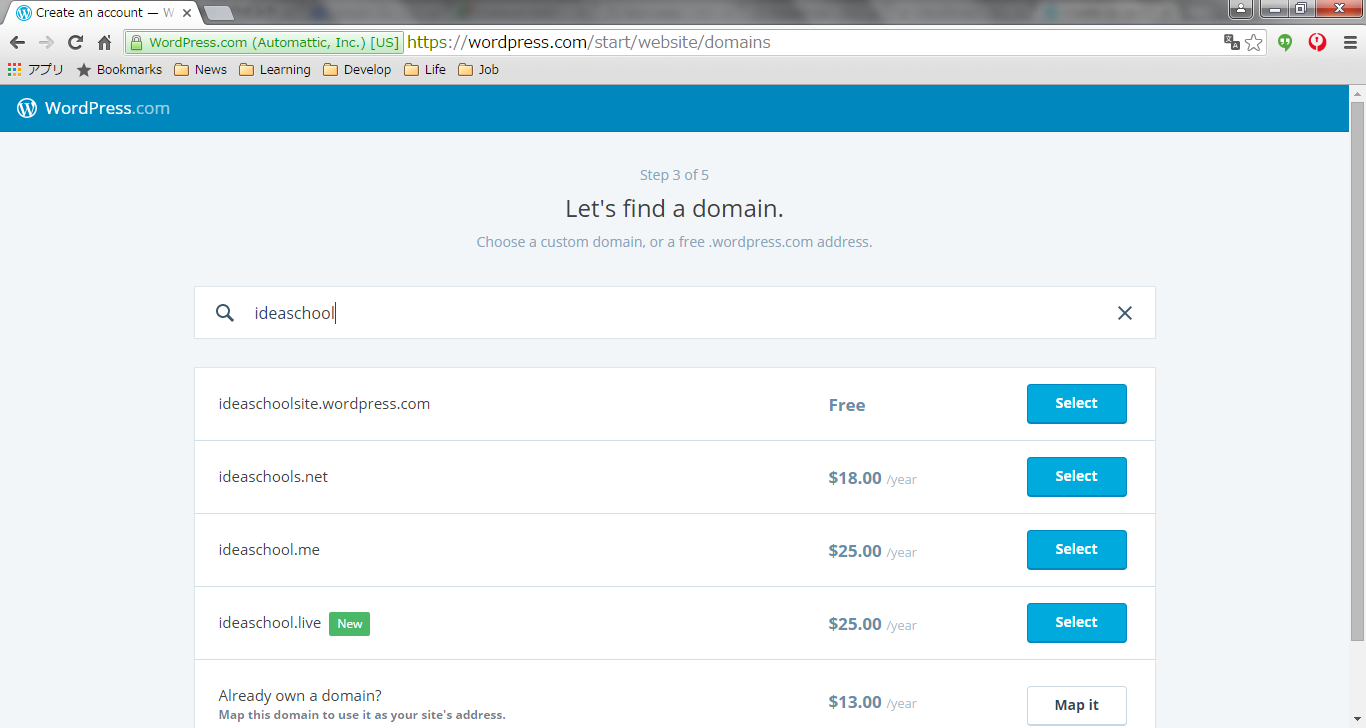
- Enter your prospective web site URL and check if it is available.
- Step.6
- Pick up the URL like. You can choose *.wordpress.com as free domain.
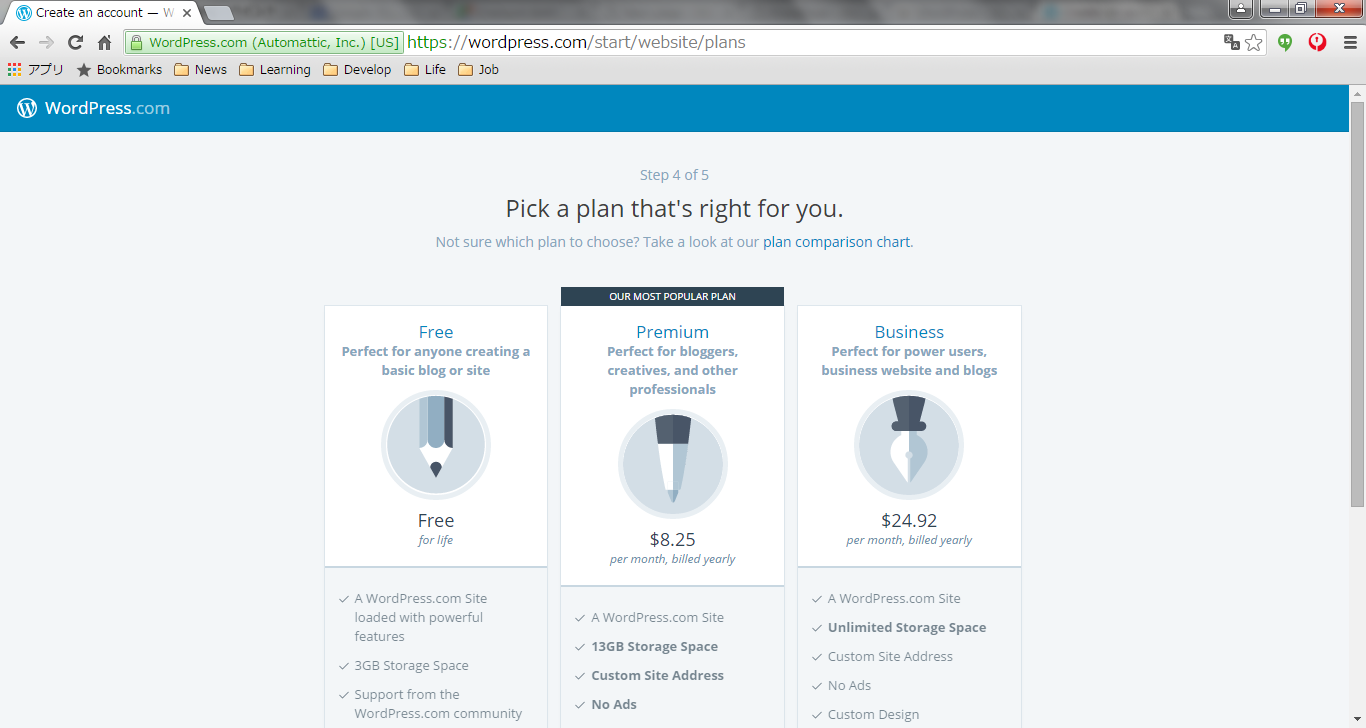
- Step.7
- Choose the service.
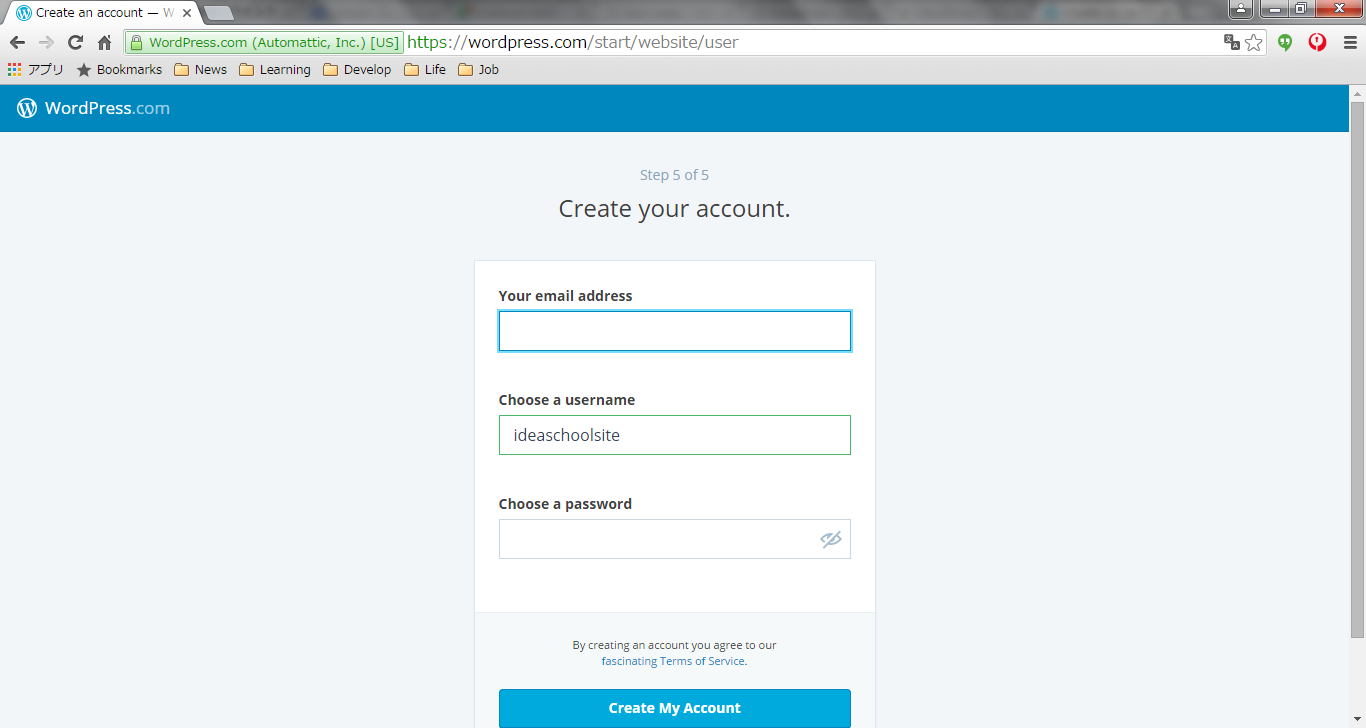
- Step.8
- Register your email address. You can register your email address only for one web site.
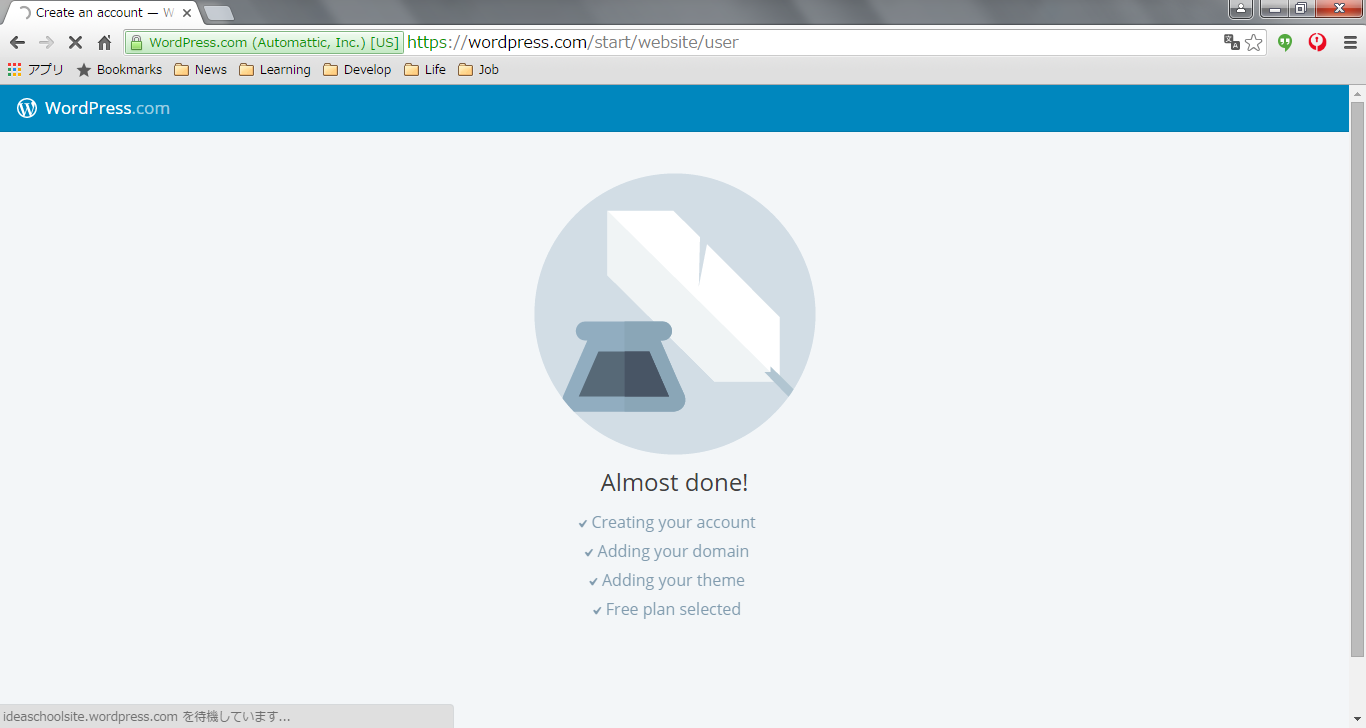
- Step.9
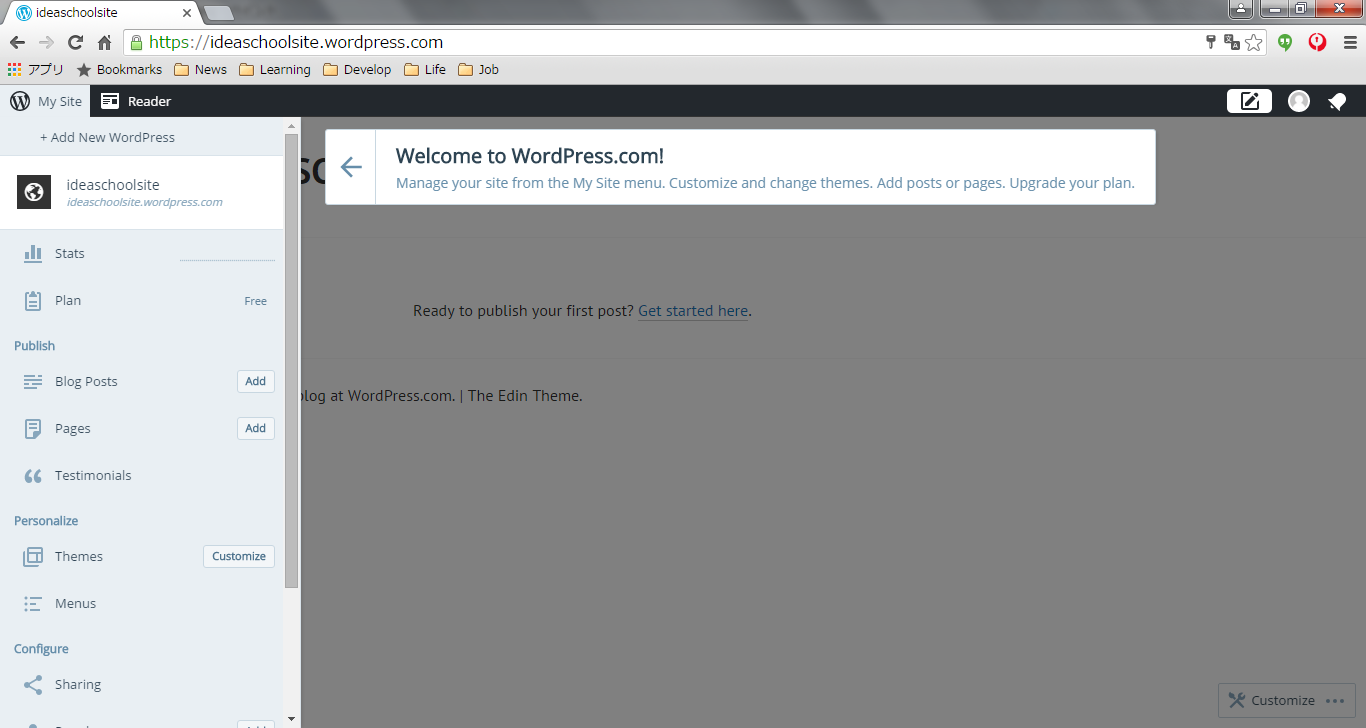
- Setup process proceeds in background. Then you can see the dashboard window to edit and configure your web site.
_ HowToUse
_ Change Theme
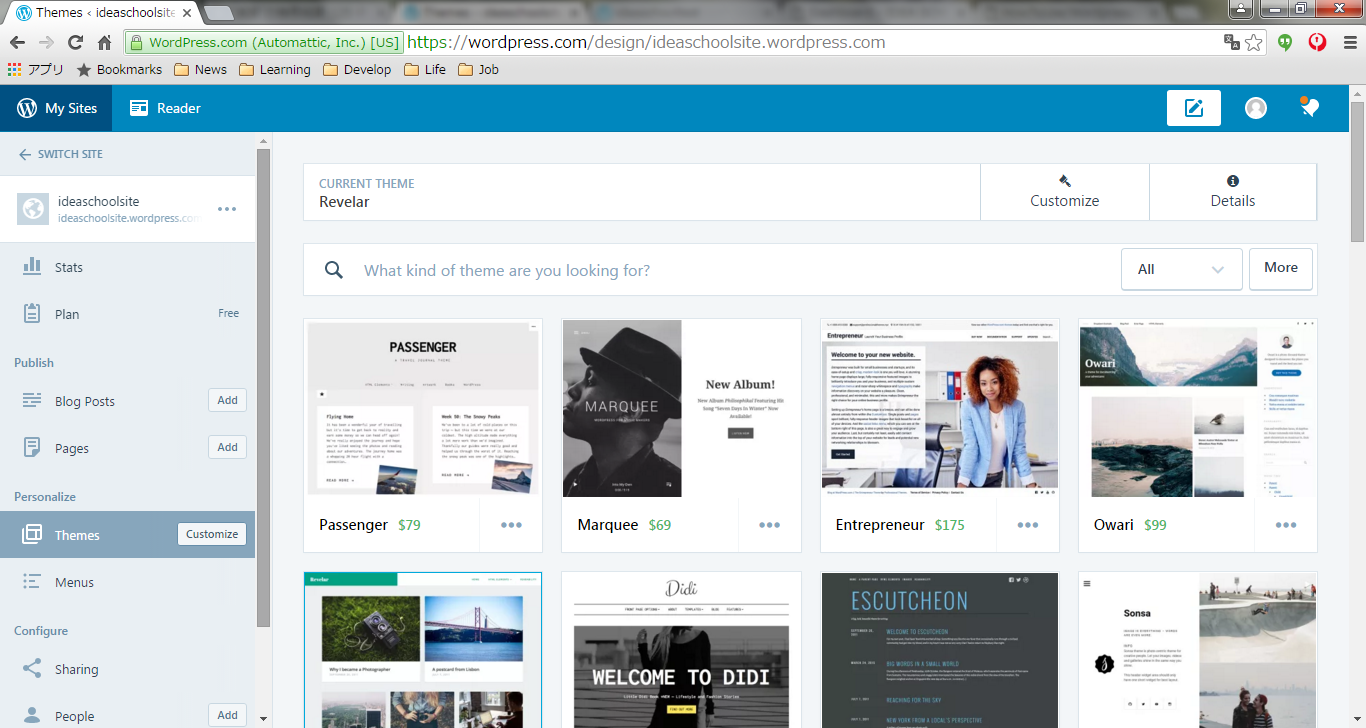
- Step.1
- Click Theme menu from the left menu.
- Step.2
- Choose your favorite Theme and click "Activate" button. Then you can see the design of your web site is changed.
_ Creating Post
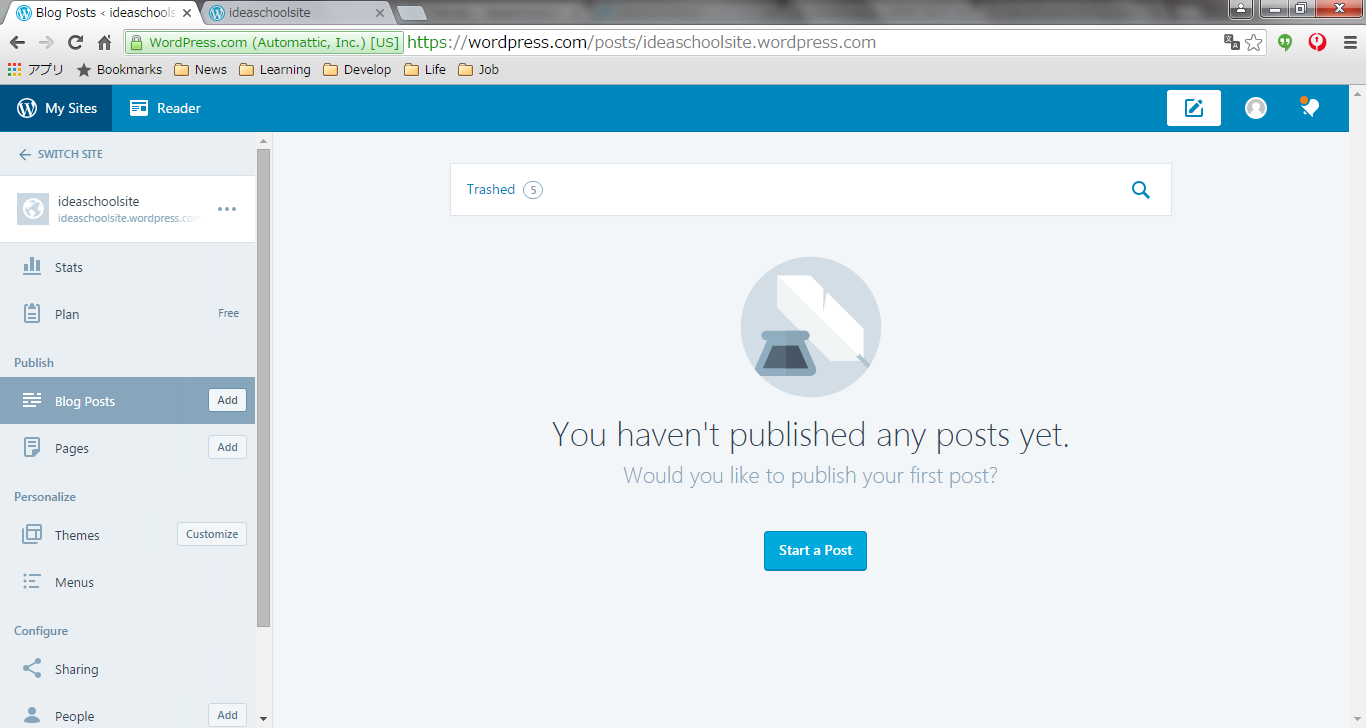
- Step.1
- Click "Add" button on "Blog Posts" menu.
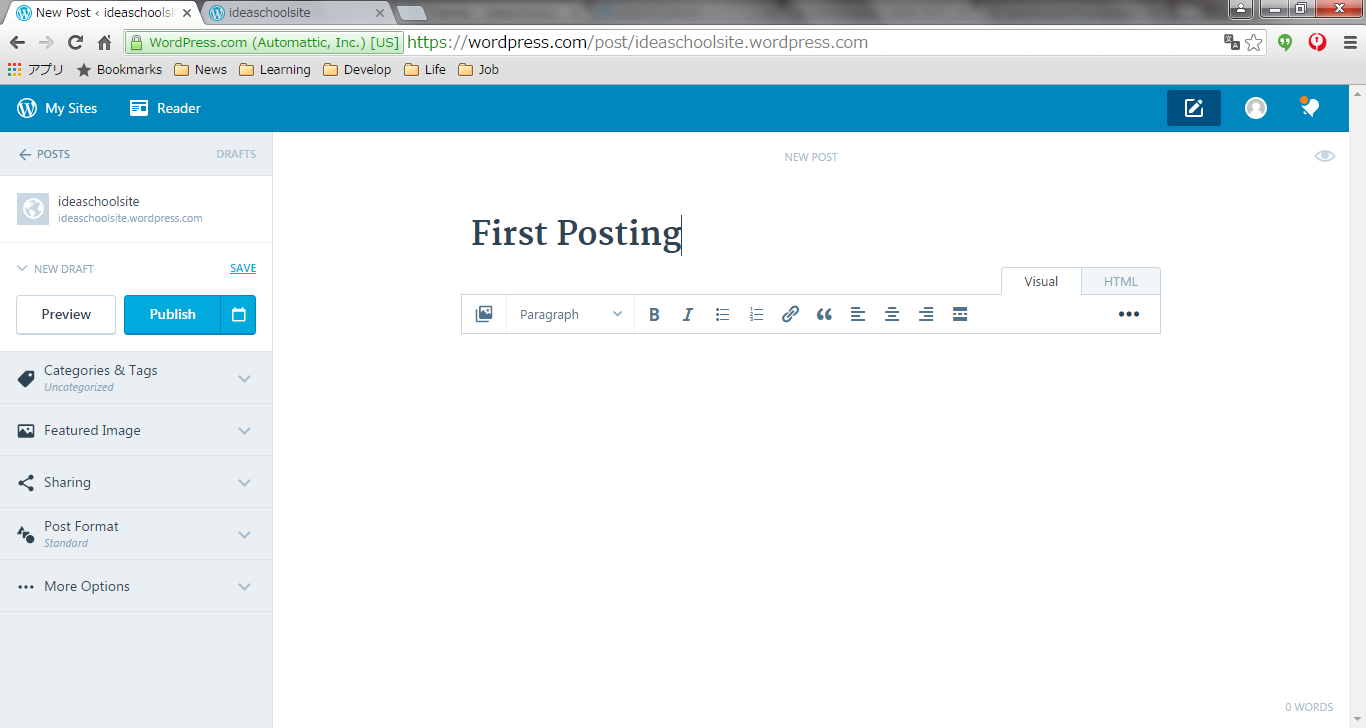
- Step.2
- Put the page title and description of page in the form.
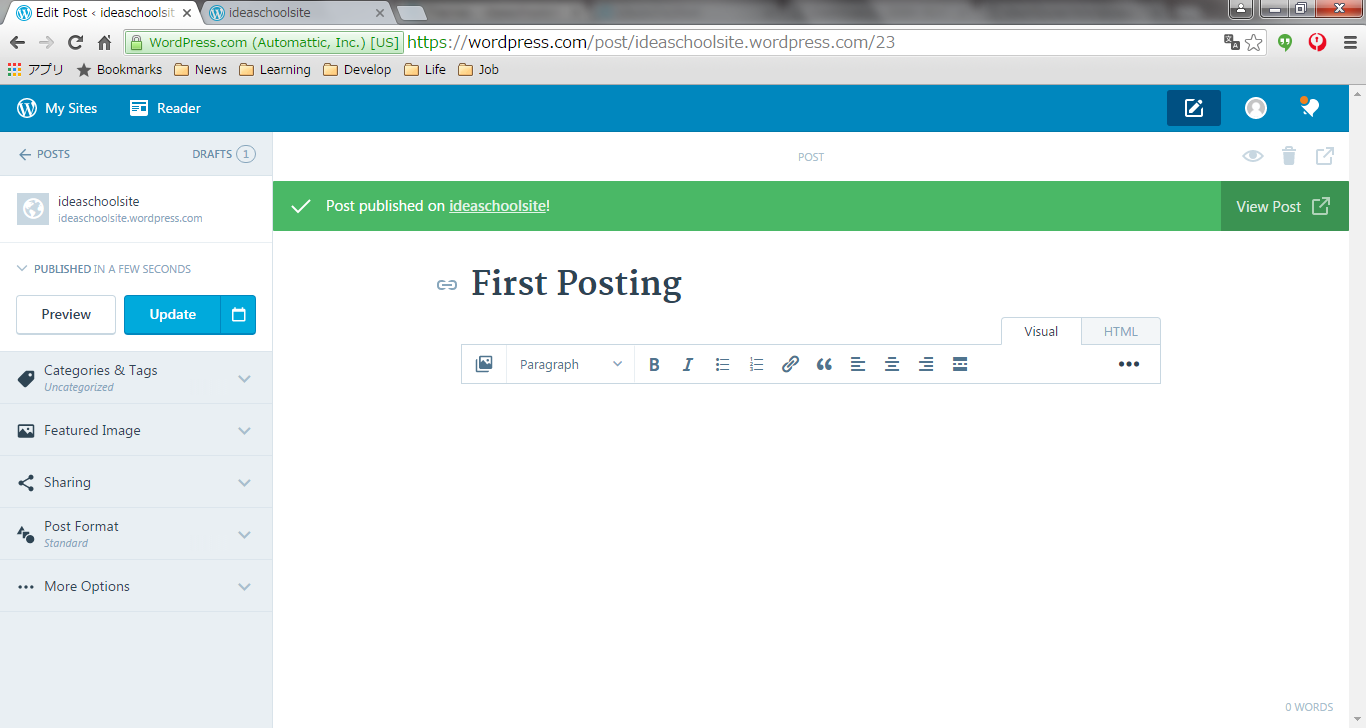
- Step.3
- Click "Publish" button. after a while, you will see the message that page is published successfully.
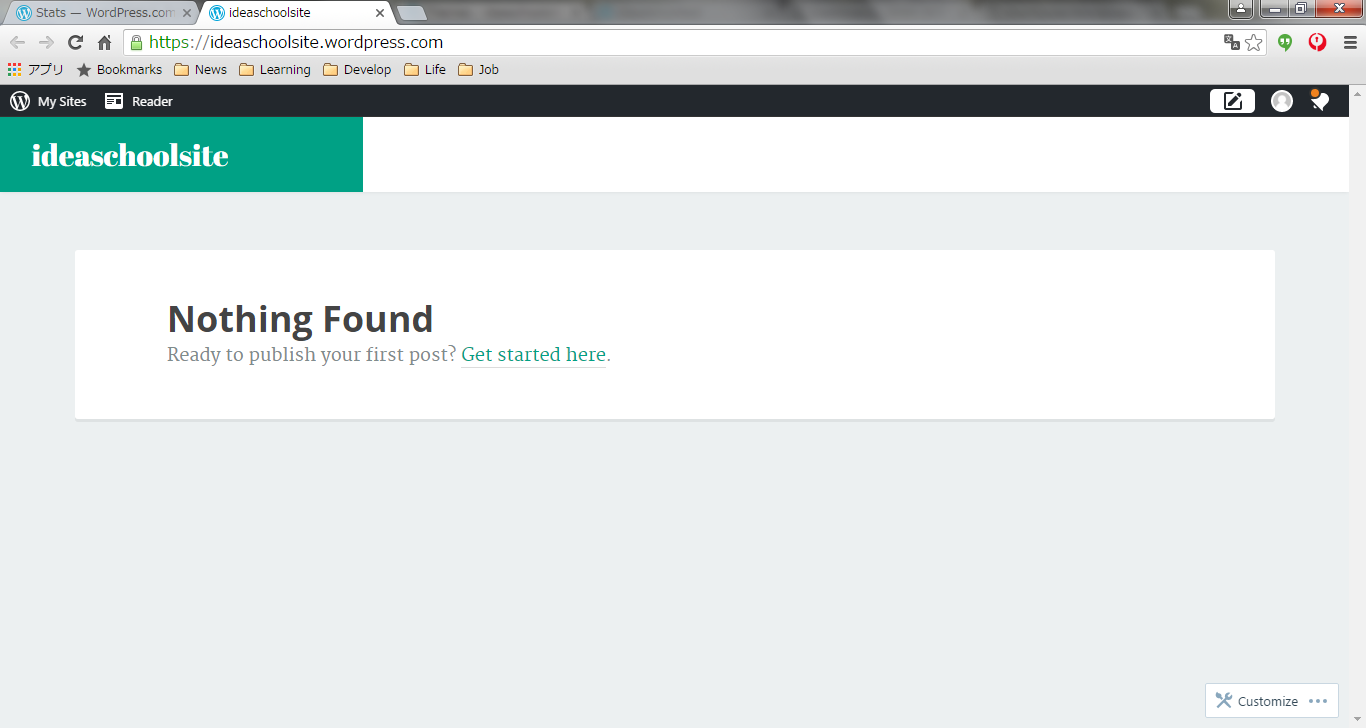
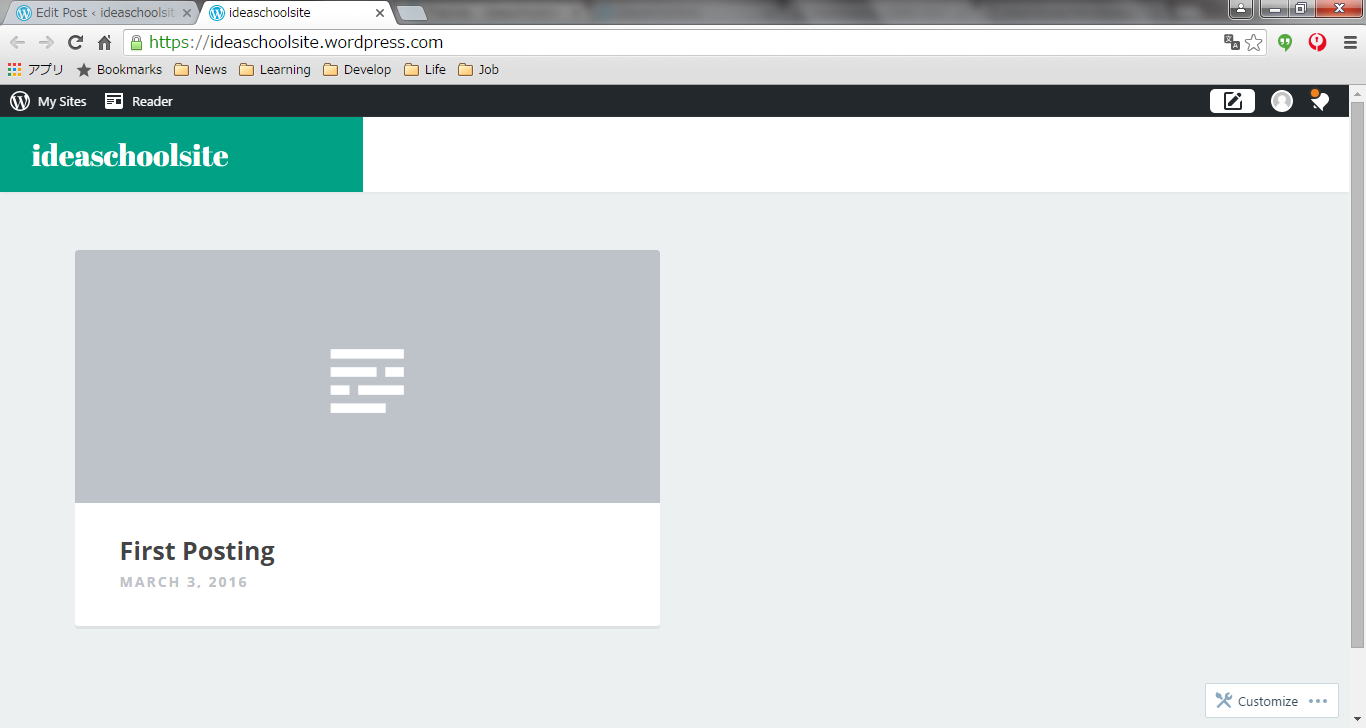
- Step.4
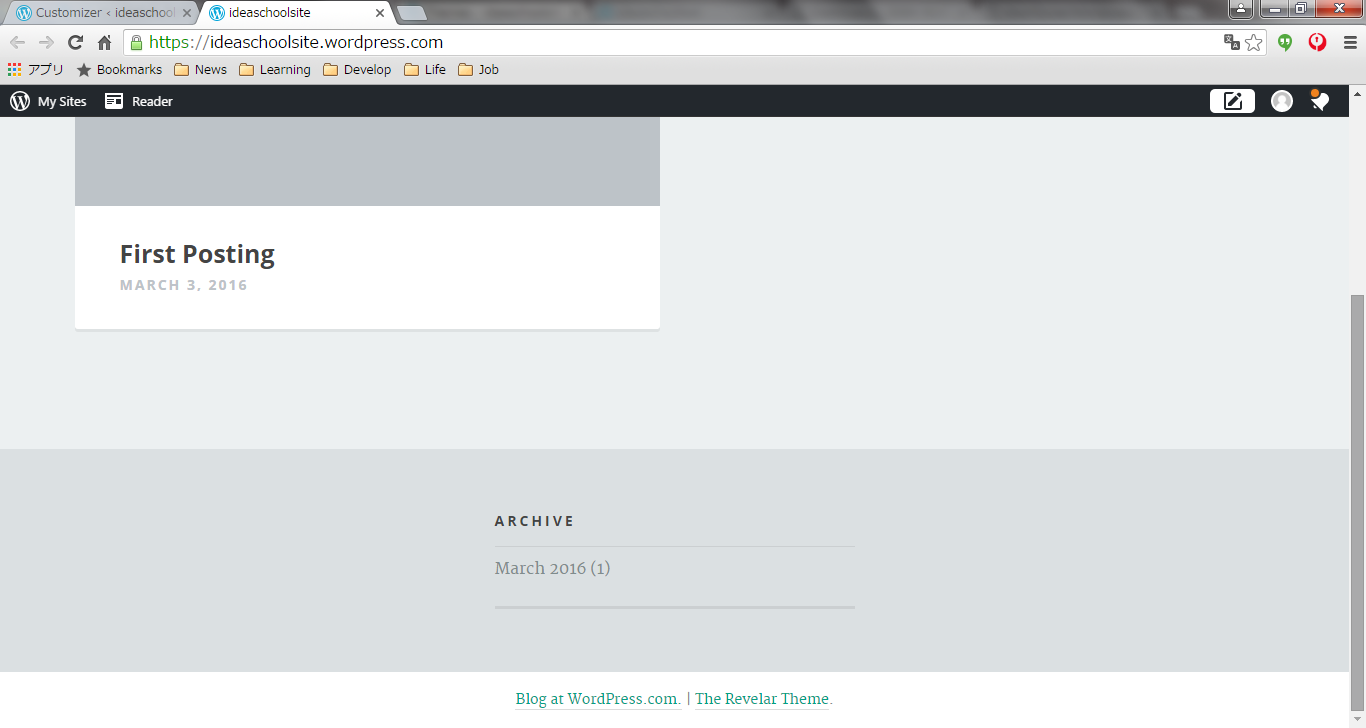
- When you access your web site, you can see your post is displayed on your top page automatically.
_ Creating Static page and Menu
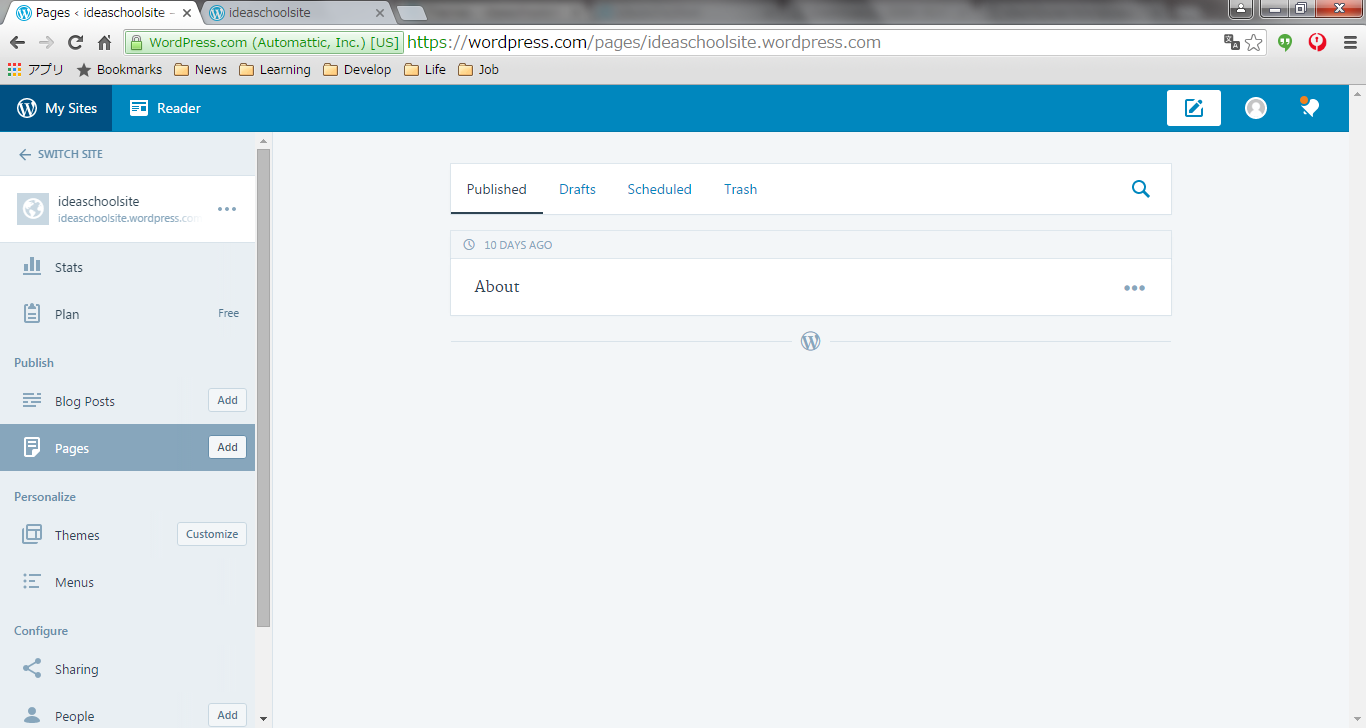
- Step.1
- Click "Add" button on "Pages" menu.
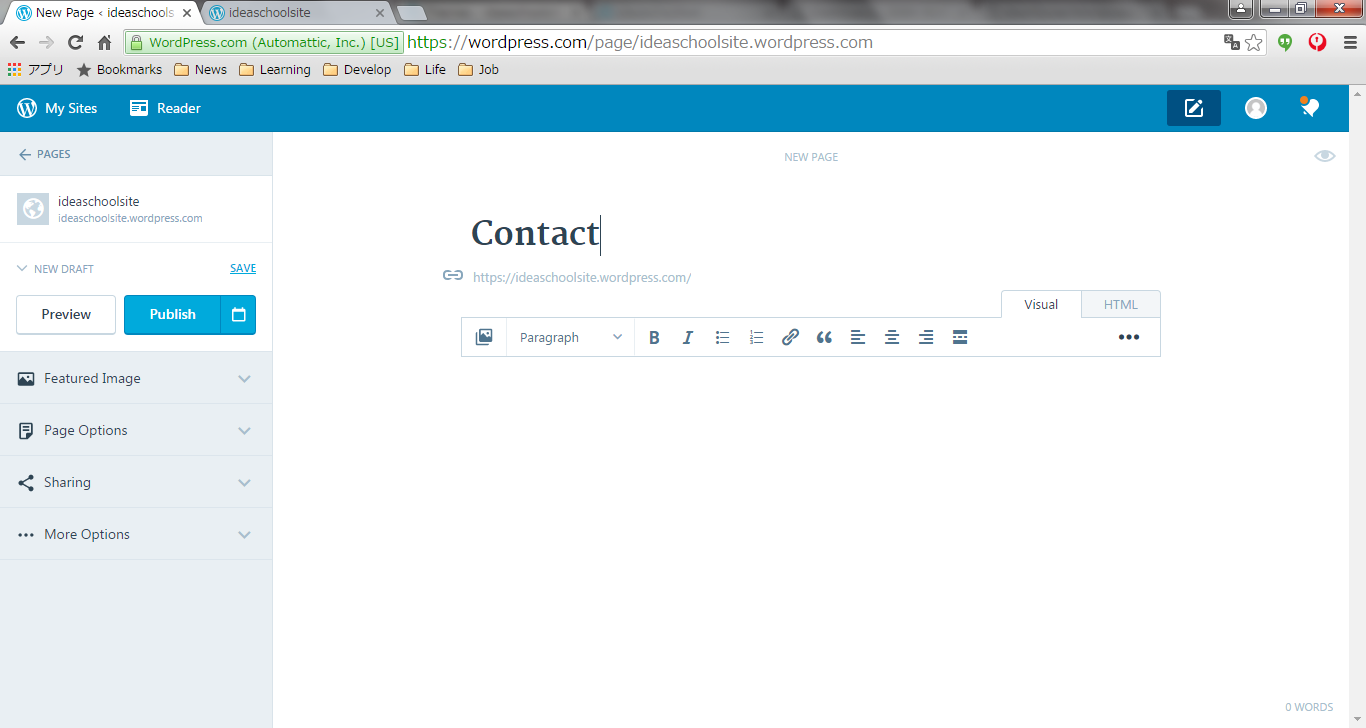
- Step.2
- Put the page tile and description for new page.
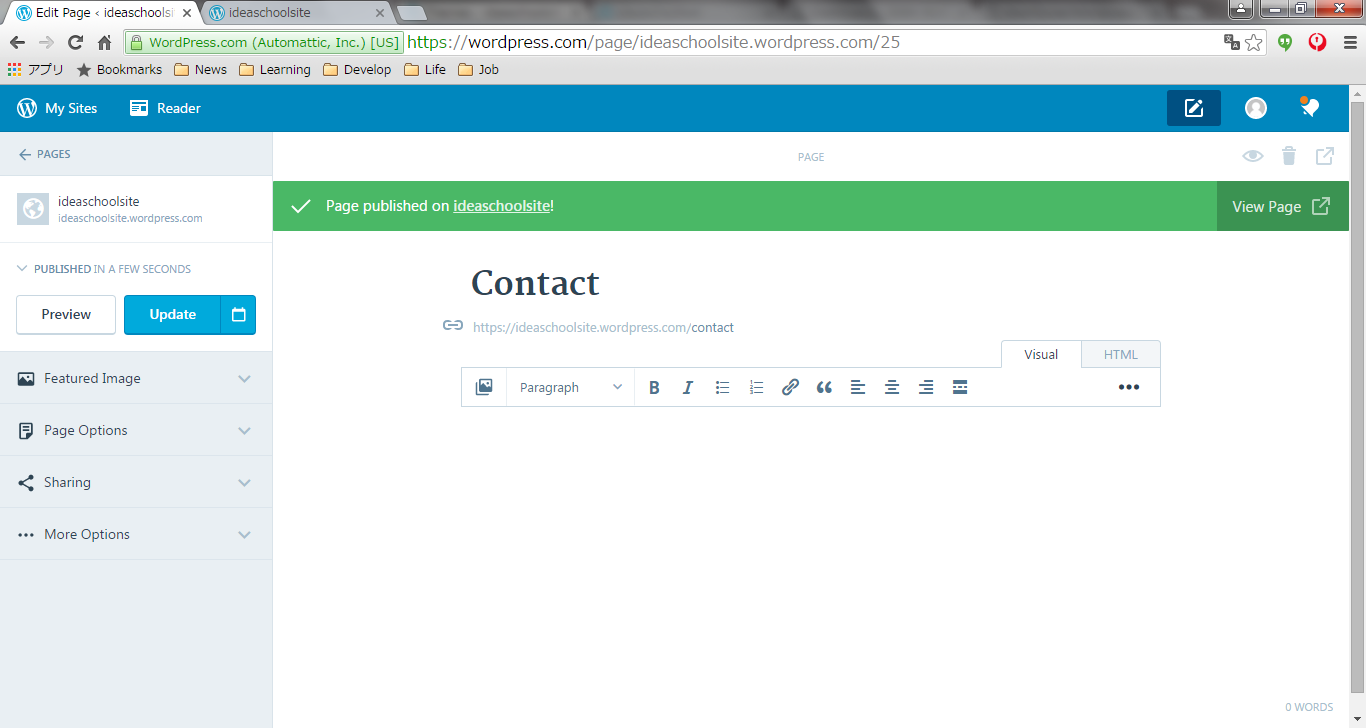
- Step.3
- Click "Publish" button and you will see the message that your page is released successfully.
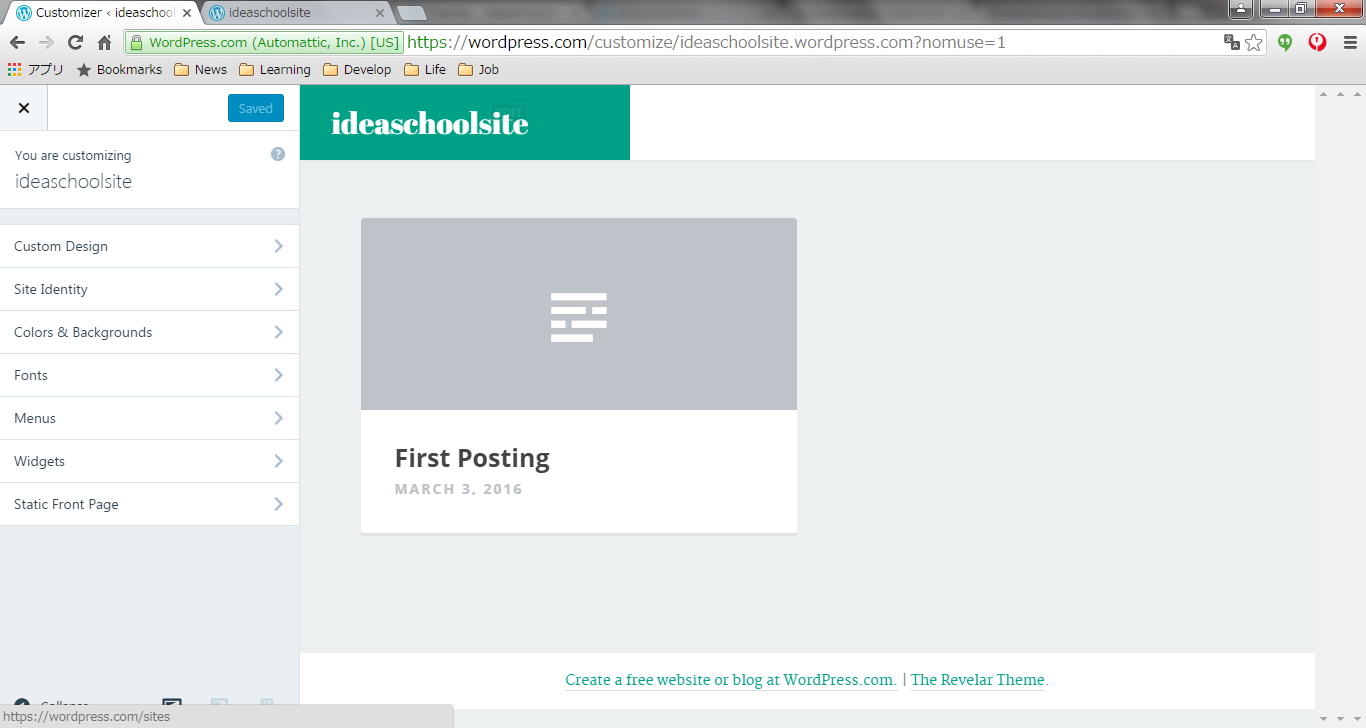
- Step.4
- In this time, you you can't see the link to this new page from your top page, so you need to put navigation menu for it. Click "customize" button on your "Theme" menu.
- Step.5
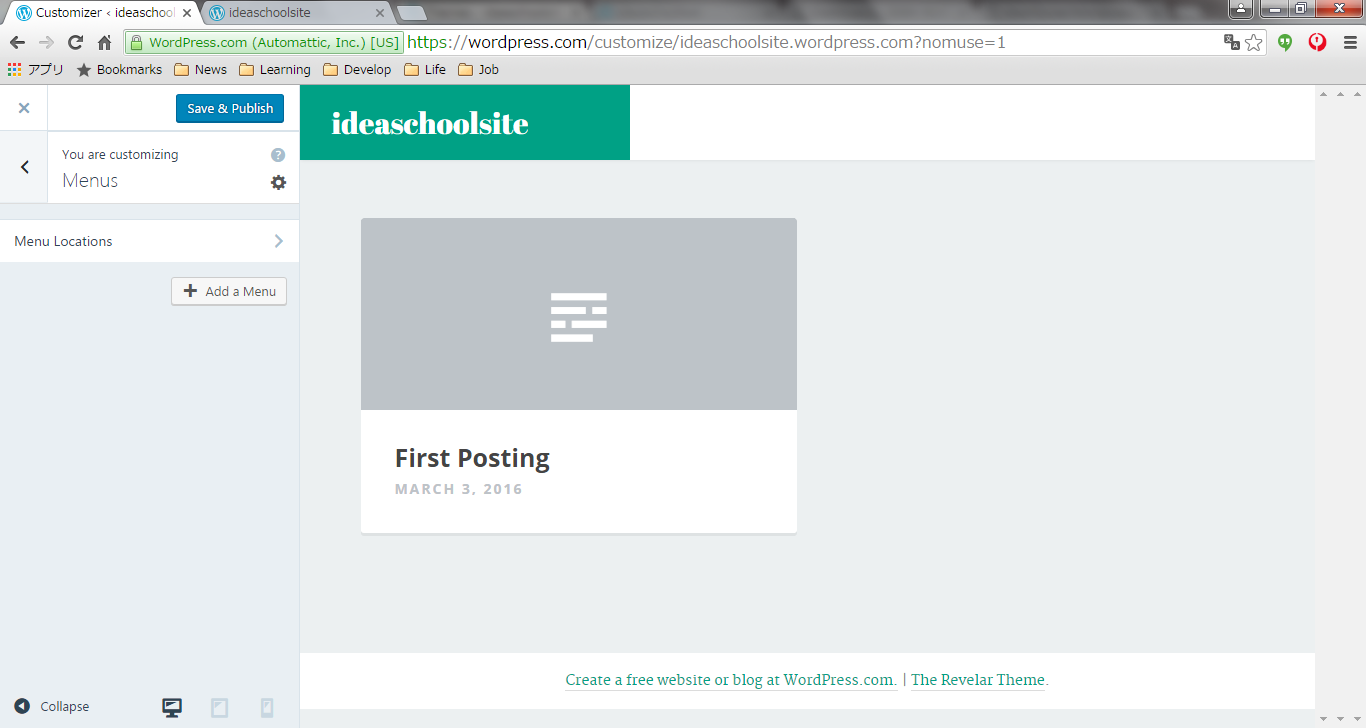
- Click "Menu" menu.
- Step.6
- Click "Add a menu" button.
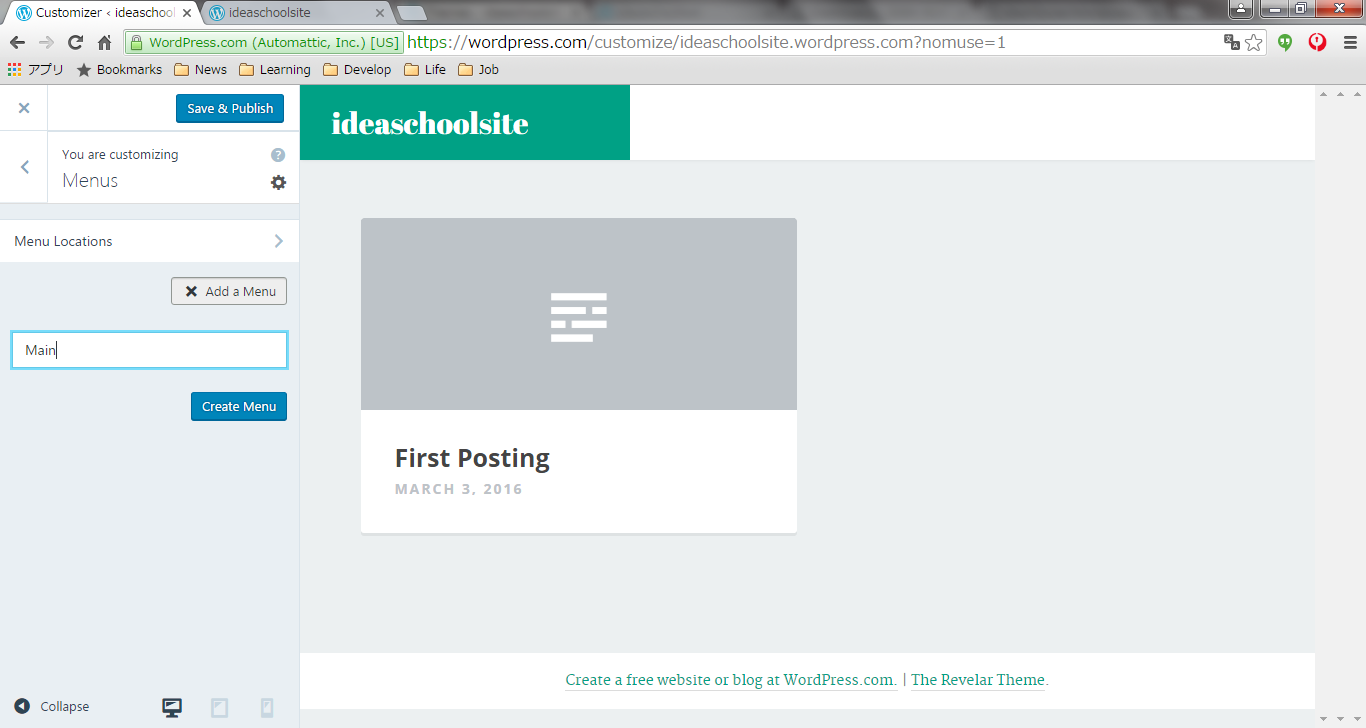
- Step.7
- Put the menu name and click "Create Menu" button. The name for menu is just for a marking, and it doesn't show up on your web site.
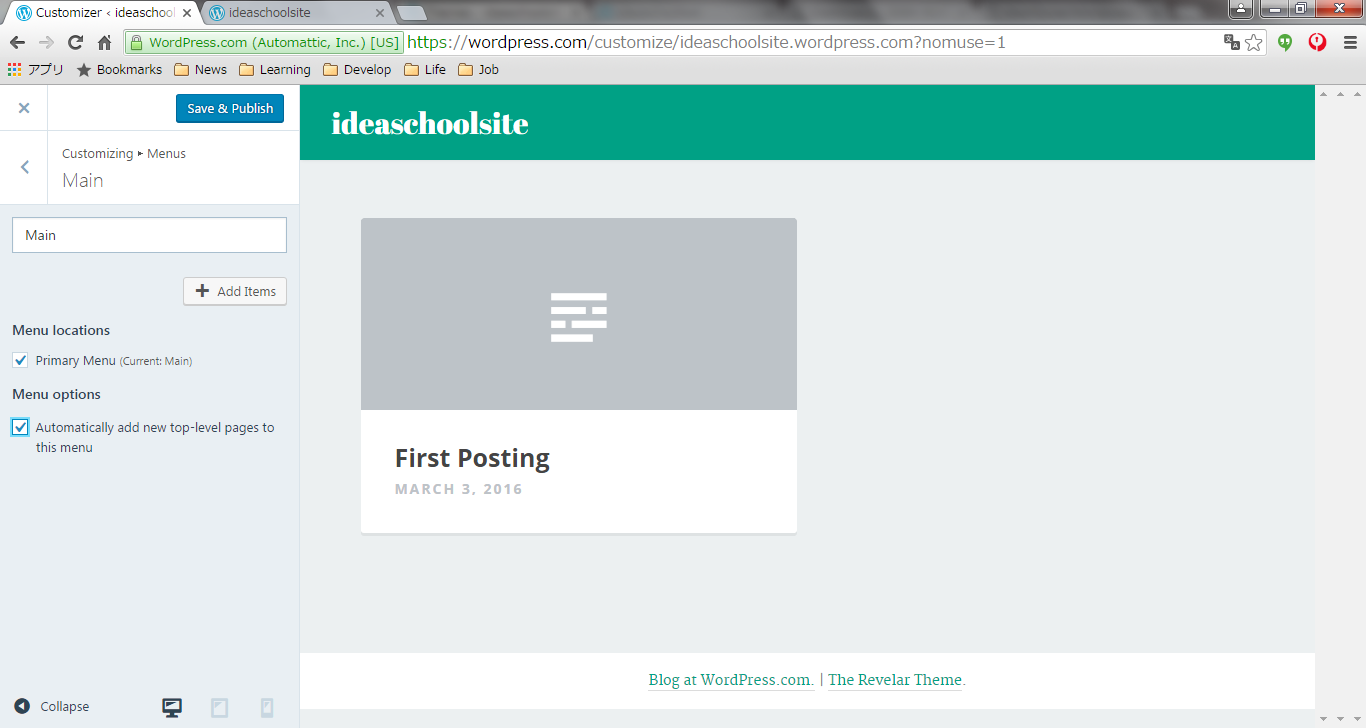
- Step.8
- Check "Primary Menu", and "Automatically Add" checkbox and click "Add Items", so that the menu is shown on your web site automatically.
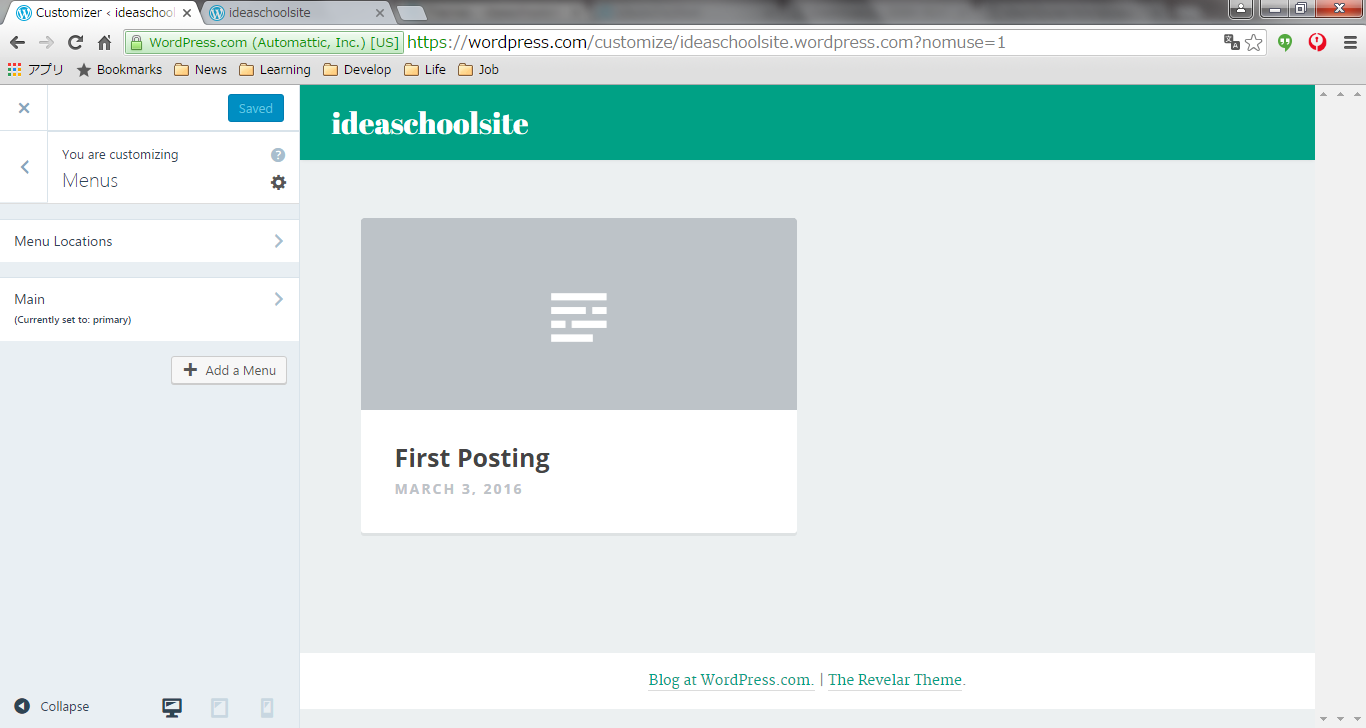
- Step.9
- Click "Save" button.
- Step.10
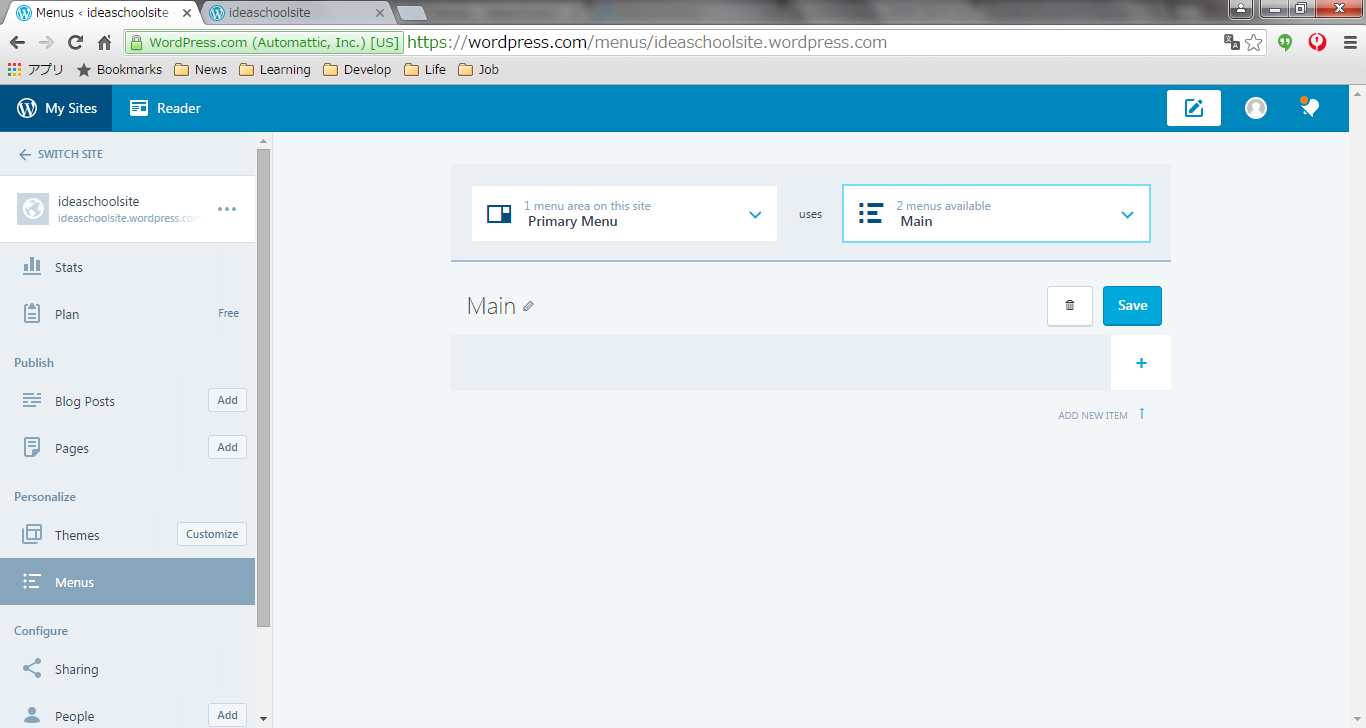
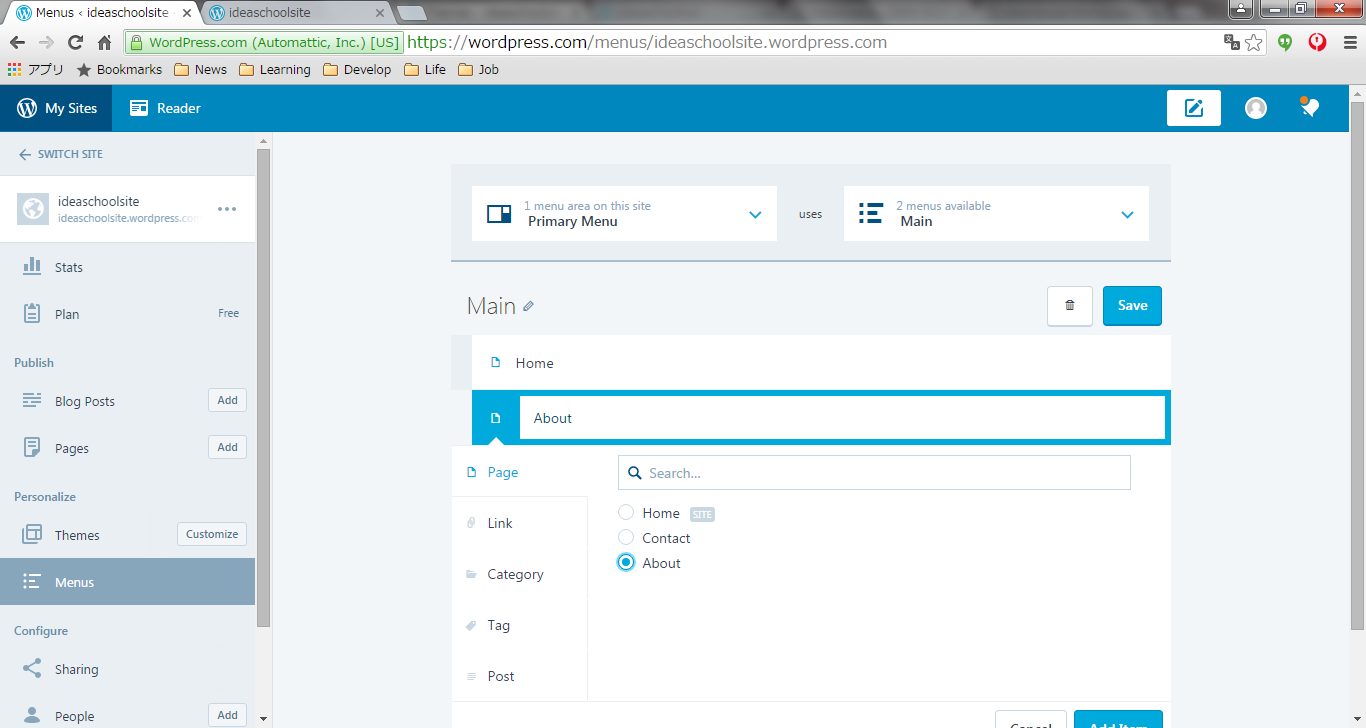
- Go back to your main maintenance page, and click "Menu" menu.
- Step.11
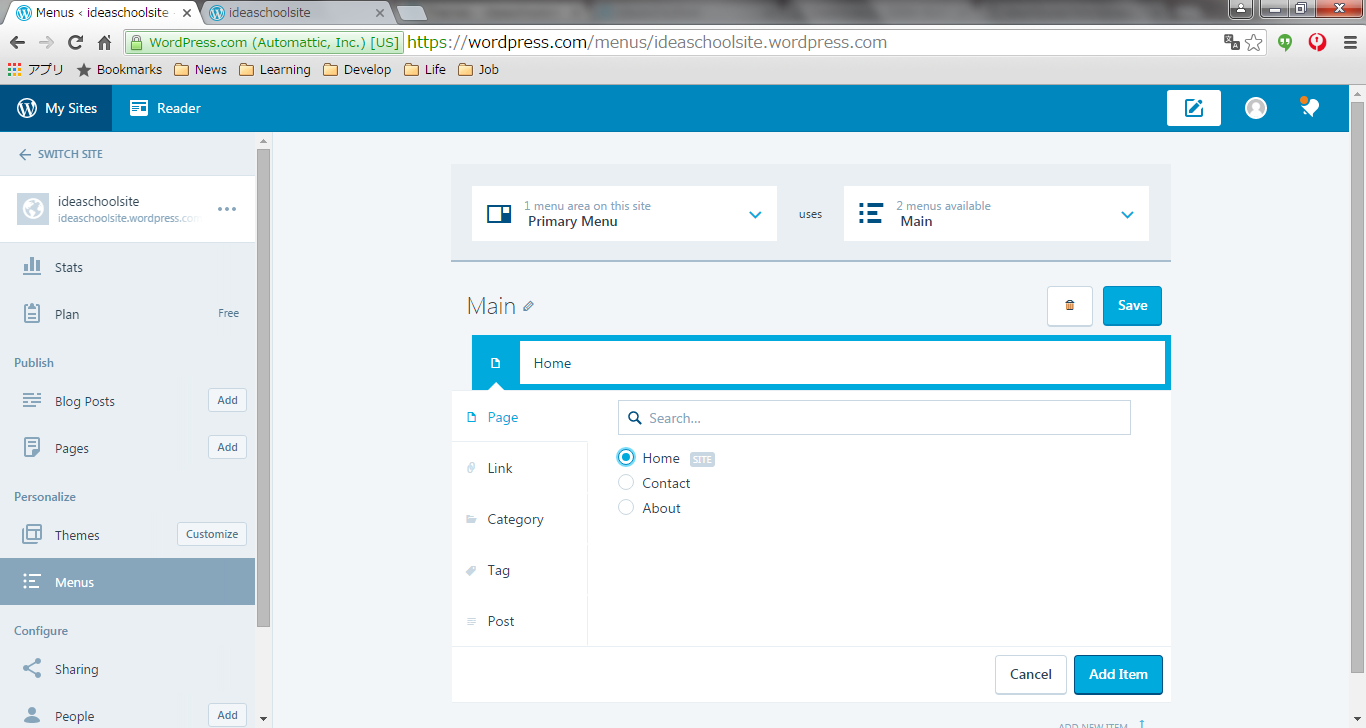
- Choose newly created menu for "Primary Menu". Choose page name from radio button and click "Add item" button.
- Step.12
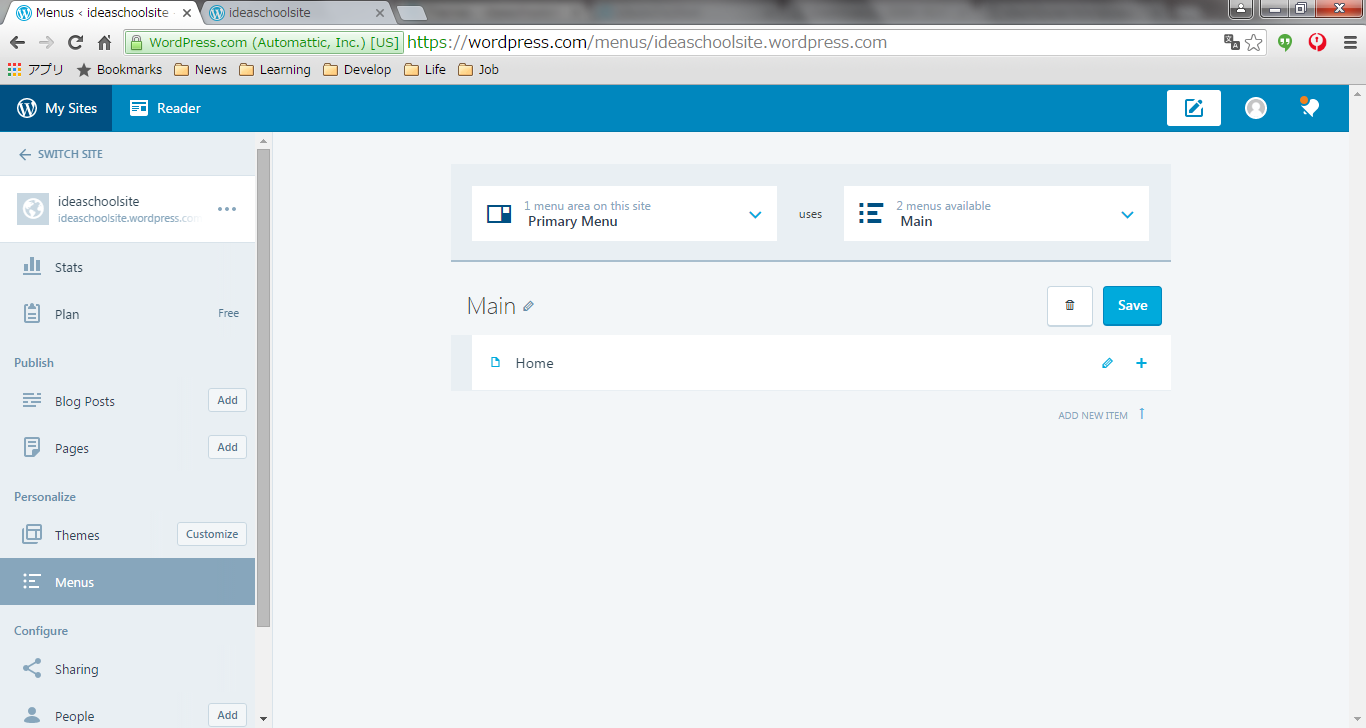
- Click "Save" button.
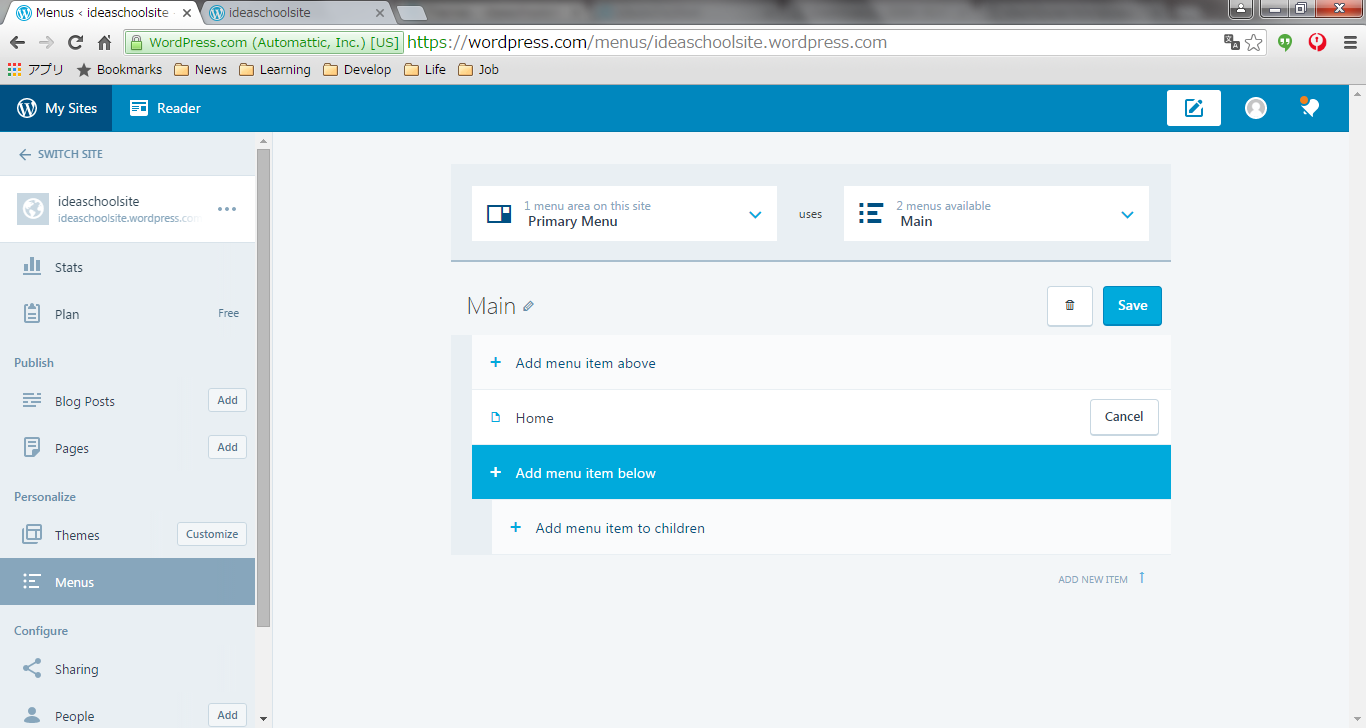
- Step.13
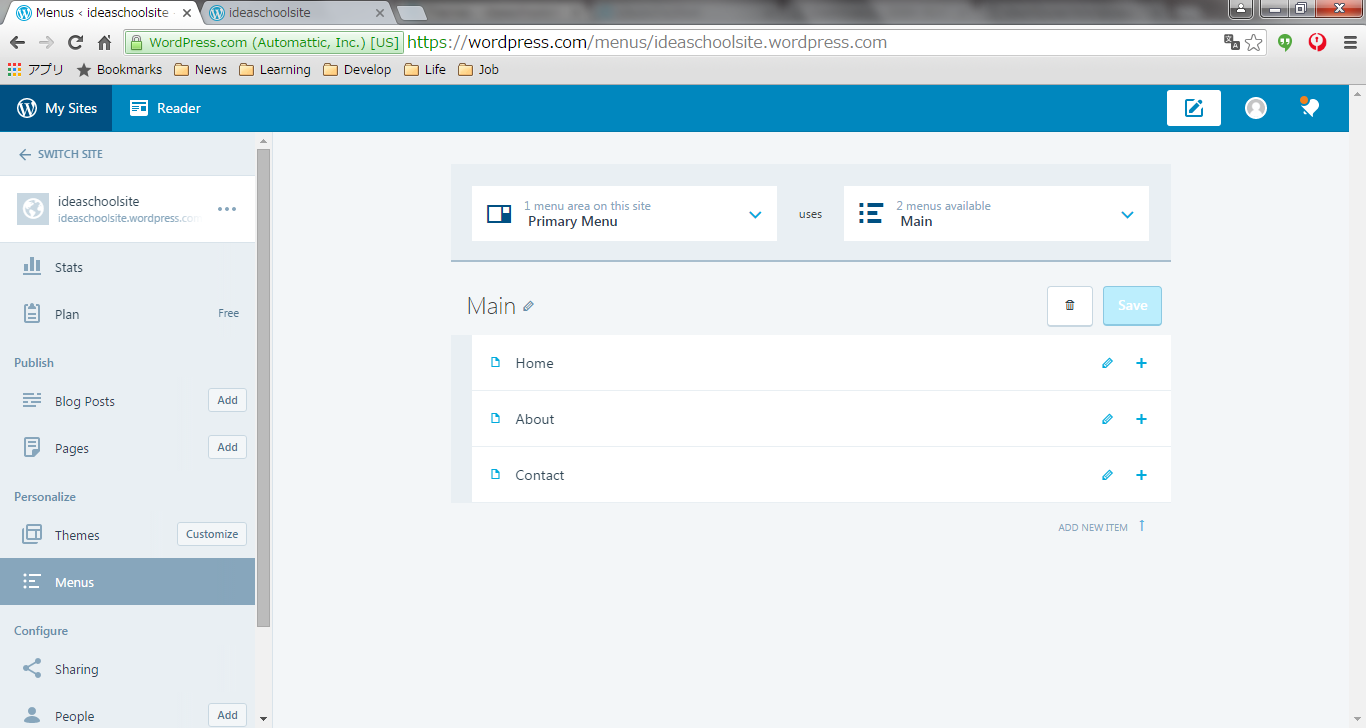
- Click "Add menu item below".
- Step.14
- Click page title and click "Add item" button repeatedly.
- Step.15
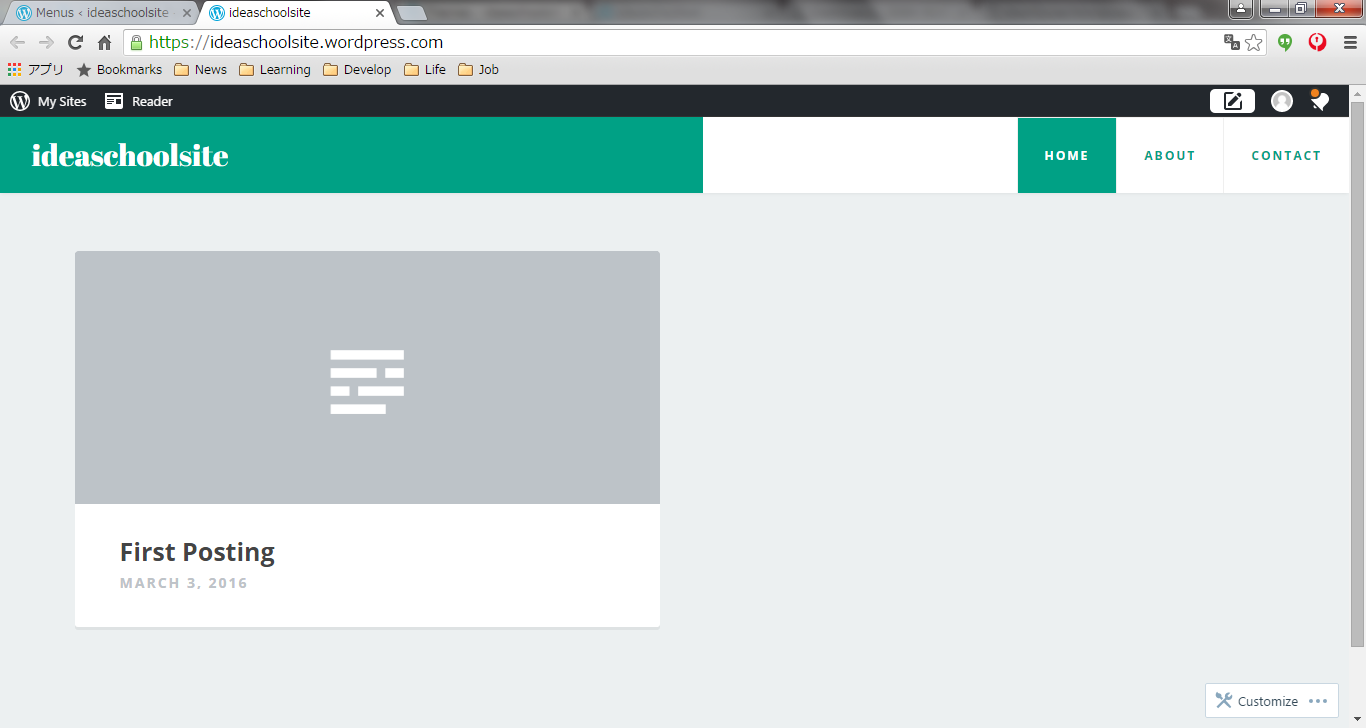
- Click "Save" button, then you can see new menu is shown up in your web site.
_ Change Widget
- Step.1
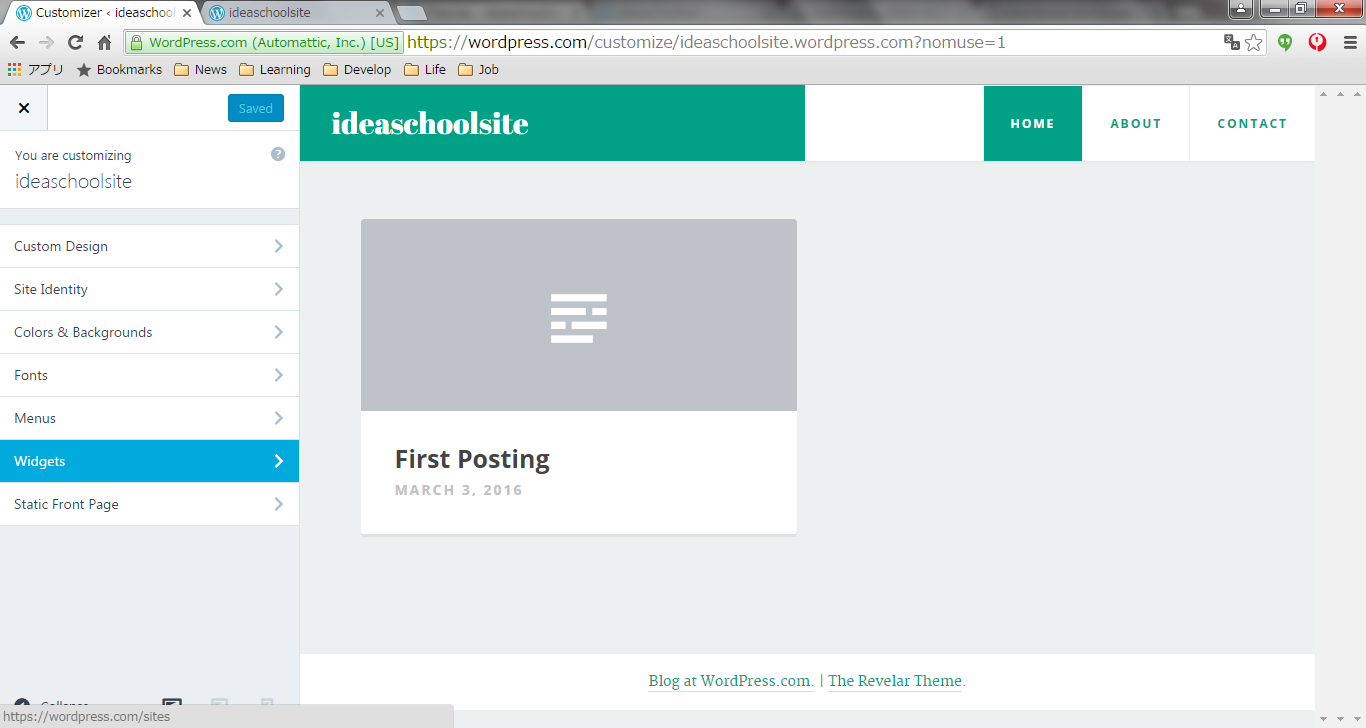
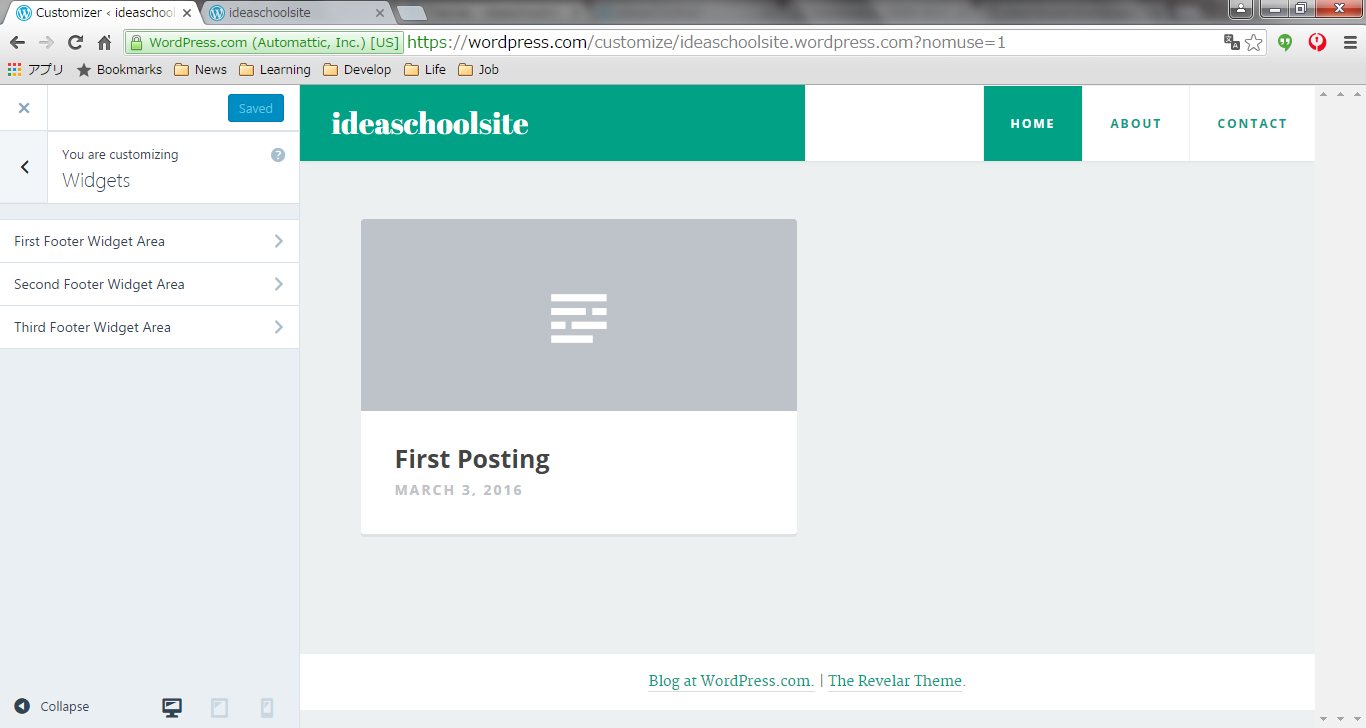
- Click "Widget" menu.
- Step.2
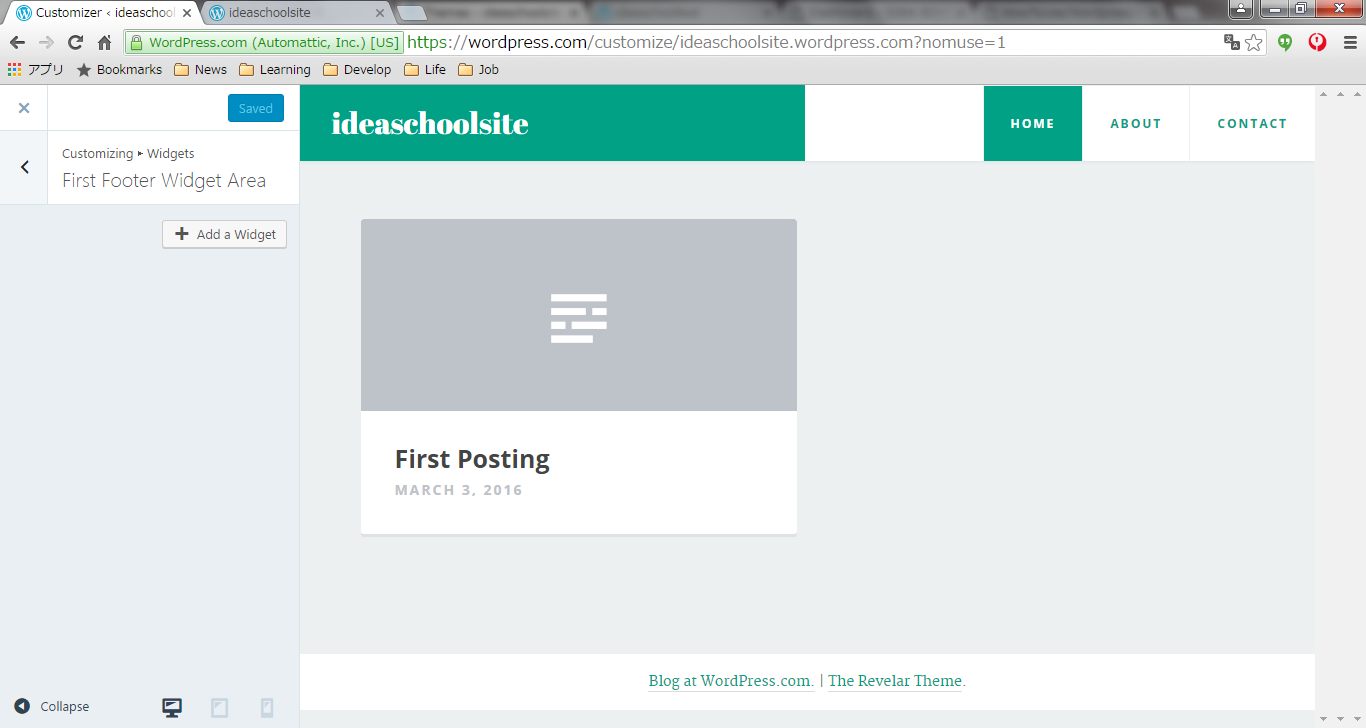
- Choose "First Footer Widget Area".
- Step.3
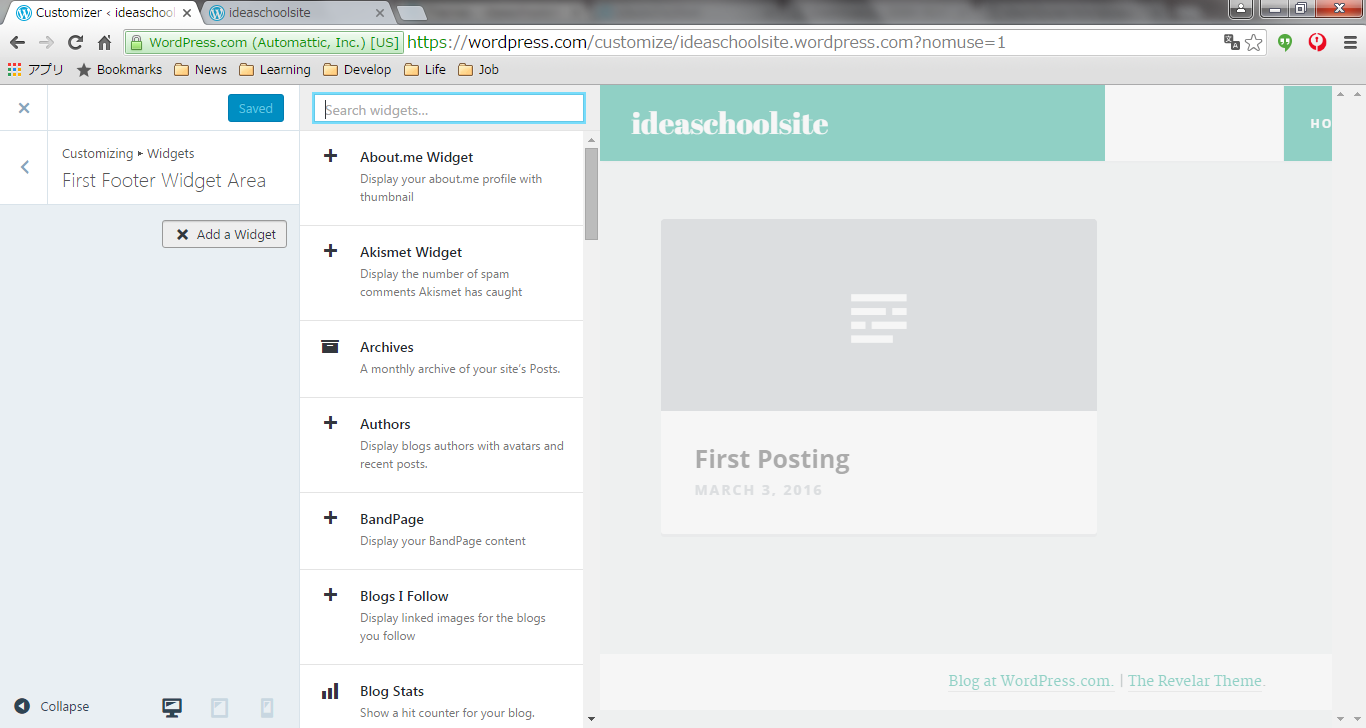
- Click "Add a Widget" button.
- Step.4
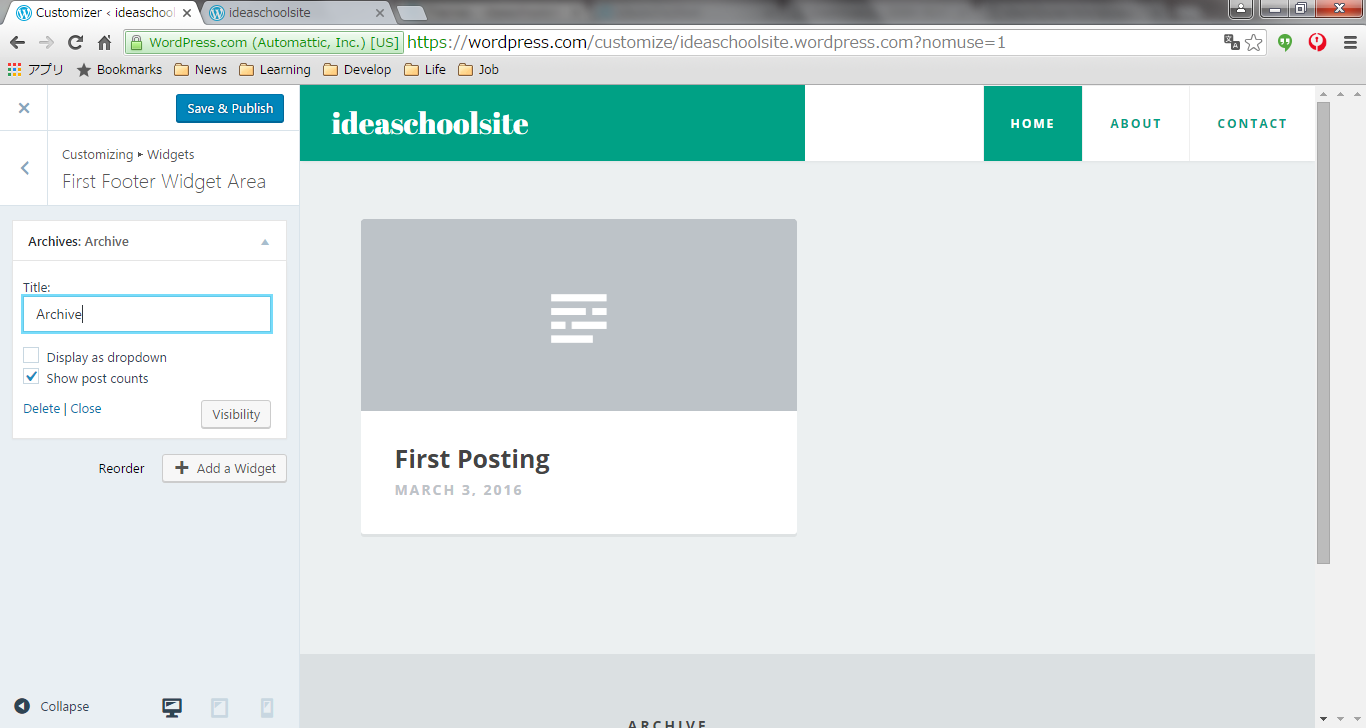
- Choose the widget type you want to add on widget area.
- Step.5
- Click "Save and Publish" button, then you can see new widget is shown up on the bottom of your web site.
_ Change php code
- Step.1
- TBD
_ Author
S.Yatsuzuka
Attach file:  Setup_fig41.png 159 download
[Information]
 Setup_fig40.png 160 download
[Information]
 Setup_fig39.png 151 download
[Information]
 Setup_fig38.png 138 download
[Information]
 Setup_fig37.png 152 download
[Information]
 Setup_fig36.png 145 download
[Information]
 Setup_fig35.png 141 download
[Information]
 Setup_fig34.png 136 download
[Information]
 Setup_fig33.png 113 download
[Information]
 Setup_fig32.png 125 download
[Information]
 Setup_fig31.png 126 download
[Information]
 Setup_fig30.png 136 download
[Information]
 Setup_fig29.png 134 download
[Information]
 Setup_fig28.png 122 download
[Information]
 Setup_fig27.png 146 download
[Information]
 Setup_fig26.png 138 download
[Information]
 Setup_fig25.png 123 download
[Information]
 Setup_fig24.png 125 download
[Information]
 Setup_fig19.png 126 download
[Information]
 Setup_fig18.png 134 download
[Information]
 Setup_fig16.png 154 download
[Information]
 Setup_fig17.png 145 download
[Information]
 Setup_fig15.png 122 download
[Information]
 Setup_fig14.png 141 download
[Information]
 Setup_fig13.png 128 download
[Information]
 Setup_fig12.png 150 download
[Information]
 Setup_fig11.png 126 download
[Information]
 Setup_fig10.png 162 download
[Information]
 Setup_fig9.png 143 download
[Information]
 Setup_fig8.png 131 download
[Information]
 Setup_fig7.png 122 download
[Information]
 Setup_fig6.png 136 download
[Information]
 Setup_fig5.png 128 download
[Information]
 Setup_fig4.png 156 download
[Information]
 Setup_fig3.png 141 download
[Information]
 Setup_fig2.png 142 download
[Information]
 Setup_fig1.png 130 download
[Information]
Last-modified: 2016-03-03 (Thu) 20:37:58 (2974d)
