_ Prerequisite
_ Install&Setup
_ Install Jenkins
- Step.1
- Import public key.
# wget -O /etc/yum.repos.d/jenkins.repo http://pkg.jenkins-ci.org/redhat/jenkins.repo
# rpm --import http://pkg.jenkins-ci.org/redhat/jenkins-ci.org.key
- Step.2
- Install Jenkins
# yum install jenkins
_ Launch Jenkins
- Step.1
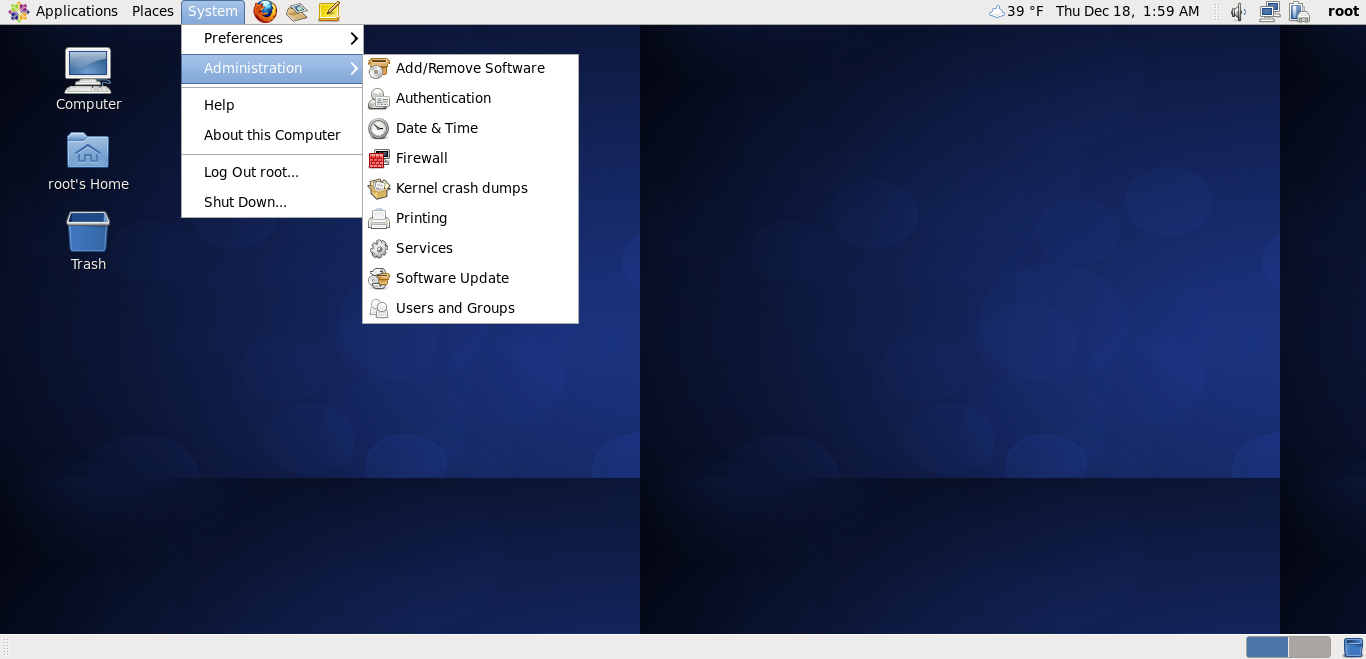
- Login from GUI with root.
- Step.2
- Select System -> Administration -> Firewall
- Step.3
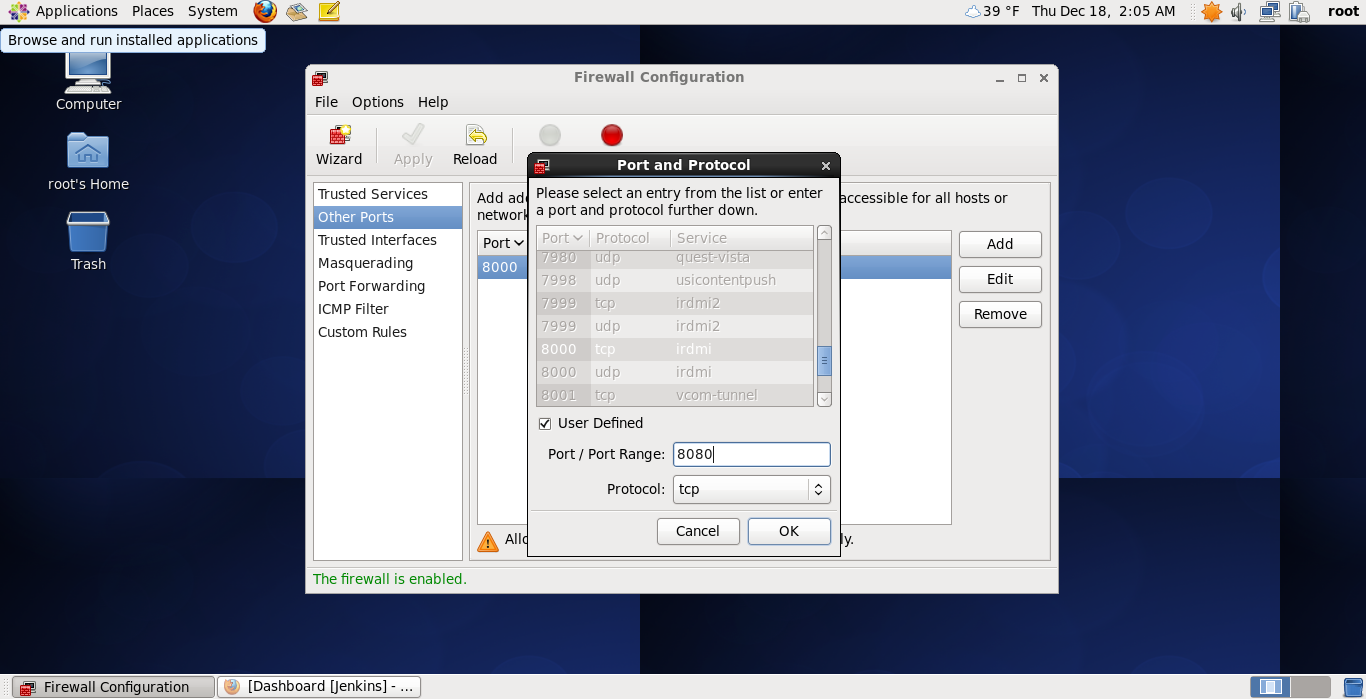
- Select "Other Ports" and click "Add" button and set 8080 port.
- Step.4
- Click "Apply" button on the "Firewall Configuration" window.
- Step.5
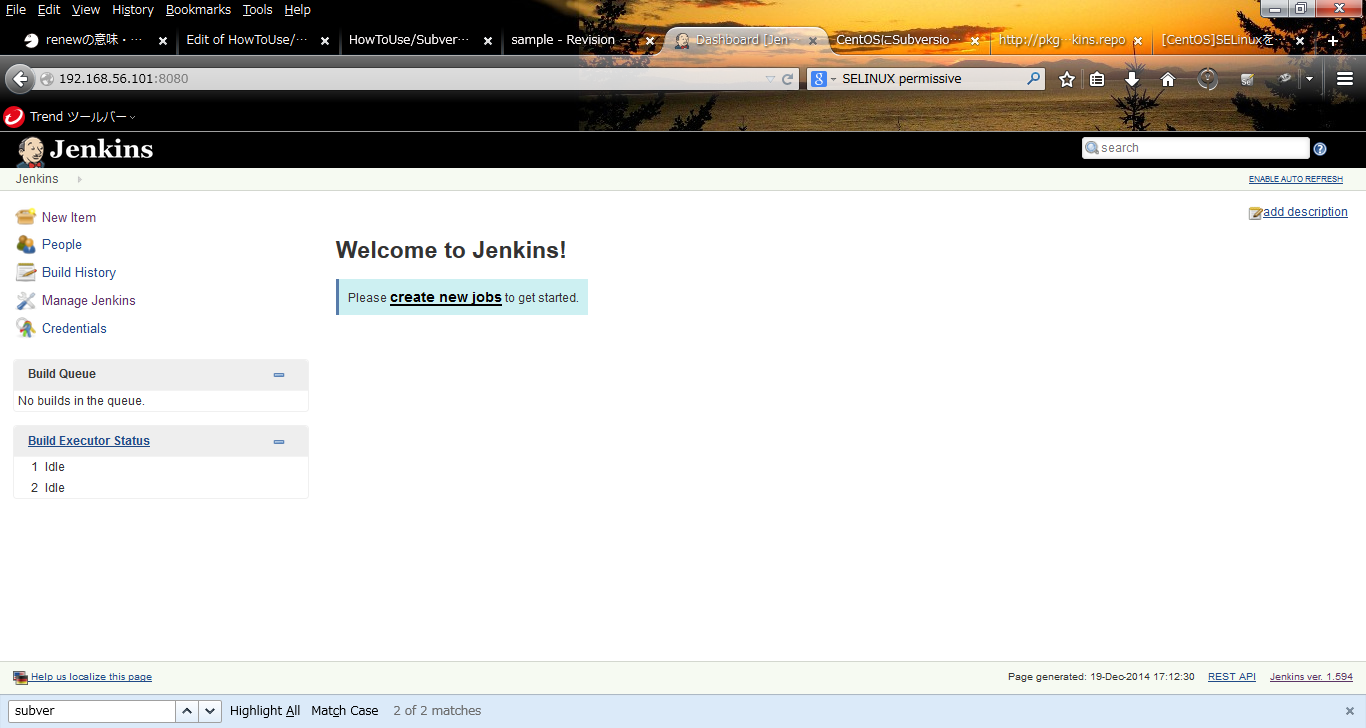
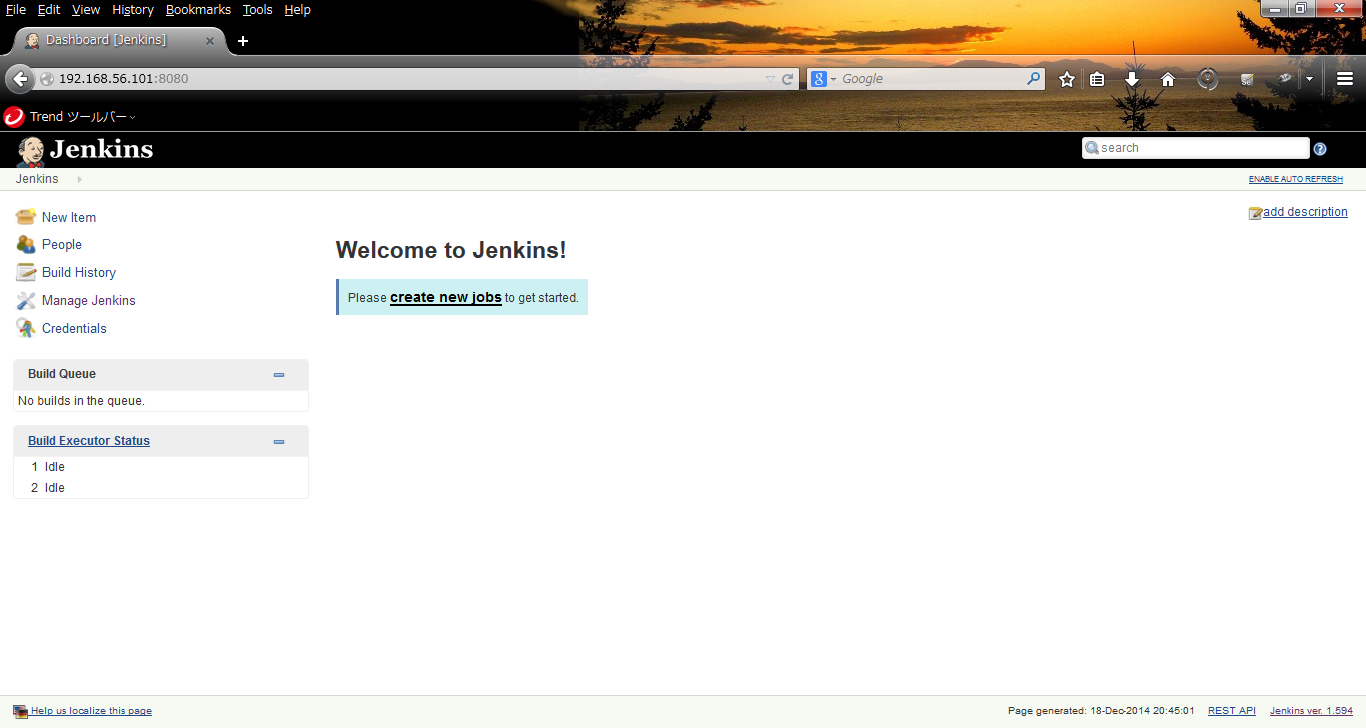
- Execute the following command and access http://<host name>:8080/.
# /etc/rc.d/init.d/jenkins start
_ HowToUse
_ Prepare maven project
- Step.1
- Prepare workspace in your pc.
# svn checkout <SVN repository path>
- Step.2
- Create Maven project.
$ cd <project directory>
$ mvn archetype:create \
 -DgroupId=<Group ID> \
 -DartifactId=<Artifact ID>
- Step.3
- Edit POM.xml so that maven create Javadoc.
# vi pom.xml
 <build>
   <plugins>
     <plugin>
       <groupId>org.apache.maven.plugins</groupId>
       <artifactId>maven-javadoc-plugin</artifactId>
       <configuration>
         <author>true</author>
         <source>1.7</source>
         <show>protected</show>
         <encoding>UTF-8</encoding>
         <charset>UTF-8</charset>
         <docencoding>UTF-8</docencoding>
       </configuration>
     </plugin>
   </plugins>
 </build>
Or you can get sample files from the Github - OSSSV
- Step.4
- Check in files into the repository Jenkins will monitor.
# svn add .
# svn commit -m "Import new files"
_ Mail Server Configuration
- Step.1
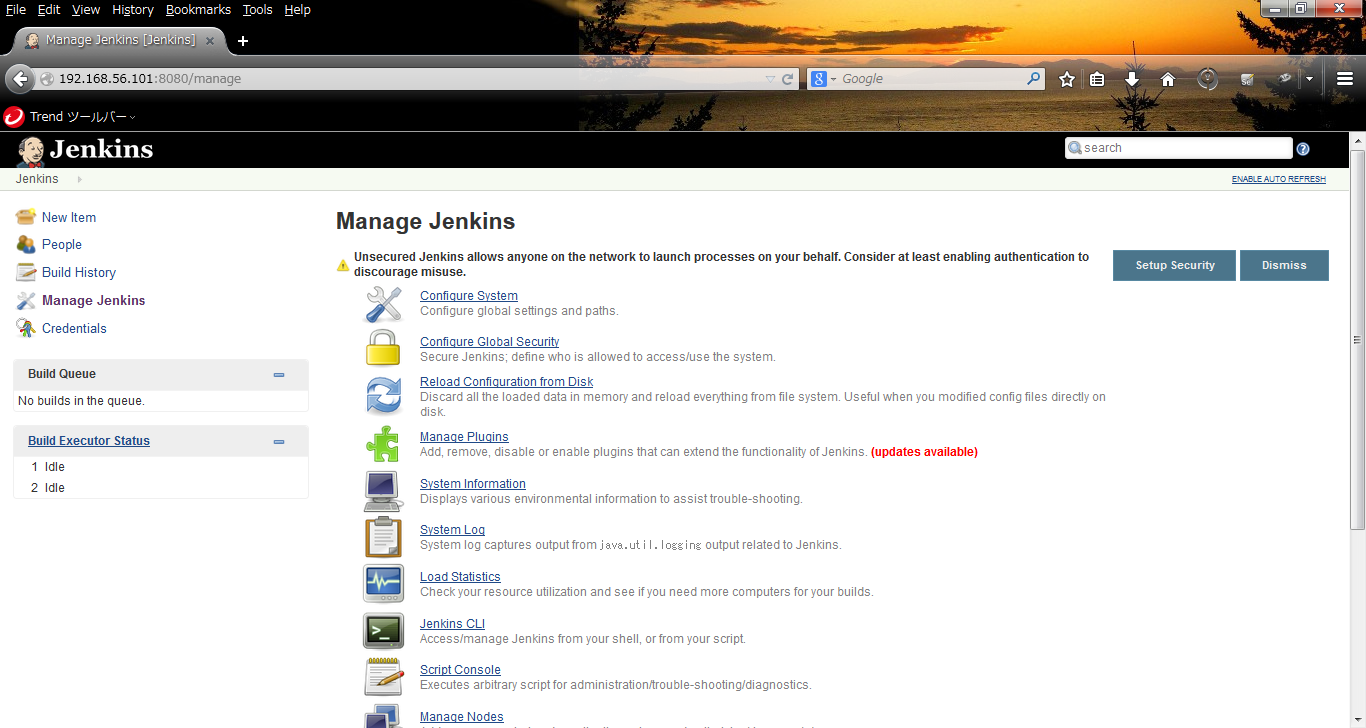
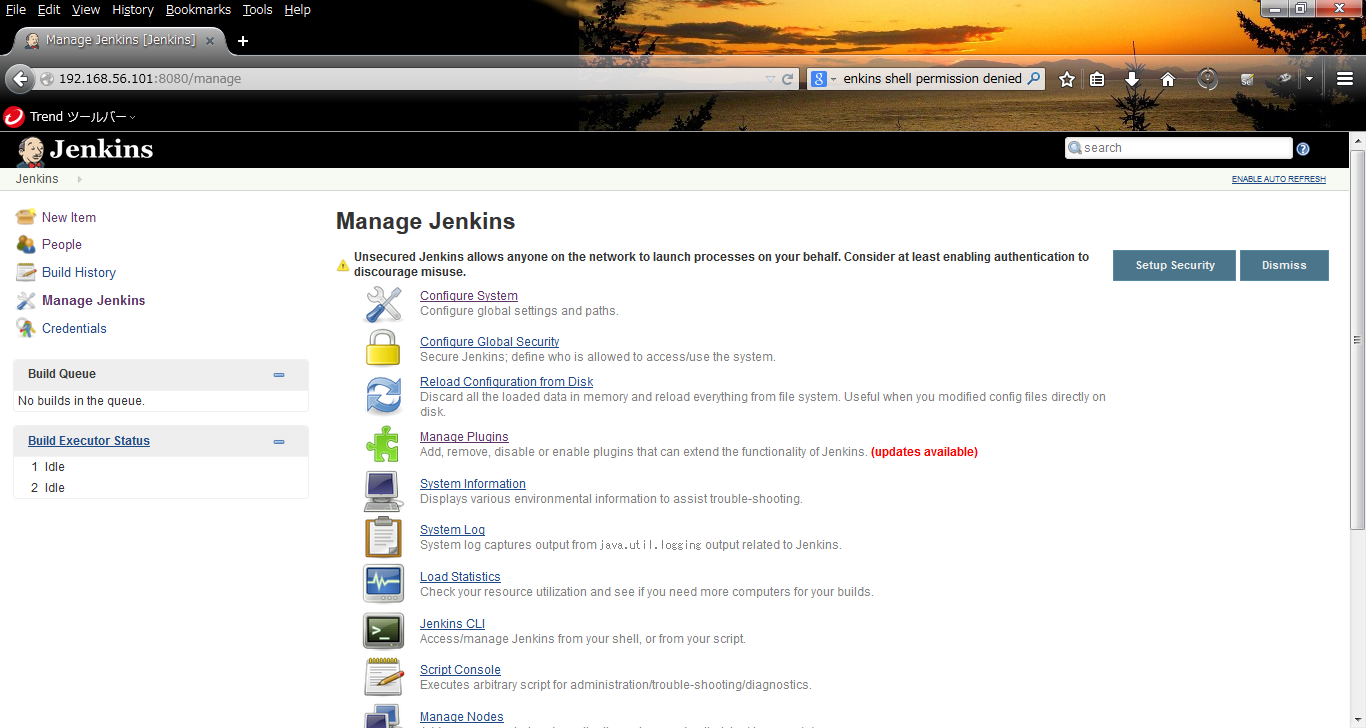
- Click "Manage Jenkins".
- Step.2
- Click "Configure System".
- Step.3
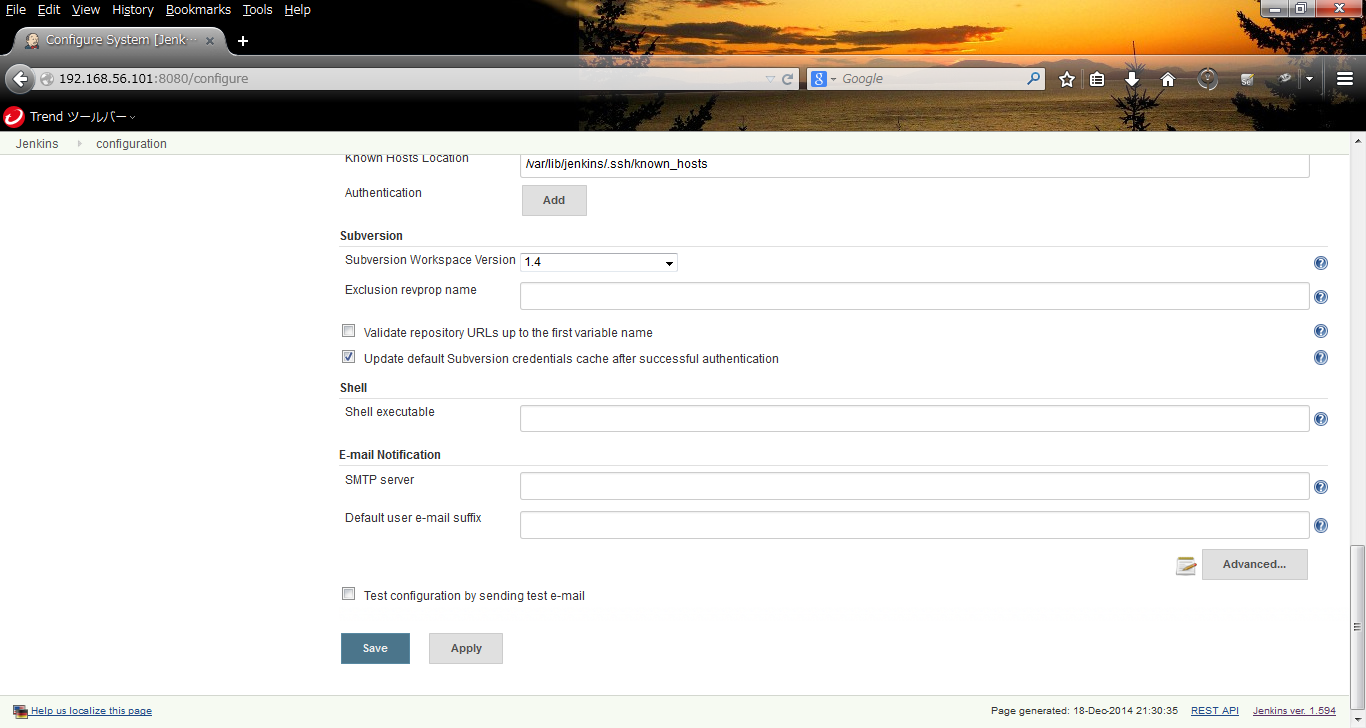
- Setup mail notification configuration.
| Item | Description | Example |
| SMTP server | SMTP server | "smtp.gmail.com" |
| Default user e-mail suffix | If you specify this as "@gmail.com", user e-mail address will be automatically obtained as <user name><suffix> | @gmail.com (for gmail) |
- Step.4
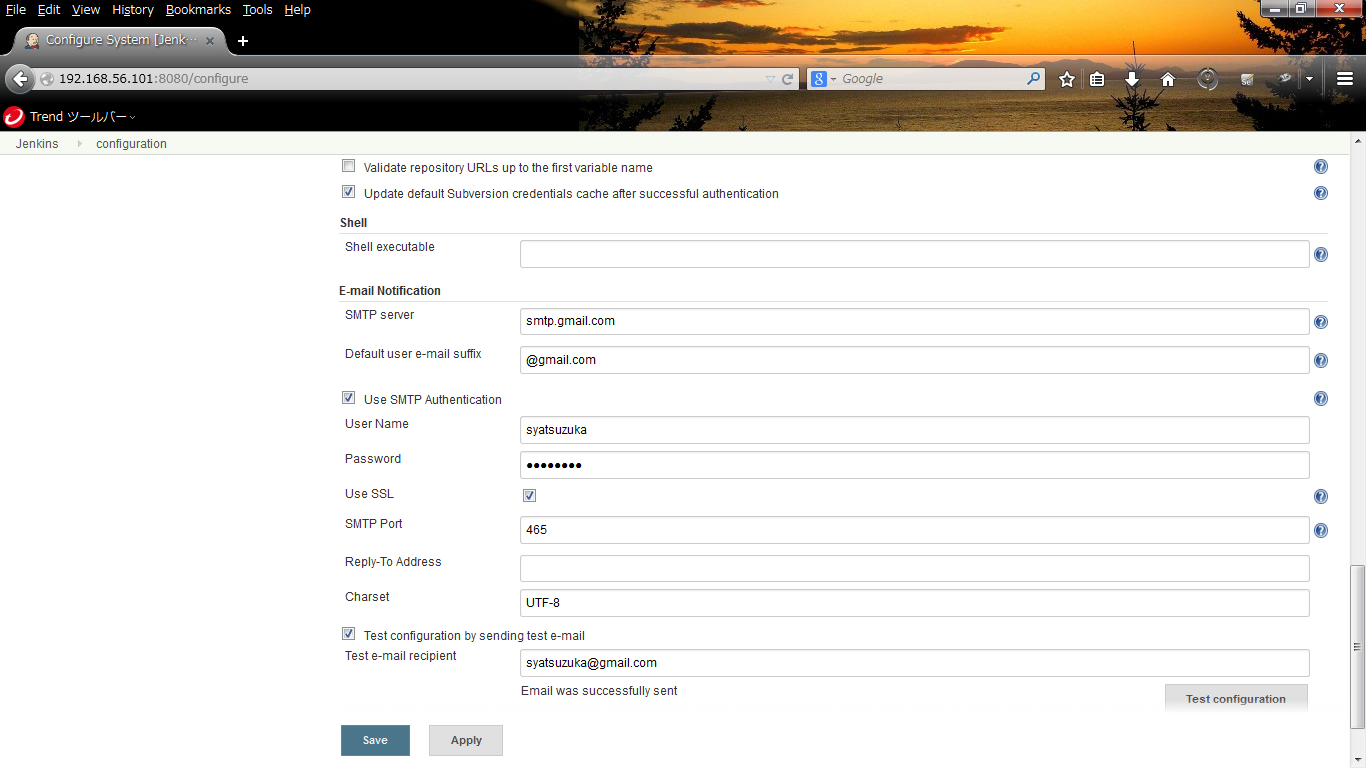
- Click "Advances..." button.
Setup the configuration.
| Item | Description | Example |
| Use SMTP Authentication | If you expect SMTP authorization, check this | TRUE (for gmail) |
| User Name | e-mail user name for SMTP authentification | "syatsuzuka" |
| Password | password for SMTP Authentification | "xxxx" |
| SSL | if SMTP server require SSL, check this | TRUE (for gmail) |
| SMTP Port | Port used in SMTP server | "465" (for gmail) |
| Charset | Character used in e-mail | "UTF-8" |
_ Install JDK for Jenkins
- Step.1
- Click "Manage Jenkins" link.
- Step.2
- Click "Configure System" link.
- Step.3
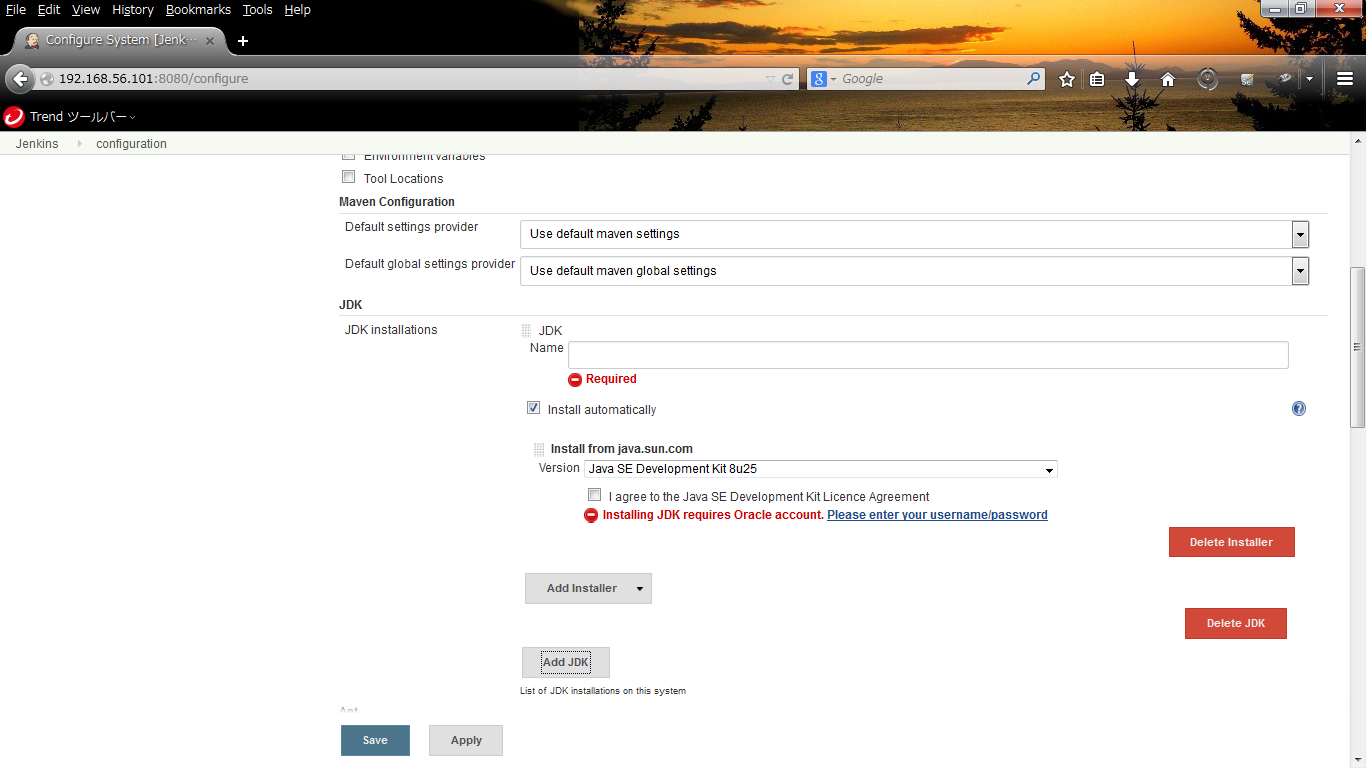
- Click "Add JDK" button.
- Step.4
| Item | Description | Example |
| Name | JDK name | "jdk8u25" |
| Install automatically | If you want to install JDK automatically, keep this checked | TRUE (default) |
| Version | JDK Version | "Java SE Development Kit License Agreement |
| I agree to the Java SE Development Kit License Agreement | | TRUE |
- Step.5
- Click "Please enter your username/password" link.
- Step.6
- Enter Oracle account and click "OK" button.
_ Install Maven for Jenkins
- Step.1
- Click "Add Maven" button and set Name.
- Step.2
- Click "Save" button.
_ Create Items for Build
- Step.1
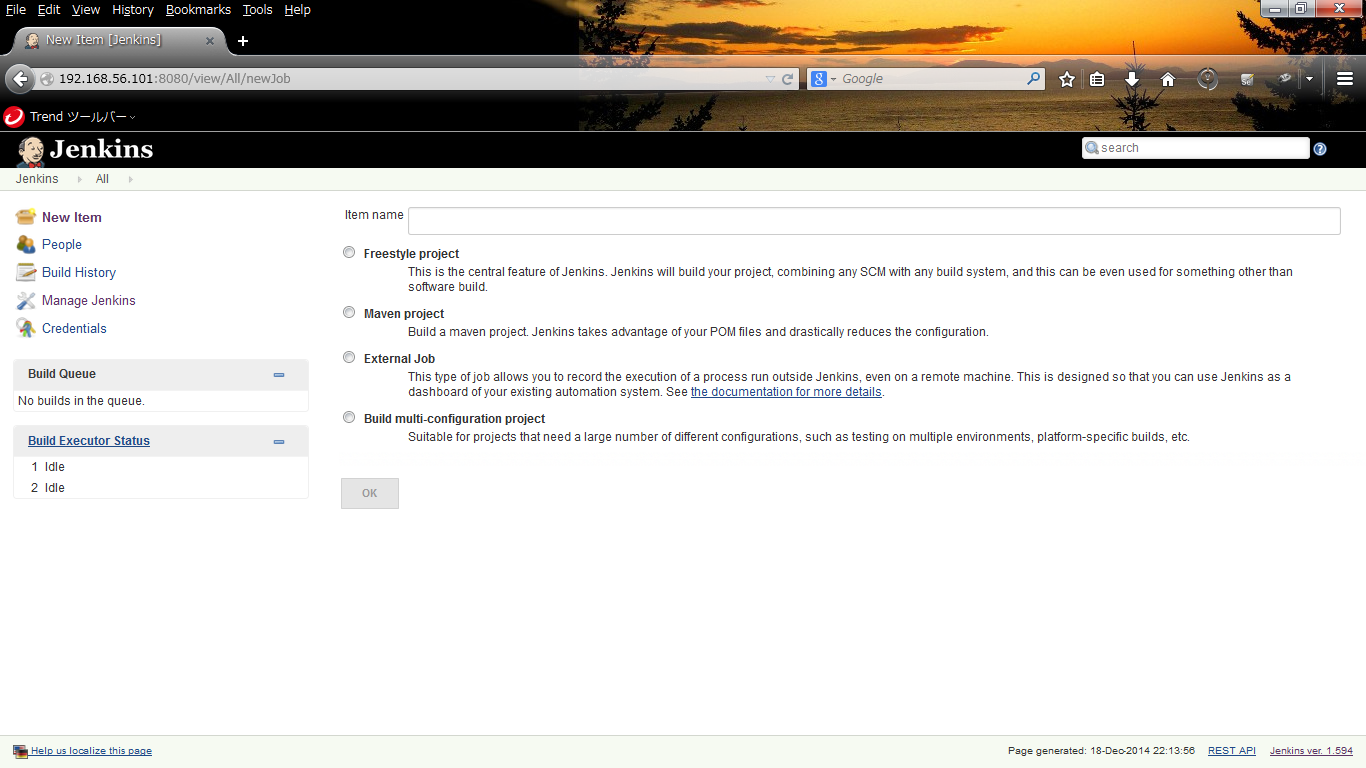
- Click "New Item" link.
- Step.2
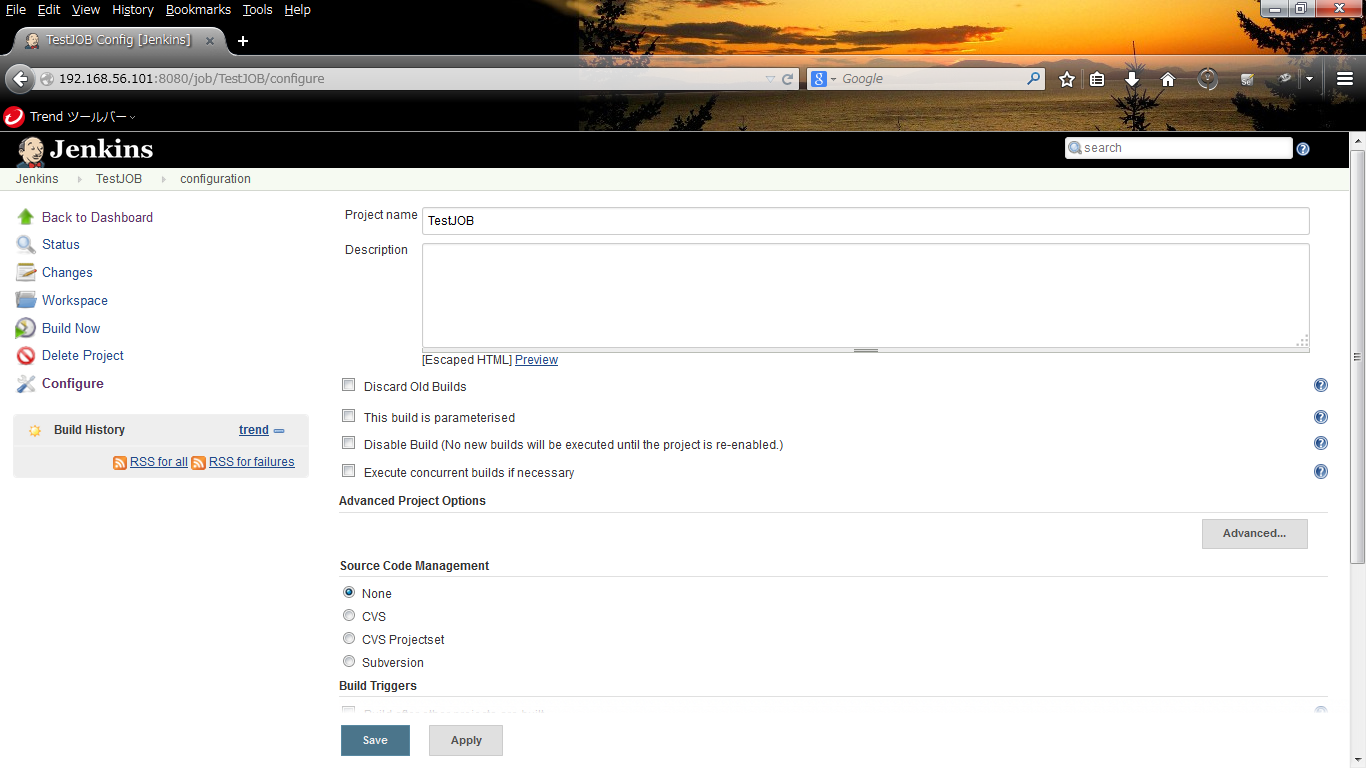
- Set "Item name", check "Freestyle project" and click "OK" button.
| Item | Description | Example |
| Item name | Item name | "sample" |
Now, you have new directory named "sample" in JENKINS_HOME, namely, /var/lib/jenkins.
Resources which are necessary for build will be stored in workspace.
- Step.3
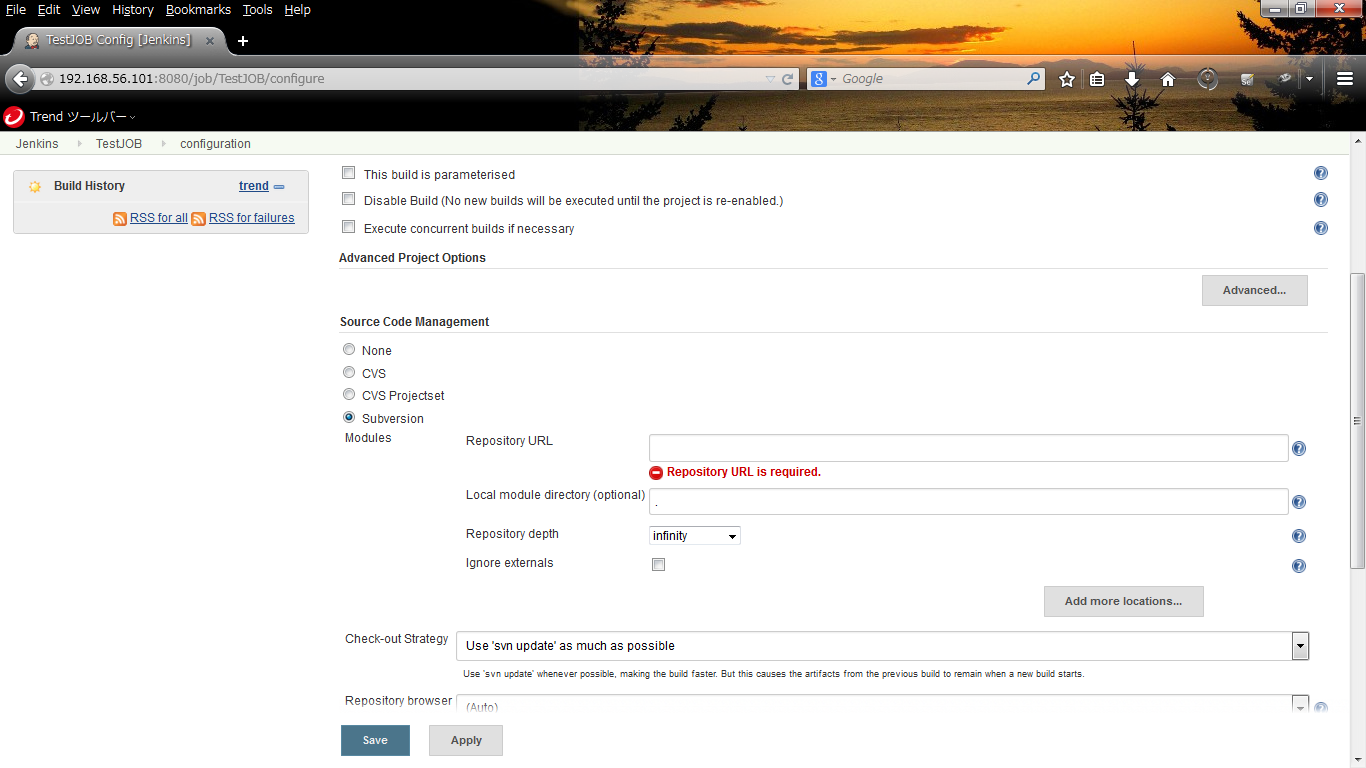
- Click Subversion for "Source Code Management" and set "Repository URL".
- Step.4
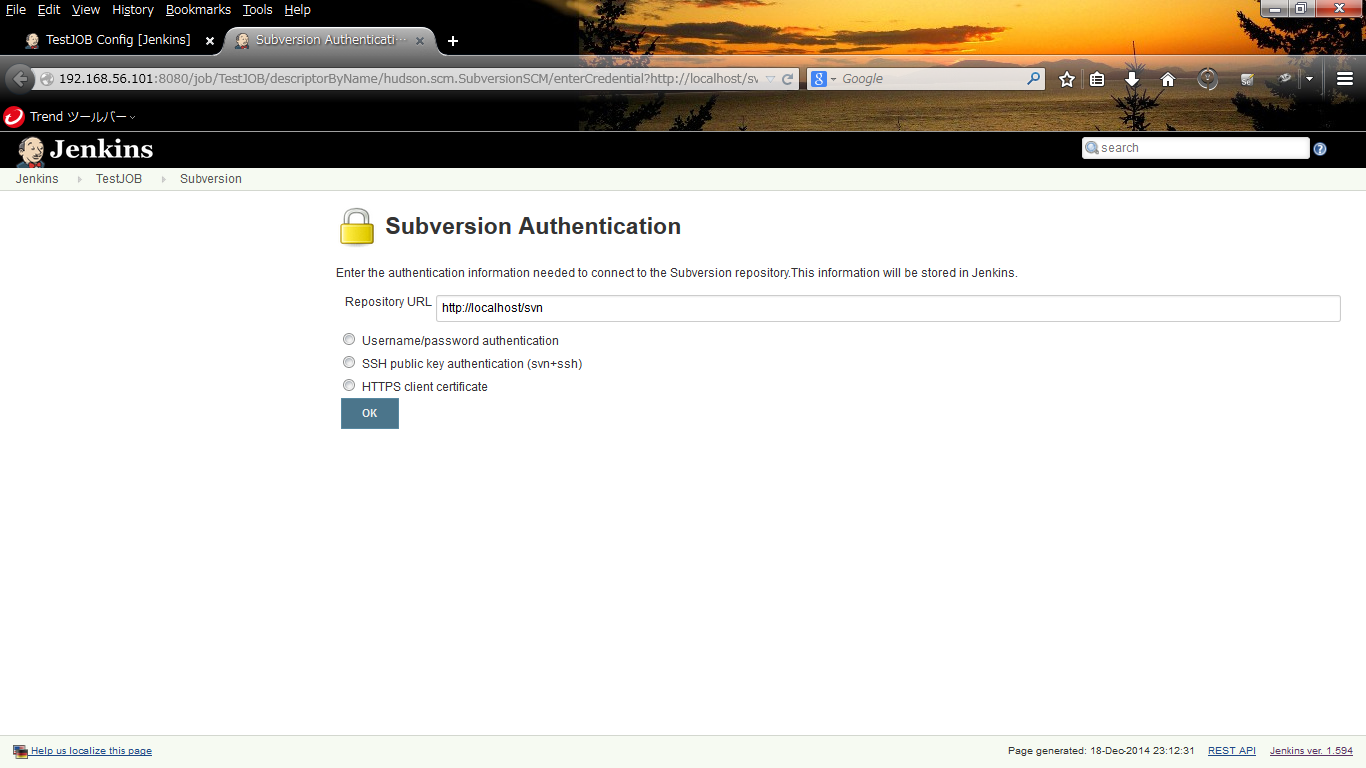
- Click "enter credential" link.
- Step.5
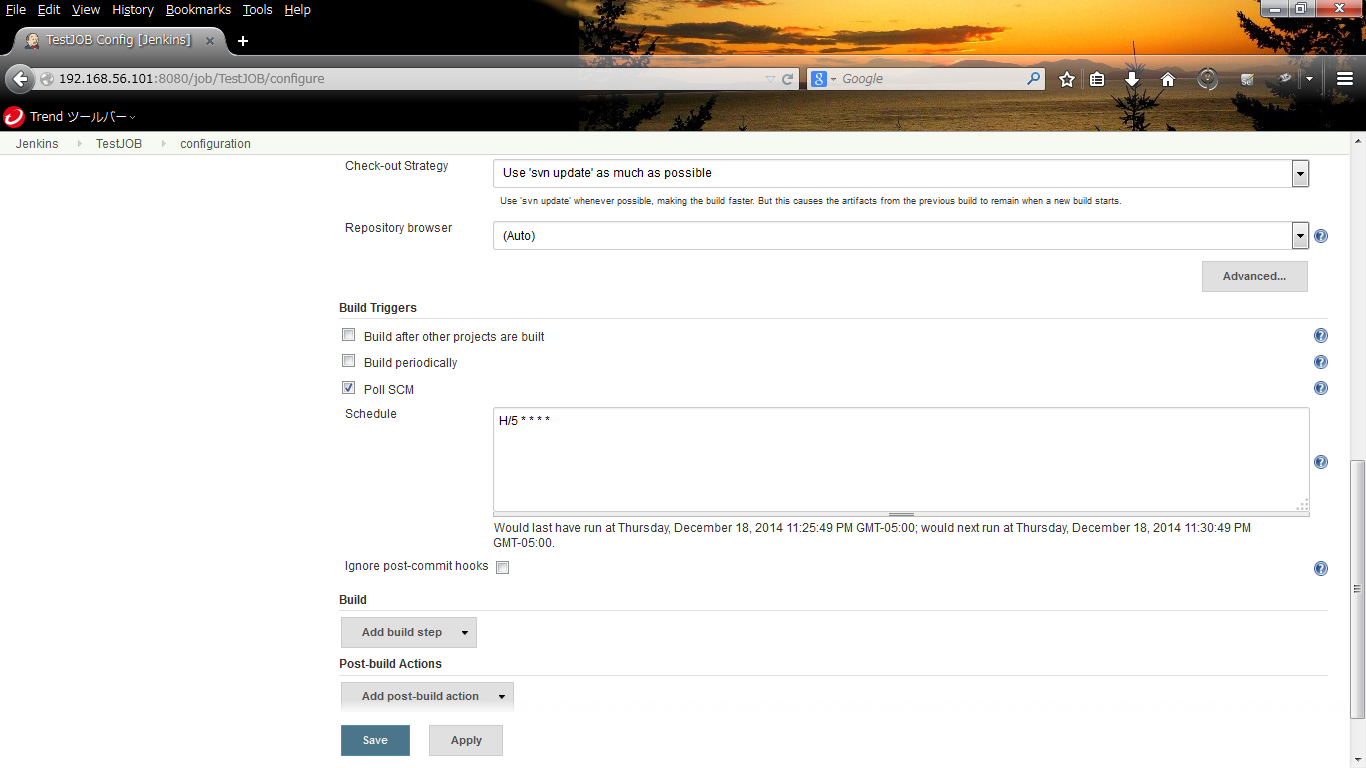
- You can choose build trigger according to your situation.
- "Build after other projects are built"
- "Build periodically"
- "Poll SCM"
Here, I choose "Poll SCM". Check "Poll SCM". If you want to check every 5min, set as follows.
The order of parameters are same as cron.
min hour day month wday
H/5 * * * *
- Step.6
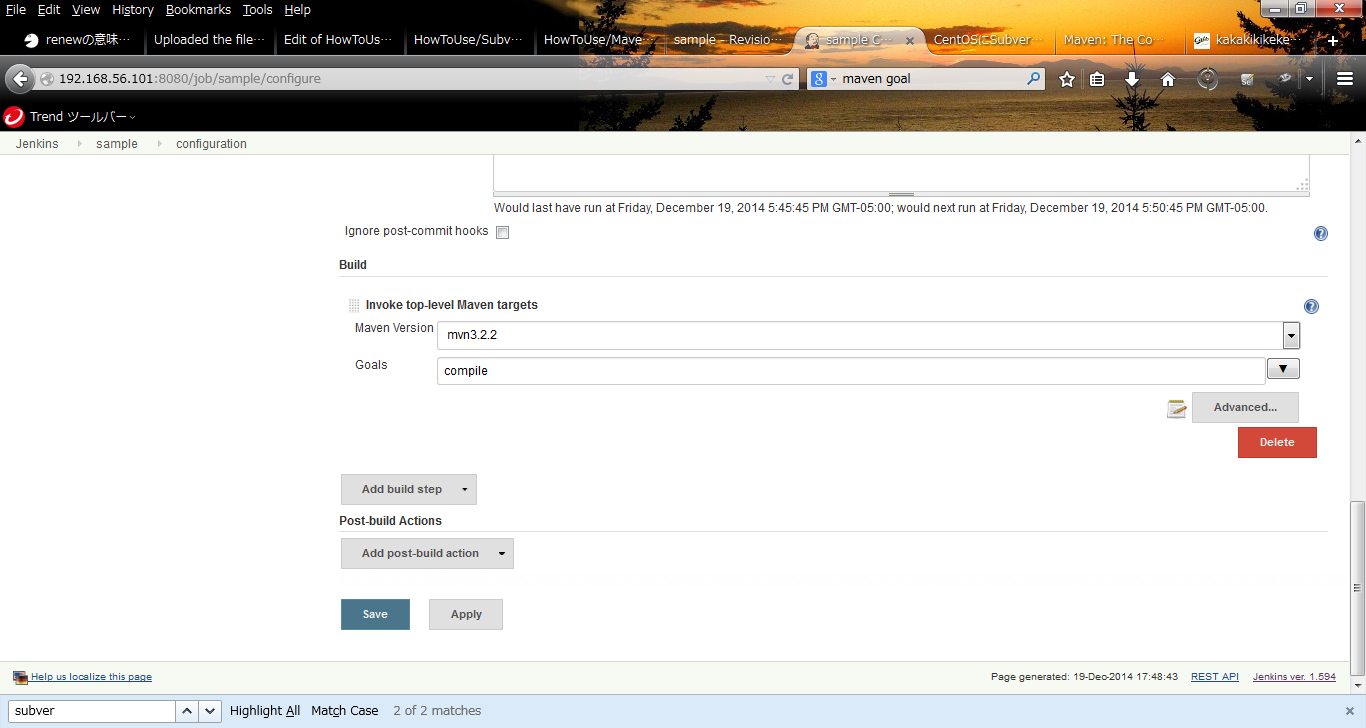
- Select "Invoke top-level Maven targets" from "Add build step".
- Step.7
- Set the following.
| Item | Description | Example |
| Maven Version | installed maven version | "maven3.2.2" |
| goal | maven goal | "compile" |
- Step.8
- Click "Advanced ..." link and set as following.
| Item | Description | Example |
| POM | file path to the pom.xml in the workspace | "trunk/sample/pom.xml |
- Step.9
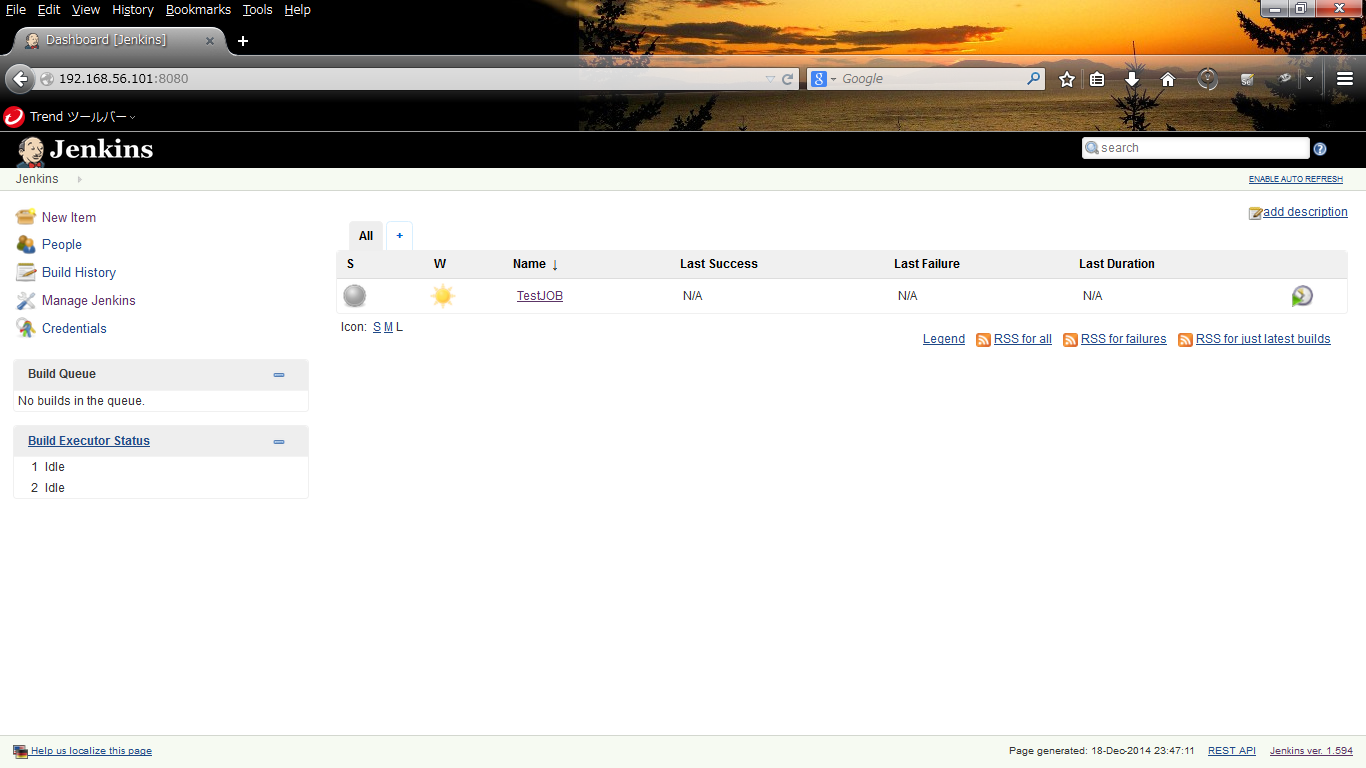
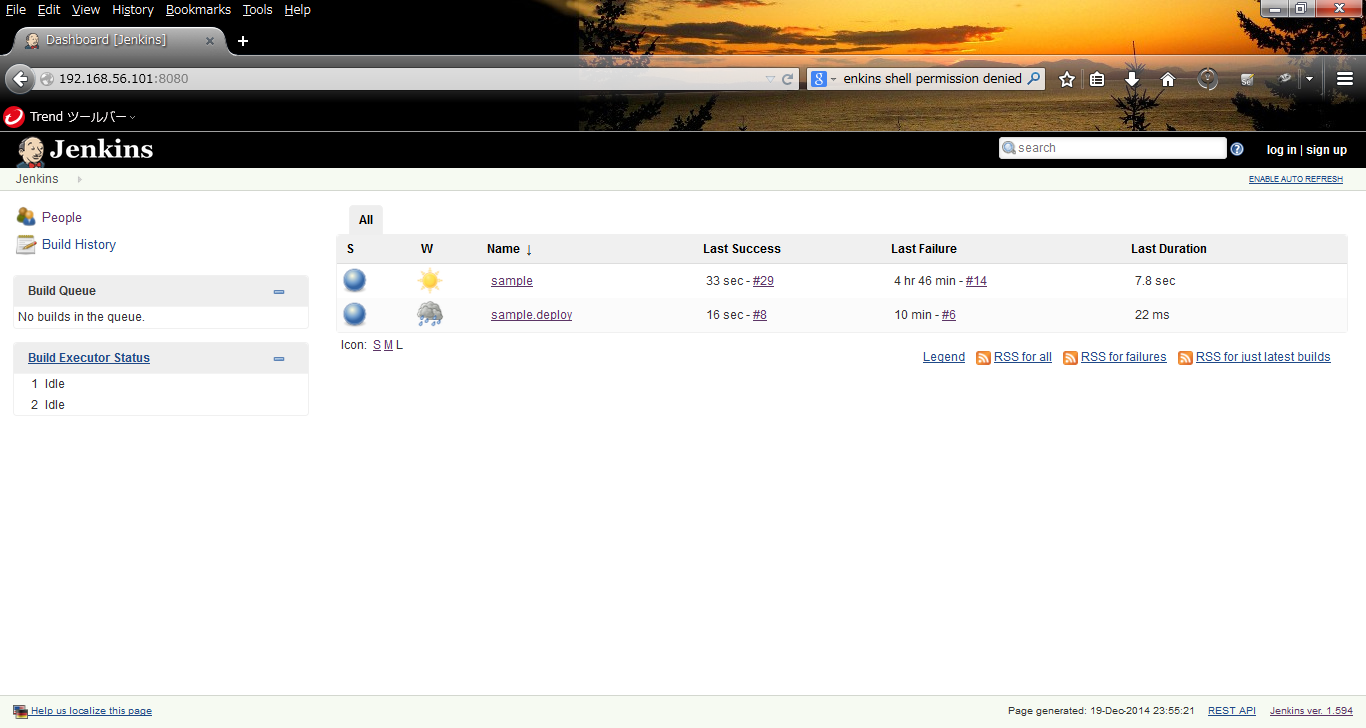
- Click "Save" button. Now, you can see New Item in the main window.
_ Run Build
- Step.1
- Click newly created "sample" link.
- Step.2
- Click "Build Job" link and you can see the status of job is changed.
- Step.3
- For your first job, Jenkins will download and install maven and related libraries, so it takes time.
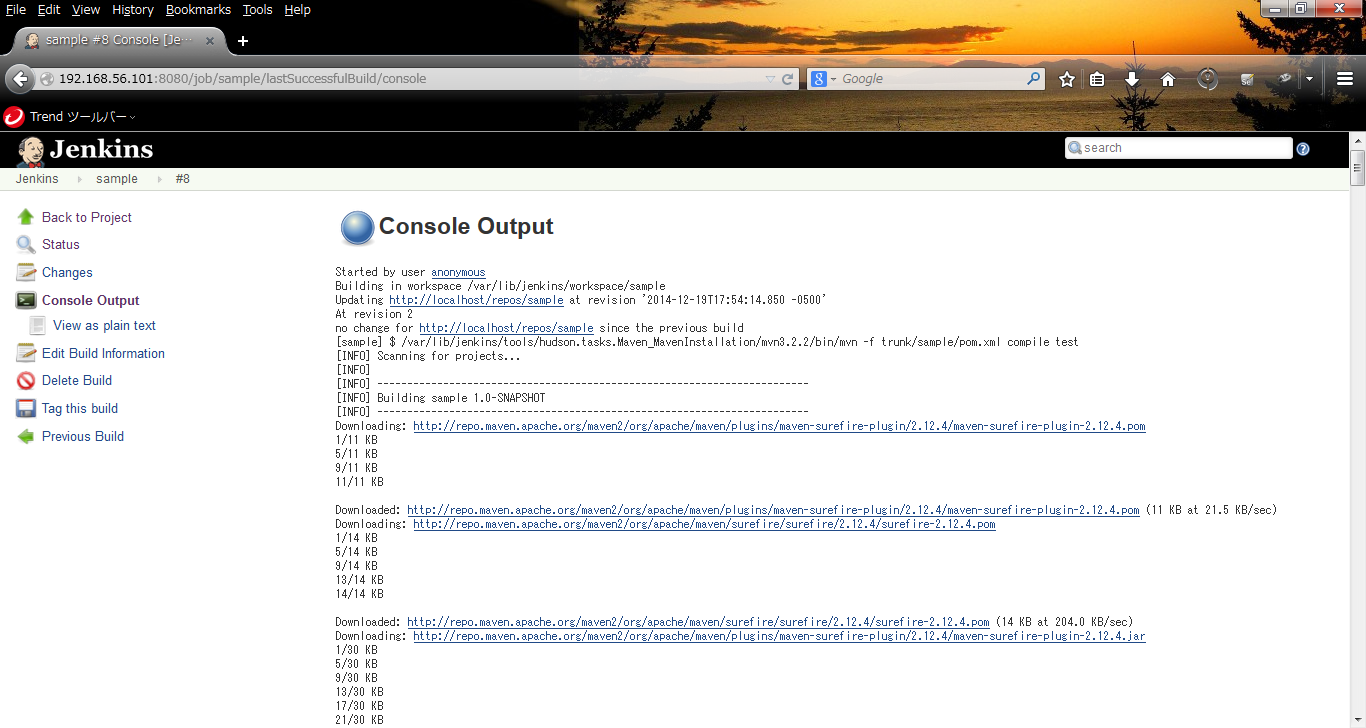
After the build job finished, you can check test result.
You can see the detail information from terminal log, Jenkins -> sample -> #<job number> -> "Console Output Windows".
_ E-mail notification setting
- Step.1
- It is useful to notify error by notification mail.
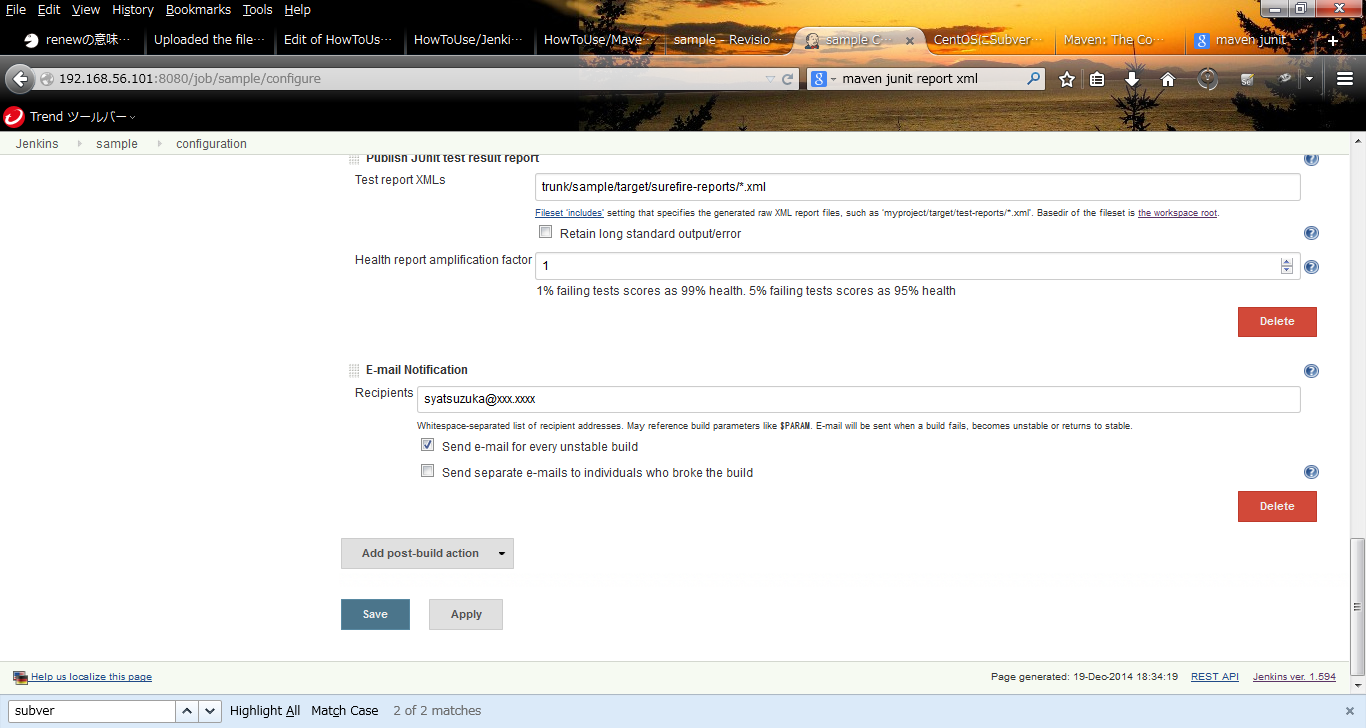
Select target Item and click "Configure" link. Then choose "E-mail Notification" from "Add post-build action" and set "Recipients".
After saving, you will recieve notification mail when you encounter error in build.
_ JUnit Testing
- Step.1
- Jenkins can display JUnit test report.
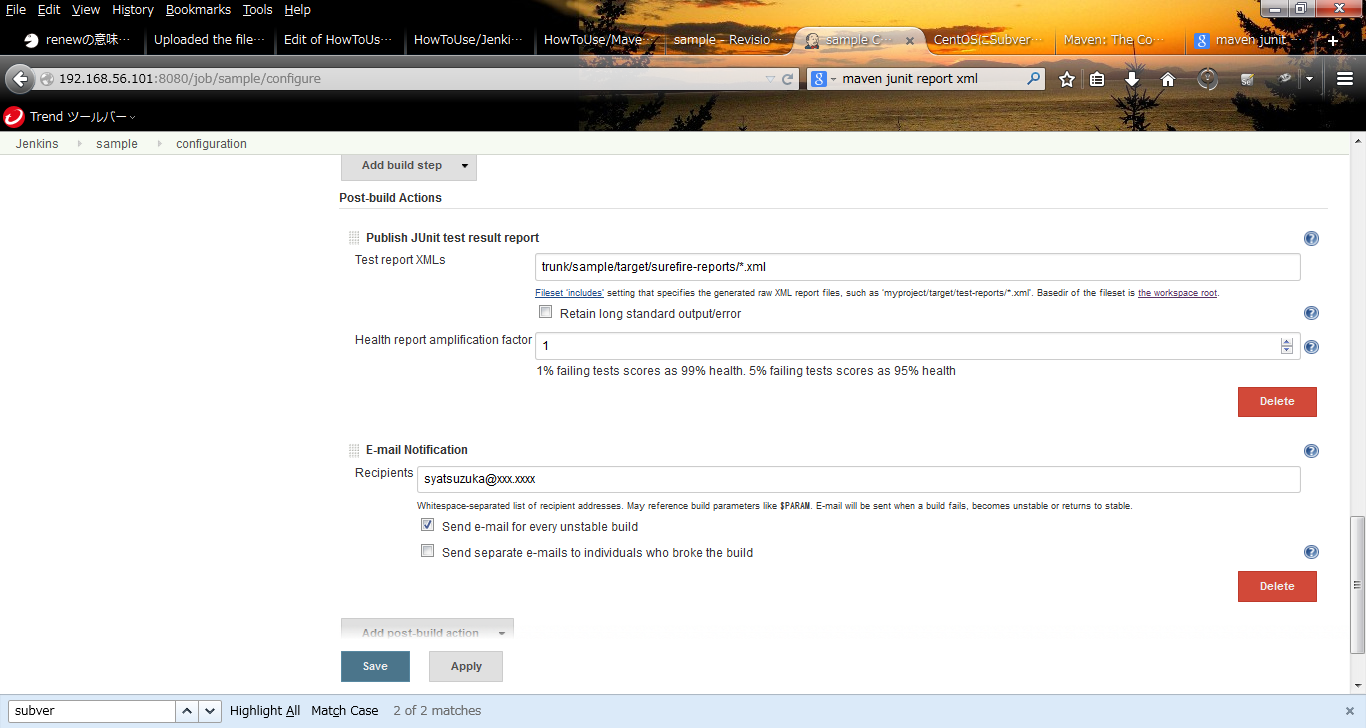
Select target Item and click "Configure" link. Then choose "Publish JUnit Test Result" from "Add post-build action".
| Item | Description | Example |
| Test report XMLs | Specify the location of JUnit result report file | "trunk/sample/target/surefire-reports/*.xml" |
- Step.2
- Add "test" to maven goal.
| Item | Description | Example |
| goal | maven goal | "compile test" |
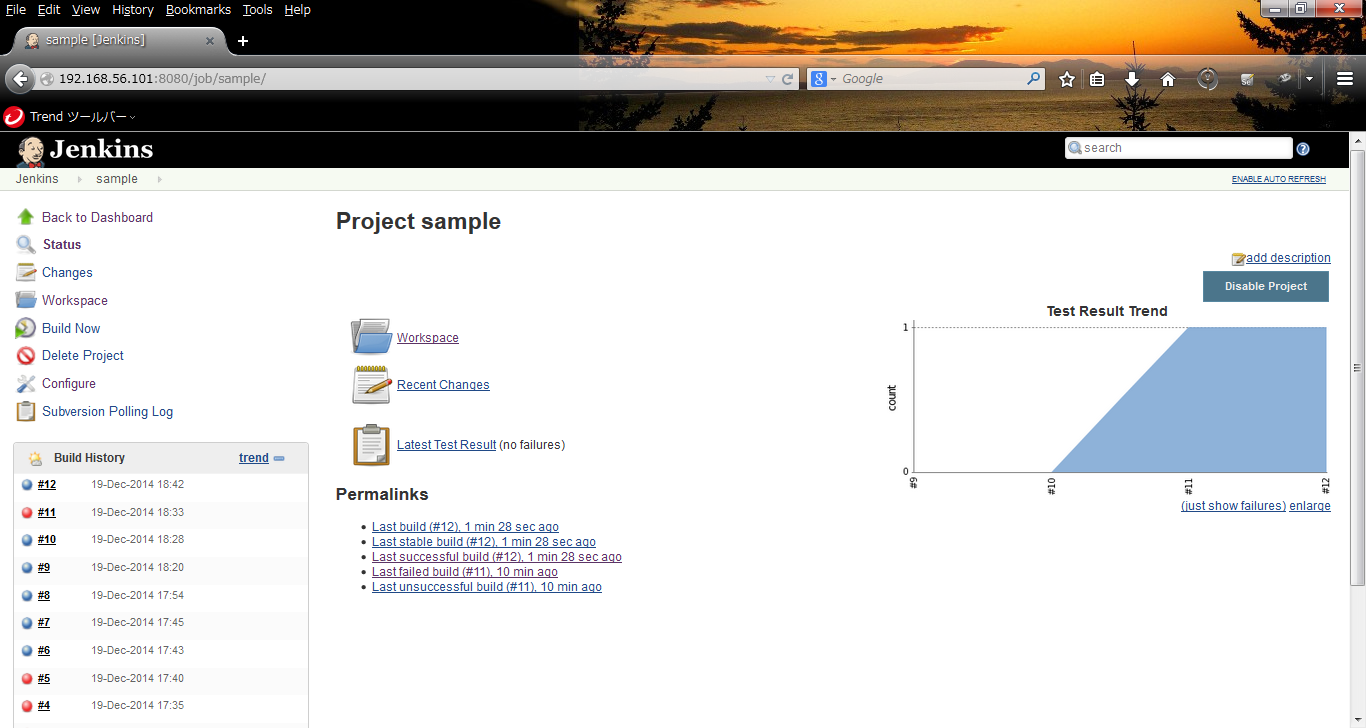
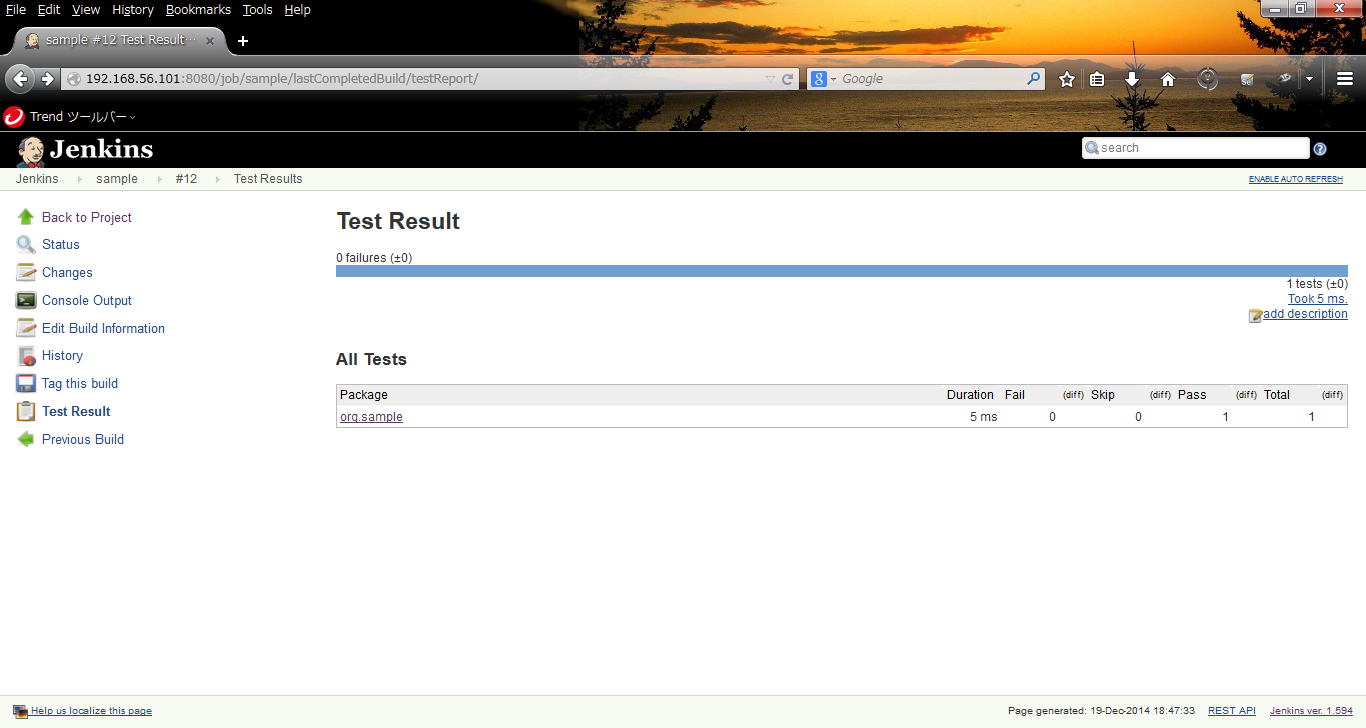
After saving, you can see test result in Jenkins window.
_ Javadoc creation
- Step.1
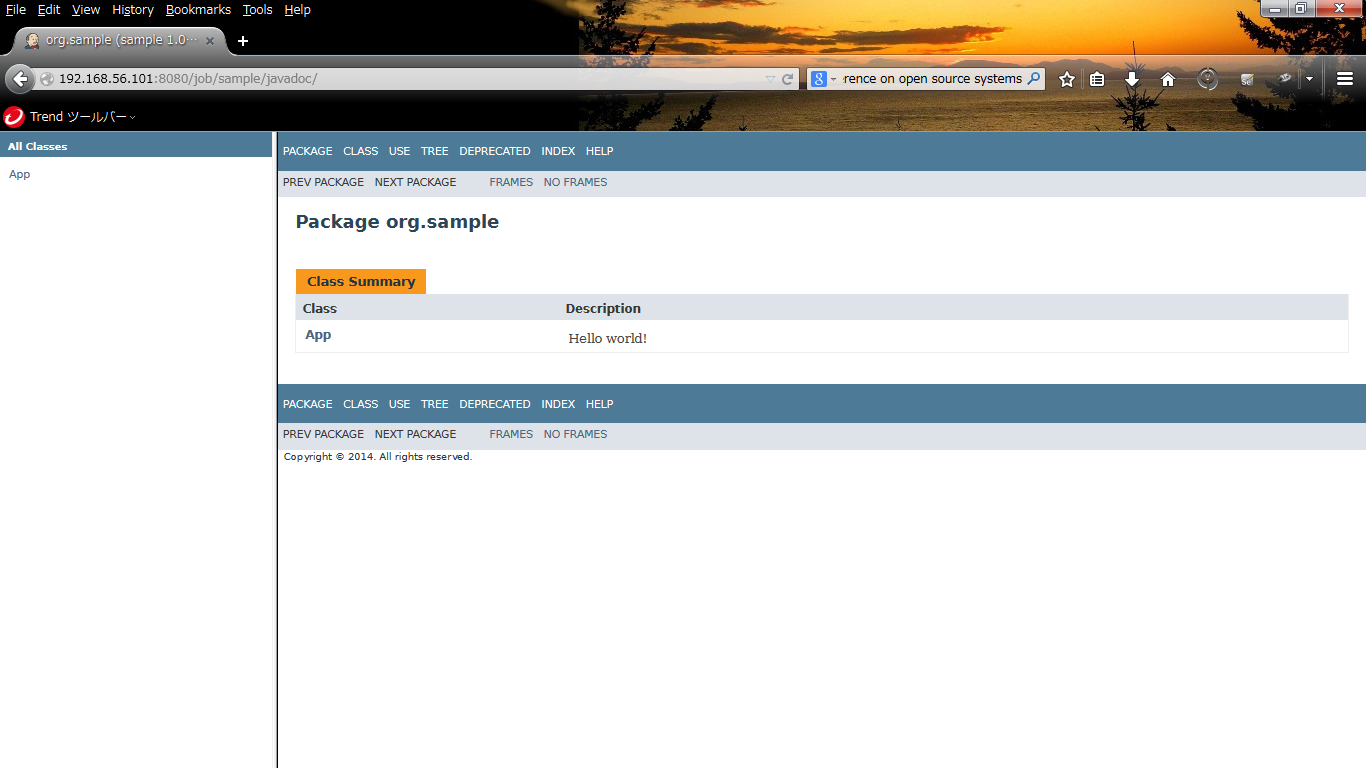
- Jenkins also can show Javadoc from its window.
Select target Item and click "Configure" link. Then choose "Publish Javadoc" from "Add post-build action".
| Item | Description | Example |
| Javadoc directory | directory path Javadoc will be stored | "trunk/sample/target/site/apidocs" |
- Step.2
- Add "javadoc:javadoc" to maven goal.
| Item | Description | Example |
| goal | maven goal | "compile test javadoc:javadoc" |
After saving, you can see javadoc link in your build result page.
_ Deploy objects
- Step.1
- Click "New Item" link.
- Step.2
- Set "Item name", check "Freestyle project" and click "OK" button.
| Item | Description | Example |
| Item name | Item name | "sample.deploy" |
- Step.3
- Select "Build after other projects are built".
| Item | Description | Example |
| Projects to watch | | "sample" |
- Step.4
- Click "Execute shell" from "Add build step" to deploy the created files. Here, I use dummy program, "deploy_files.sh" for deployment.
| Item | Description | Example |
| Command | command line | "echo deploy started >> /tmp/jenkins.log" |
- Step.5
- Set e-mail notification same as "sample".
_ Setup User Security
- Step.1
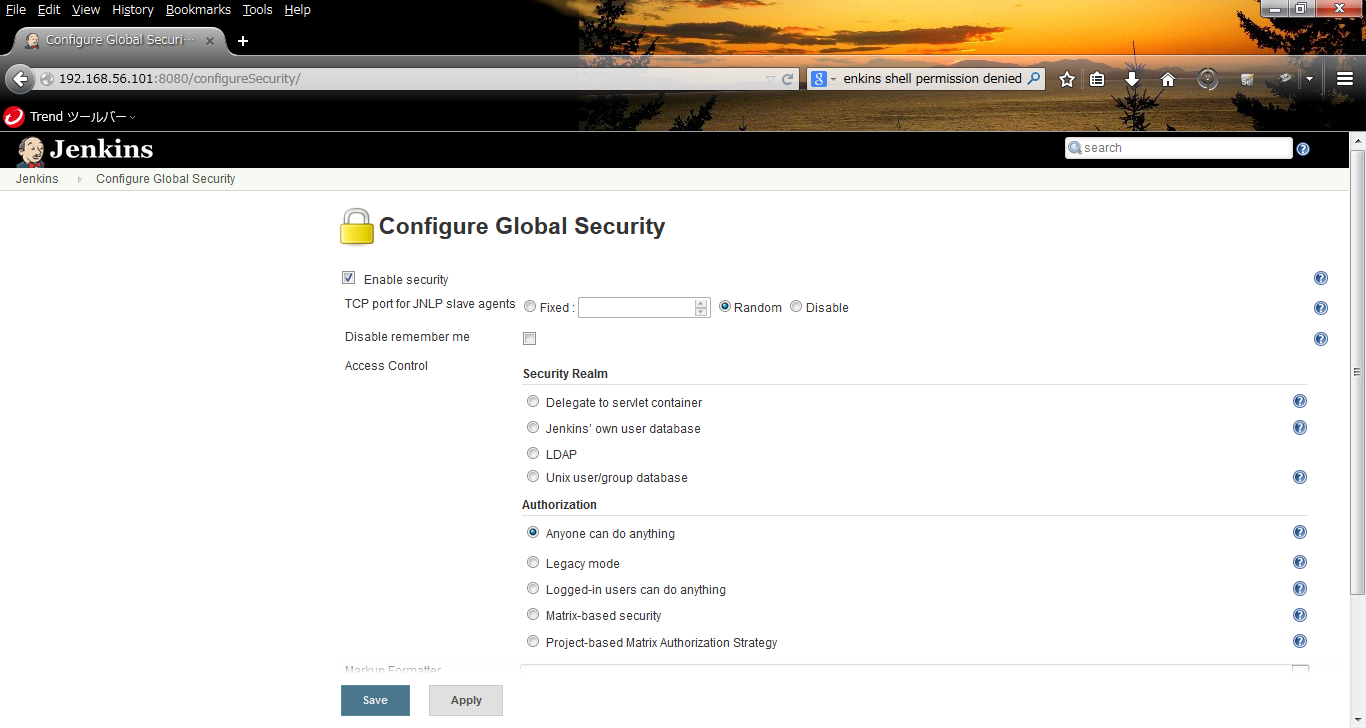
- Click "Mange Jenkins" link and "Setup Security".
- Step.2
- Click "Enable security" and "Jenkins'own user database".
| Item | Description | Example |
| Security Realm | Choose how to refer security definition | "Jenkins' own user database" |
| Authorization | Choose authorization management | "Matrix-based security" |
- Step.3
- Sign up the user.
- Step.4
- If you set readonly for "anonymous", guest user cannot execute "build" any more.
_ Author
S.Yatsuzuka
 Launch_fig3.png 196 download
[Information]
 RunBuild_fig1.png 218 download
[Information]
 Launch_fig2.png 202 download
[Information]
 Launch_fig1.png 323 download
[Information]
 Javadoc_fig1.png 220 download
[Information]
 ServerConfig_fig1.png 204 download
[Information]
 ServerConfig_fig2.png 187 download
[Information]
 SetupSecurity_fig1.png 214 download
[Information]
 SetupSecurity_fig4.png 213 download
[Information]
 ServerConfig_fig4.png 187 download
[Information]
 SetupSecurity_fig2.png 172 download
[Information]
 ServerConfig_fig3.png 200 download
[Information]
 JUnit_fig3.png 171 download
[Information]
 JUnit_fig2.png 181 download
[Information]
 CreateItem_fig3.png 215 download
[Information]
 CreateItem_fig4.png 190 download
[Information]
 CreateItem_fig2.png 227 download
[Information]
 JUnit_fig1.png 186 download
[Information]
 Email_fig1.png 173 download
[Information]
 CreateItem_fig5.png 198 download
[Information]
 CreateItem_fig6.png 199 download
[Information]
 InstallJDK_fig2.png 197 download
[Information]
 InstallJDK_fig1.png 201 download
[Information]
 CreateItem_fig8.png 99 download
[Information]
 CreateItem_fig7.png 229 download
[Information]
 CreateItem_fig1.png 319 download
[Information]
