HowToUse/Travis-CI/2016
- List of Backups
- View the diff.
- View the diff current.
- View the source.
- Go to HowToUse/Travis-CI/2016.
- 1 (2016-04-10 (Sun) 16:49:47)
- 2 (2016-05-23 (Mon) 15:24:22)
_ Prerequisite
- Python installation (You can refer HowToUse/Python/2.7)
_ Install&Setup
- Step.1
- Access Travis-ci web site, and register account with GitHub account.
- Step.2
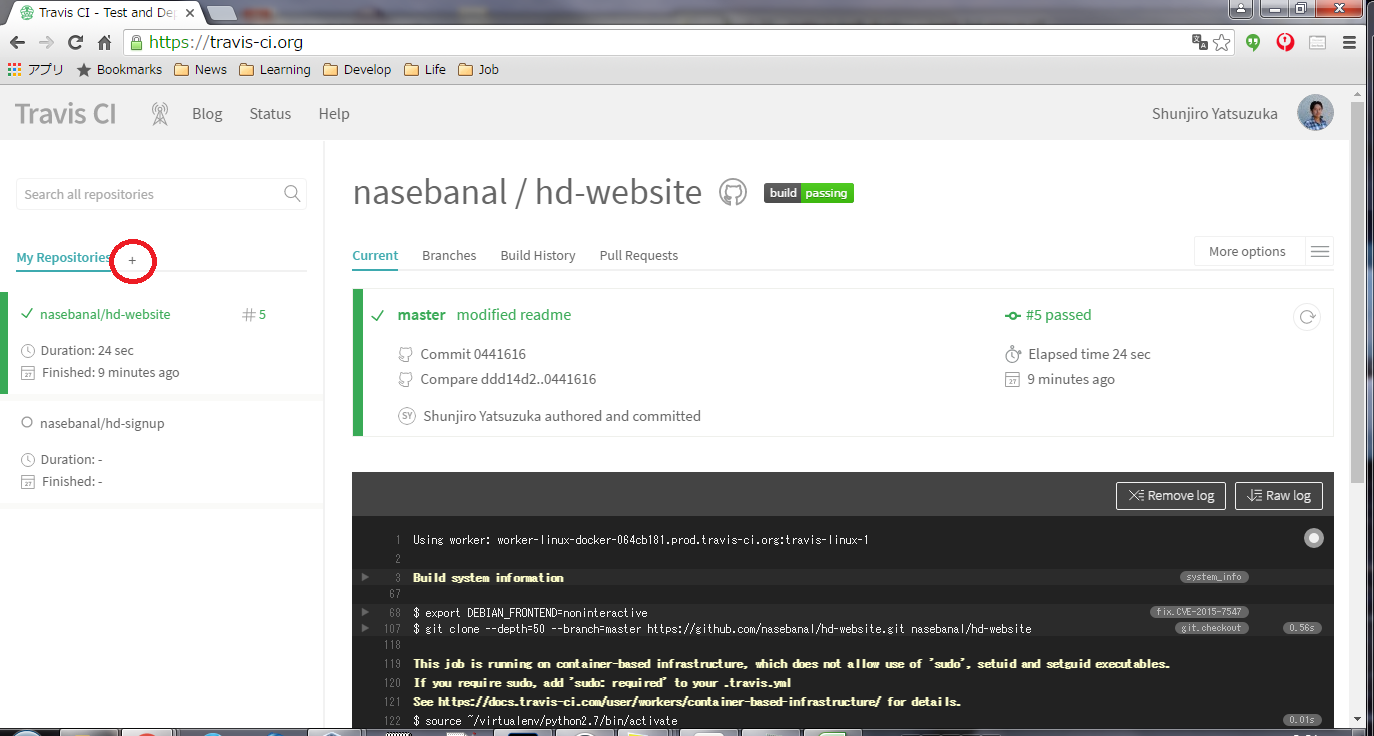
- Click "+" on the right of "My Repositories" menu.
- Step.3
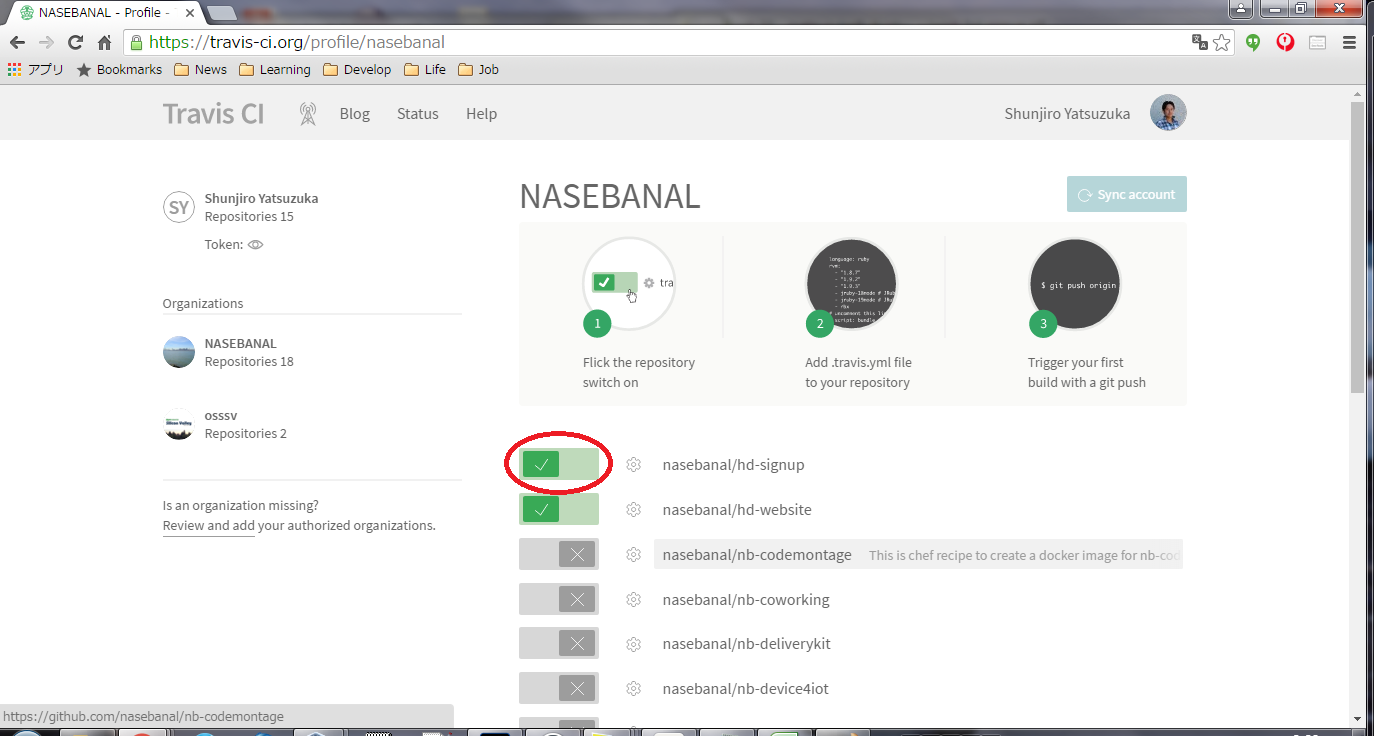
- Choose target project to integrate with Travis CI.
- Step.4
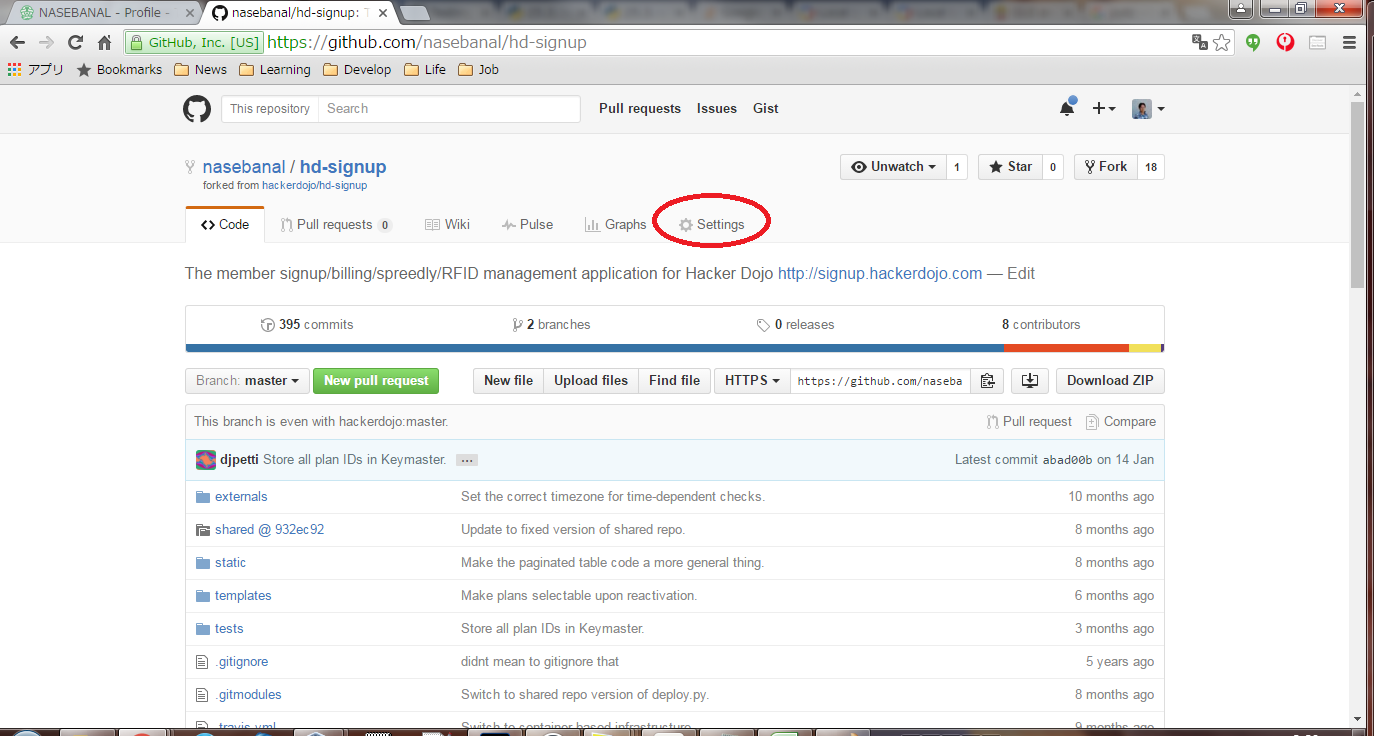
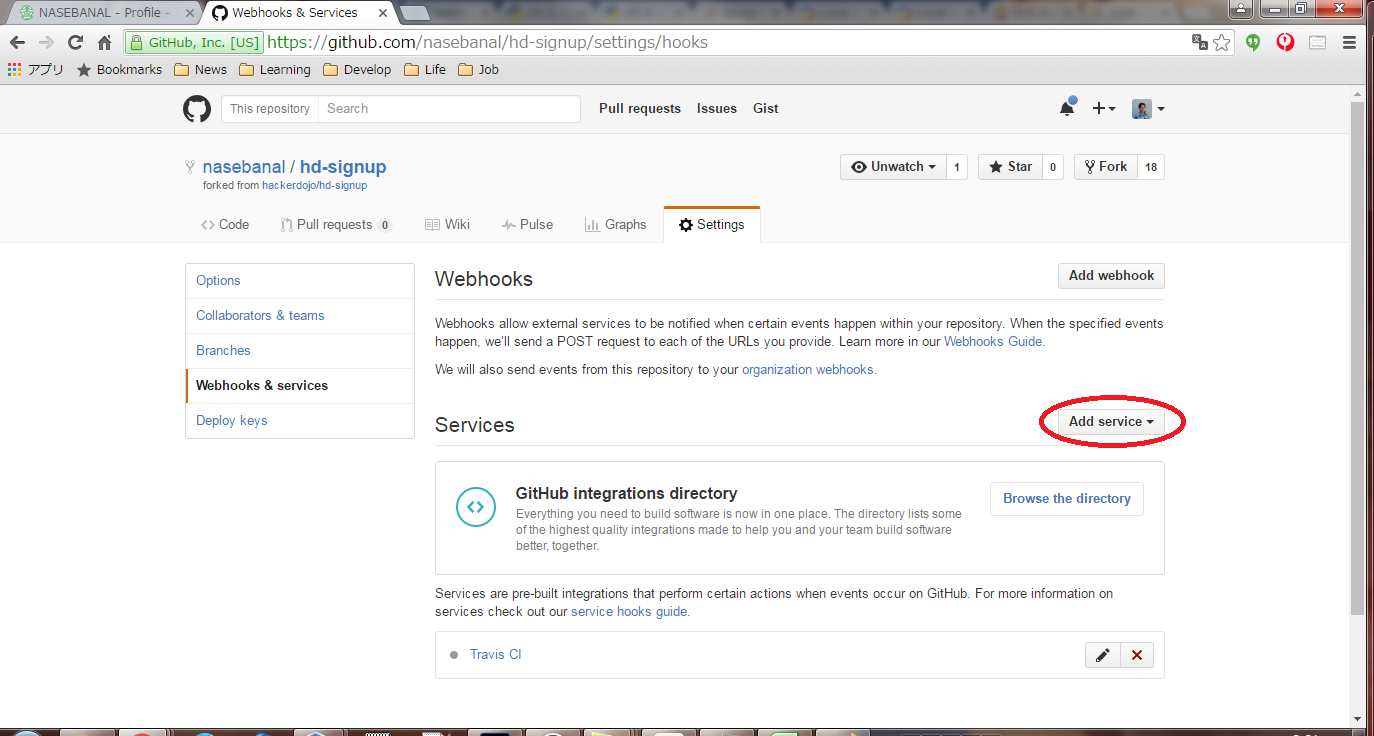
- Access to GitHub project, and choose "setting" menu.
- Step.5
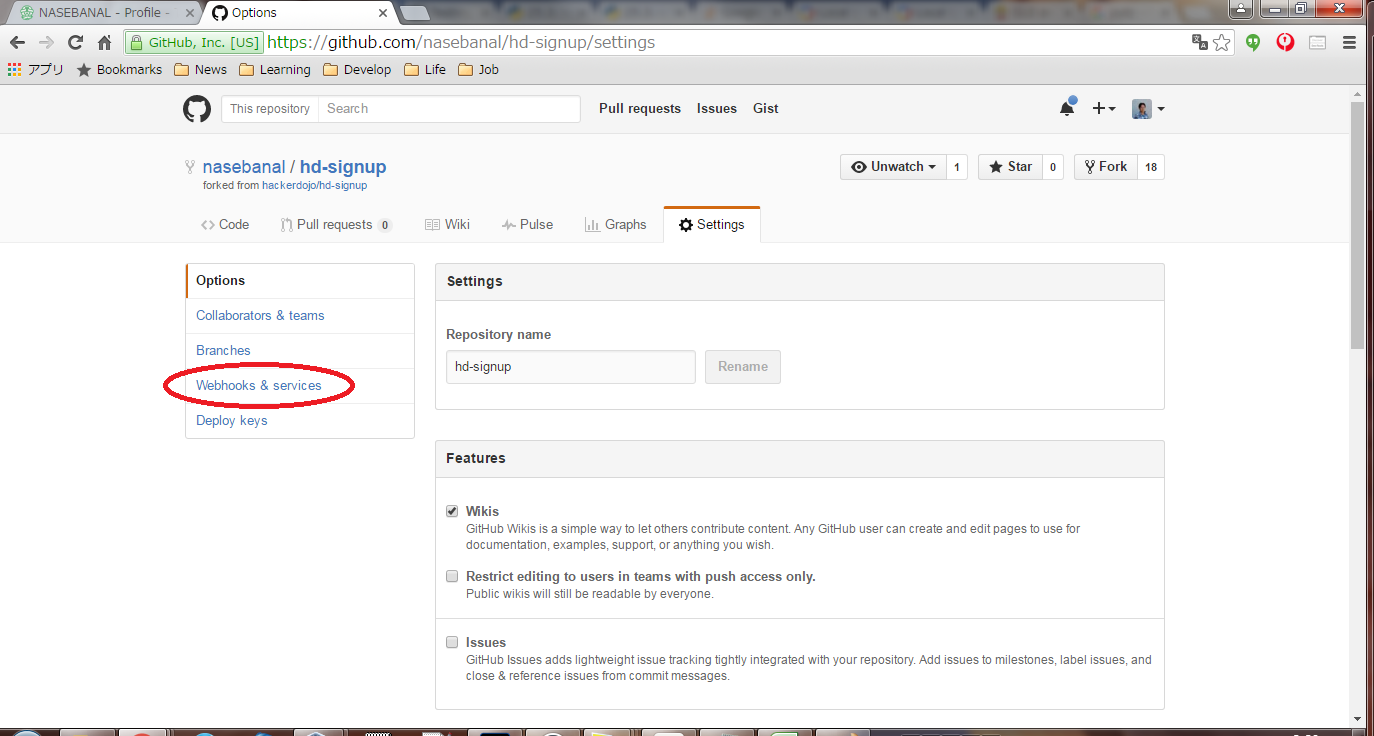
- click "Web Hook" menu".
- Step.6
- click "Add Service" menu, and choose "Travis-ci".
_ HowToUse
- Step.1
- Prepare .travis.yml in the project root directory.
$ vi .travis.yml
(Example)
language: python
python:
- "2.7"
# command to install dependencies
install: "pip install nose"
# command to run tests
script: nosetests
- Step.2
- Prepare test script.
- Step.3
- Check in .travis.yml to GitHub, then test will be autoran on travis-ci server.
If you put the following line in your README.md file, you can see the status of Travis-ci from it.
[](https://travis-ci.org/nasebanal/hd-website)
_ Author
S.Yatsuzuka
