Hello World from OSS Silicon Valley
HowToUse/Selenium Web Driver/2.44
_ Prerequisite
- Eclipse (You can refer HowToUse/Eclipse/4.3)
- Maven (You can refer HowToUse/Maven/3.2)
- Cygwin (You can refer HowToUse/Cygwin/2.850)
_ Install&Setup
- Step.1
- (We use maven here)
_ HowToUse
_ Prepare Project
- Step.1
- Launch Cygwin.
- Step.2
- Create the most simple maven project.
$ mvn archetype:create \
 -DgroupId=org.test \
 -DartifactId=selenium_webdriver
- Step.3
- Luanch Eclipse and import Maven project.
- Step.4
- Open POM.xml, append the following description and save it. After the save, all of necessary library files will be downloaded and set into build path by maven.
<dependency>
  <groupId>junit</groupId>
  <artifactId>junit</artifactId>
  <version>4.8.1</version>
  <scope>test</scope>
</dependency>

<dependency>
  <groupId>org.seleniumhq.selenium</groupId>
  <artifactId>selenium-java</artifactId>
  <version>2.44.0</version>
</dependency>
_ Create Test Code
- Step.1
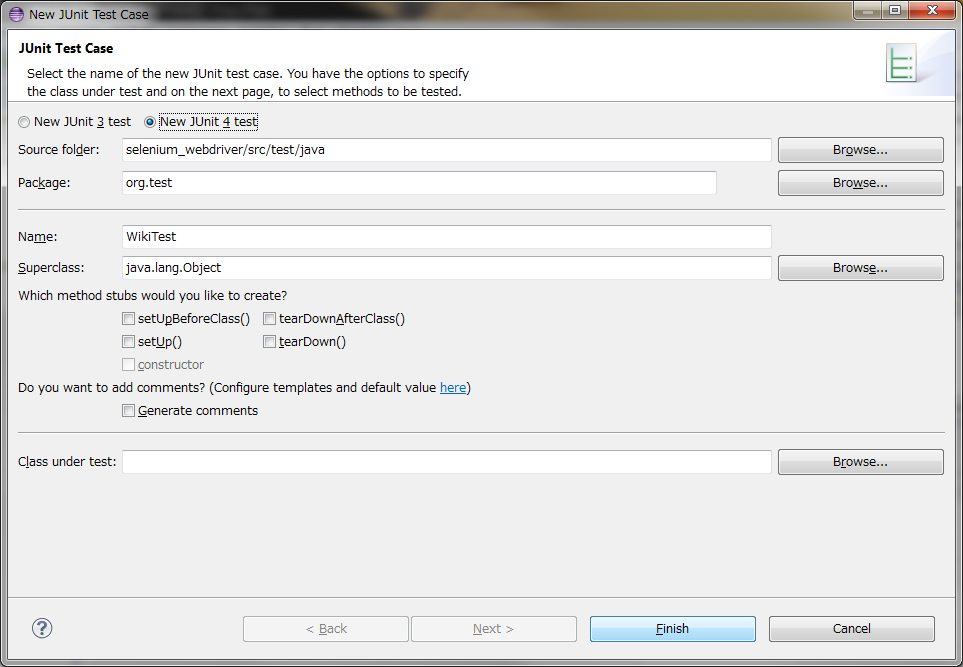
- Create new test class, "WikiTest".
- Step.2
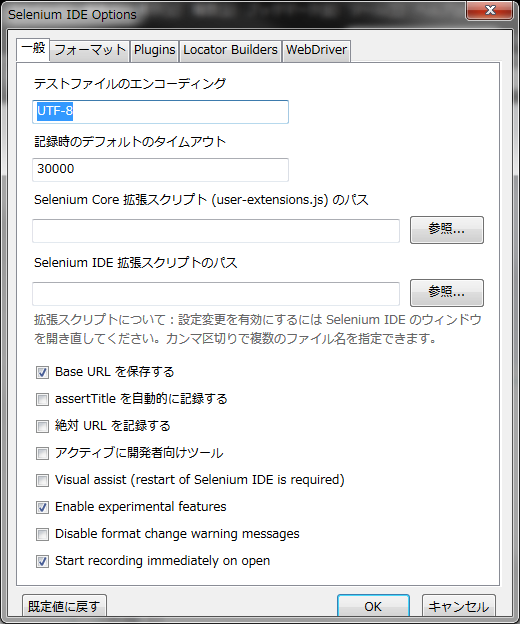
- In the Selenium IDE window, select "Option"->"Setting" and check "Enable experimental features".
- Step.3
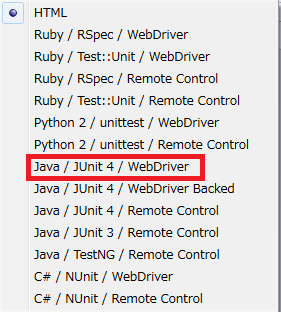
- Select "Option"->"Format" and choose "Java / JUnit 4 / WebDriver.
- Step.4
- Copy and paste Java code to new test class "WikiTest". Change package name and class name as needed.
- Step.5
- Execute maven test. New web browser will be launched , execute the test case and close it automatically.
$ mvn test.
_ Author
S.Yatsuzuka
Attach file:  CreateTestCode_fig3.png 212 download
[Information]
 CreateTestCode_fig2.png 214 download
[Information]
 CreateTestCode_fig1.png 230 download
[Information]
Last-modified: 2015-08-17 (Mon) 02:41:34 (3174d)


